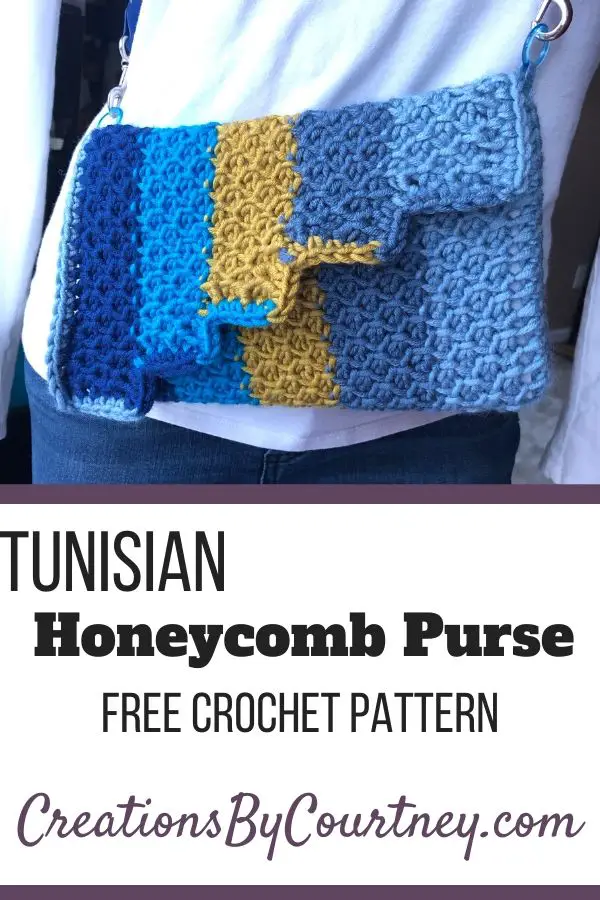
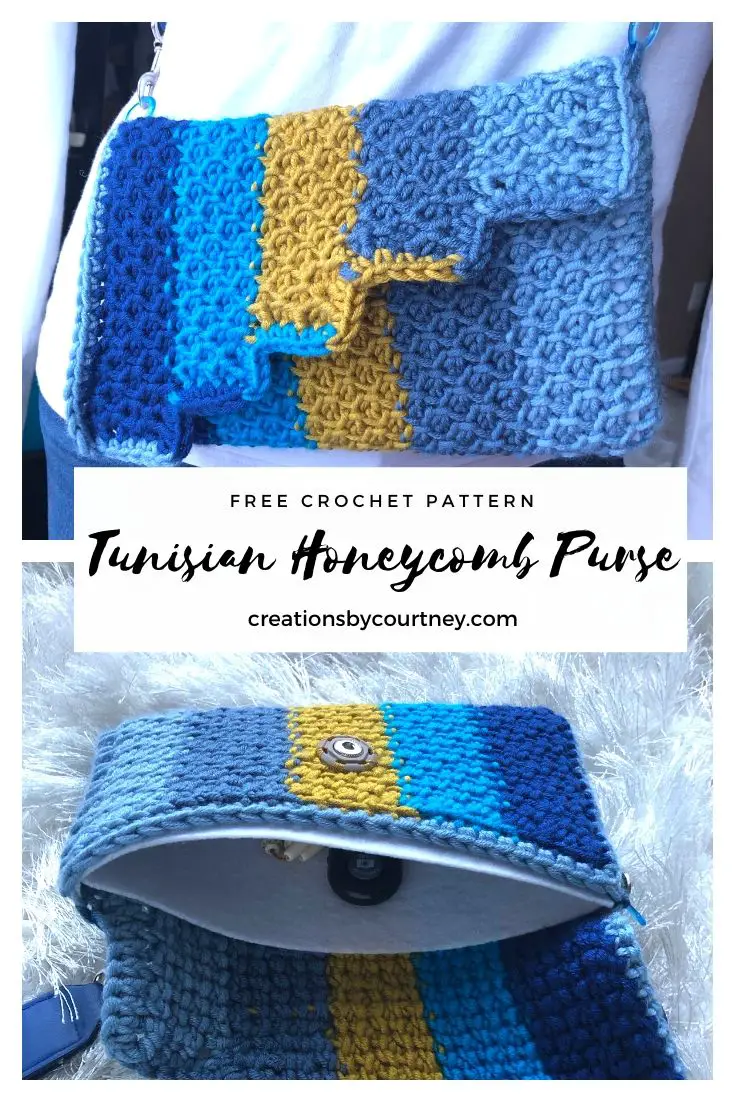
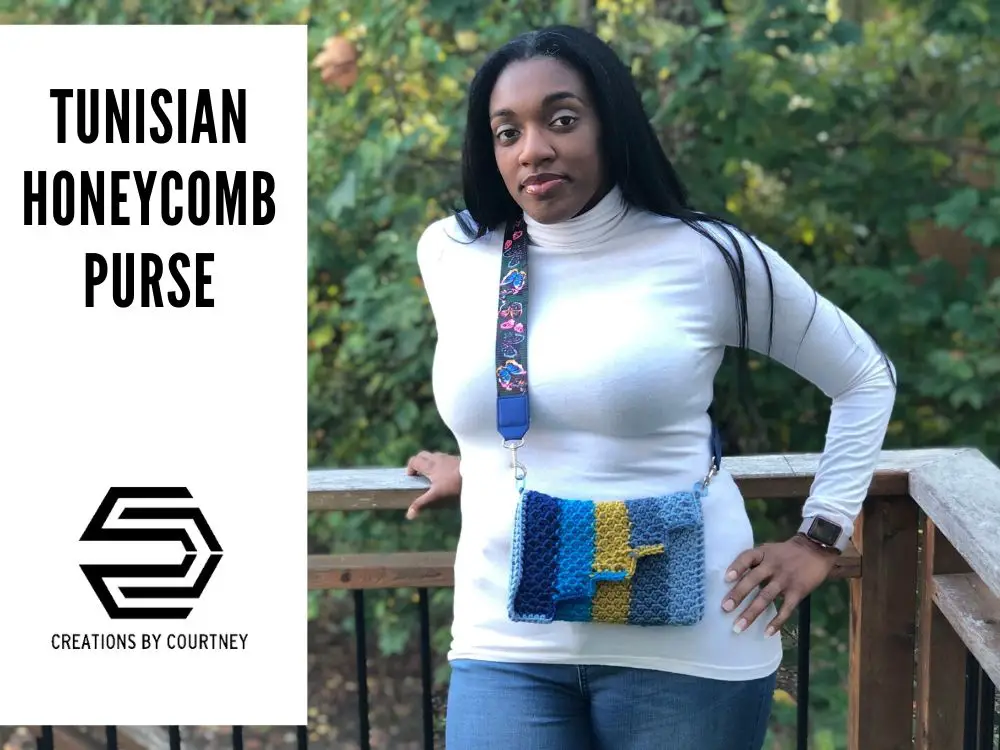
Have you jumped into the tunisian trend yet? Have you seen the tunisian honeycomb stitch??
One of my favorite crochet designers that has awesome tunisian tutorials and patterns is TL Yarn Crafts! I was inspired by the texture of the honeycomb stitch, and knew I had to make to something with yarn from my stash. Also, I wanted to make something with one skein.
TIP: Always use a hook larger than recommended for the yarn when working tunisian. This will help prevent the corners from curling too much. For example, a worsted weight yarn may recommend a 5.00mm hook, so I would start with 7.00 or larger with a tunisian hook and hope that I won’t need to do wet blocking to get the corners flat. ?
This pattern is featured in the Summer Stitch Along during the week of June 8th to 14th.
Scroll slowly to find the “Download the PDF Pattern” and “Find the Round-Up Here” buttons to grab the PDF and check out the other patterns.
MATERIALS
- Caron x Pantone (60% acrylic, 20% merino wool, 20% nylon; 127 yards/ 116 m; 3.53 oz/ 100 g), bulky weight #5, Peacock Blue, 1 braid, or 25 yards of each color
- Hook: US L/11 ( 8.00 mm) afghan hook, or Tunisian hook with 14” extender
- Hook: US K/10 1/2 (6.00 mm)
- Scissors
- Yarn Needle
- 4 Stitch Markers
- 2 small rings
- Purse Strap of choice
- Sew-on Snap
- Stiffened Felt in coordinating color, 12” x 18”
- Sewing thread and needle, optional
GAUGE
- 3 Honeycombs = 1”, 3 rows = 1”
SIZES
- 18” long x 8.5” wide after blocking and before seaming
PATTERN KEY
A: color A
B: color B
beg: beginning
C: color C
Ch: chain
D: color D
E: color E
FO: fasten off
M: stitch marker
PM: place marker
rep: repeat
RetP: standard return pass
sc: single crochet
sk: skip
sl st: slip stitch
Tps: tunisian purl stitch
Tss: tunisian simple stitch
YO: yarn over
SPECIAL STITCHES & TECHNIQUES
- Tps:
- The sc for the edging will be completed as follows, unless otherwise stated within the pattern: insert hook under next vertical (same manner as Tss), YO, pull up a loop (2 loops on hook), YO, pull through 2 loops
- The last sc will be worked under two loops in the same manner as the last Tss
EXPERIENCE LEVEL
Intermediate
NOTES
- Pattern is written US terms
- Read the entire pattern before beginning
- Pattern is worked in 2 sections: body and edging
- Do not turn work. Tunisian crochet is never turned, but worked back and forth each row.
- The Standard Return Pass: YO, pull through 1 loop, (YO, pull through next 2 loops on hook) until 1 loop remains
- The last stitch will always be a Tss under two loops to create a consistent edge.
- When skipping stitches/vertical bars, always count the first bar that is not worked into.
- Do not fasten each color, but place a marker in the remaining loop. The loops will be used to create the edging.
Want an ad-free PDF?
Check out the Summer Stitch Along patterns
INSTRUCTIONS:
Foundation Row: With A, ch 54, pull up a loop in back bump of 2nd ch from hook and each remaining ch; RetP
Row 1: *1 Tps, 1Tss; rep from * across, RetP.
Row 2: *1 Tss, 1 Tps, rep from * across, RetP.
Row 3-4: Rep Row 1-2, PM in last loop.
Row 5: Sk 3 vertical bars (this includes the 1st vertical bar that is not worked into, here and throughout), attach B in 4th vertical bar (counts as Tps), *1 Tss, 1 Tps, rep from * across (51 loops), RetP.
Row 6: *1 Tps, 1 Tss, rep from * across, RetP.
Row 7: *1 Tss, 1 Tps, rep from * across, RetP.
Row 8-9: Rep Row 6-7, PM in last loop.
Row 10: Sk 3 vertical bars, attach C in 4th vertical bar (counts as Tps), *1 Tss, 1 Tps, rep from * across (48 loops), RetP.
Row 11: *1 Tps, 1 Tss, rep from * across, RetP.
Row 12: *1 Tss, 1 Tps, rep from * across, RetP.
Row 13-14: Rep Row 11-12, PM in last loop.
Row 15: Sk 3 vertical bars, attach D in 4th vertical bar (counts as Tps), *1 Tss, 1 Tps, rep from * across (45 loops), RetP.
Row 16: *1 Tps, 1 Tss, rep from * across, RetP.
Row 17: *1 Tss, 1 Tps, rep from * across, RetP.
Row 18-19: Rep Row 16-17, PM in last loop.
Row 20: Sk 3 vertical bars, attach E in 4th vertical bar (counts as Tps), *1 Tss, 1 Tps, rep from * across (41 loops), RetP.
Row 21: *1 Tps, 1 Tss, rep from * across, RetP.
Row 22: *1 Tss, 1 Tps, rep from * across, RetP.
Row 23-24: Rep Row 21-22 , PM in last loop.
Edging
Row 1: Using smaller hook, remove M from A, *(sc between the vertical bars) 3 times, sl st to 1 st of next color, sc in next 4 row ends, sc in next row end and change to next color in the last YO*, rep from *- * three more times; with E, ch 1, sc across (41 sc), rotate piece 90 degrees to continue along rows ends, ch 1, sc in each row end (25 sc), rotate piece 90 degrees, ch 1, sc in each st (53 sc), rotate piece 90 degrees, ch 1, sc in next 5 row ends, FO all colors.
Finishing
- Block piece to finished measurements. Once dry, weave in ends.
- Cut stiffened felt to 8.25” wide x 12” long, then fold in half. You can hand sew each side, but not required. Set to the side.
- With right side facing up, trifold the crochet piece with the straight edge inside and the stepwise side on top (the wrong side will show). Make sure that the shortest section can hang over the bag.
- Line up stitches and PM to hold the straight edge in place with side.
- Cut a length of yarn in color of choice at least 36”, attach yarn to bottom of bag, using smaller hook and working through both sides, sl st in the back loop of each st until marker, hold one ring in place, tightly sl st around ring and pull yarn tail through to secure. Remove M.
- Use yarn needle to weave across back of bag to the other M.
- Insert hook through back loop of both sides, YO, pull up a loop from yarn tail. Place second ring, sl st tightly around ring.
- Working through both sides, sl st in back loop of each st until bottom of bag, weave tail and FO. Remove M.
- Flip bag to right side. Insert stiffened felt in bag to hold shape. Attach purse strap.
- Sew on snaps.
Pin It for Later


Check me out in the following places:
♥ Join the Creations By Courtney Community on Facebook for CALs, exclusive coupons, giveaways and more.
You can also find me and more crochet designs in the following places:
Crochet Patterns, Newsletter, Facebook, Pinterest, Instagram, Ravelry, LoveCrochet


15 Responses
I absolutely love the design of this purse! Such great detail and coloring. Will be putting it on my list and sharing your post with friends. Looking forward to your next creation!
Thank you Dana for the kind words! I look forward to seeing your finished purse!
I just bought Tunisian hooks and book! I’m ready to try it!
That’s great, Katie! Tunisian seems intimidating but it’s easier than regular crochet, in my opinion. I’m looking forward to seeing your first tunisian project!
I made this for my granddaughter for Christmas I have to get the strap yet. I used 6 weight yarn so it’s a little bigger but it turned out good
I’m glad it came out well! I’m sure she’ll love it! Please share a picture once you add a strap.