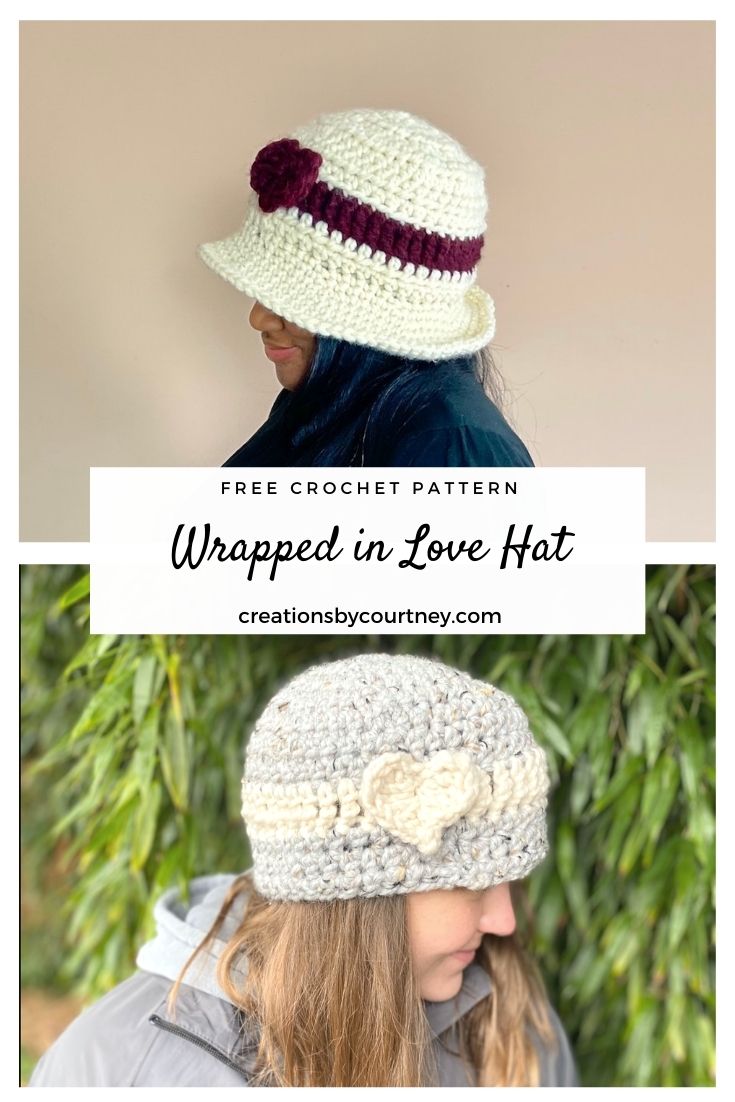
The Wrapped in Love Hat was kind of a random idea, to be honest. 😅 I was working on another design, and doing my darnest to only use the yarn in my stash… I had to send my husband to Joann Fabric twice in order to finish the first idea… That doesn’t count as yarn shopping since he bought it and not me, right??? 😂
Anyways, with the remaining yarn, I could have put it on the shelves for a later time, but my imagination screamed, “Make a bowl hat!”
I chose a smaller, but large hook to make the hat for shaping since I wanted to add a brim. Some crochet hats double the yarn or use wire to hold the shape of the brim, but to double a super bulky yarn would have been tough on one’s hand and wrist. By using a slightly smaller than recommended hook size, the stitches are tighter to hold their shape.
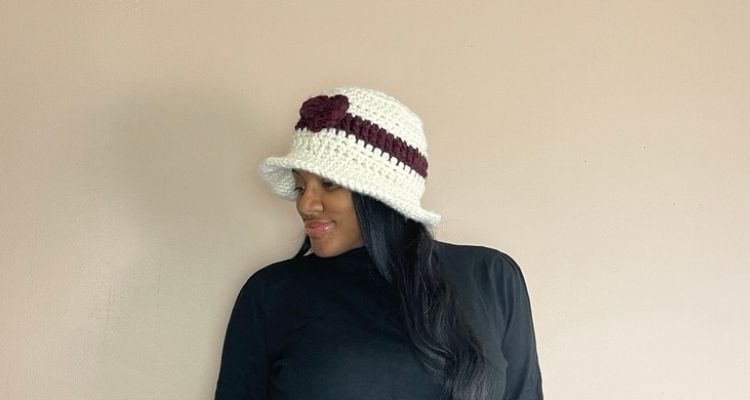
To me, this hat reminds me of Blossom… Did I just age myself with that reference?? A larger brim hat would have been similar to summer sun hats, and that would create a different vibe for the style.
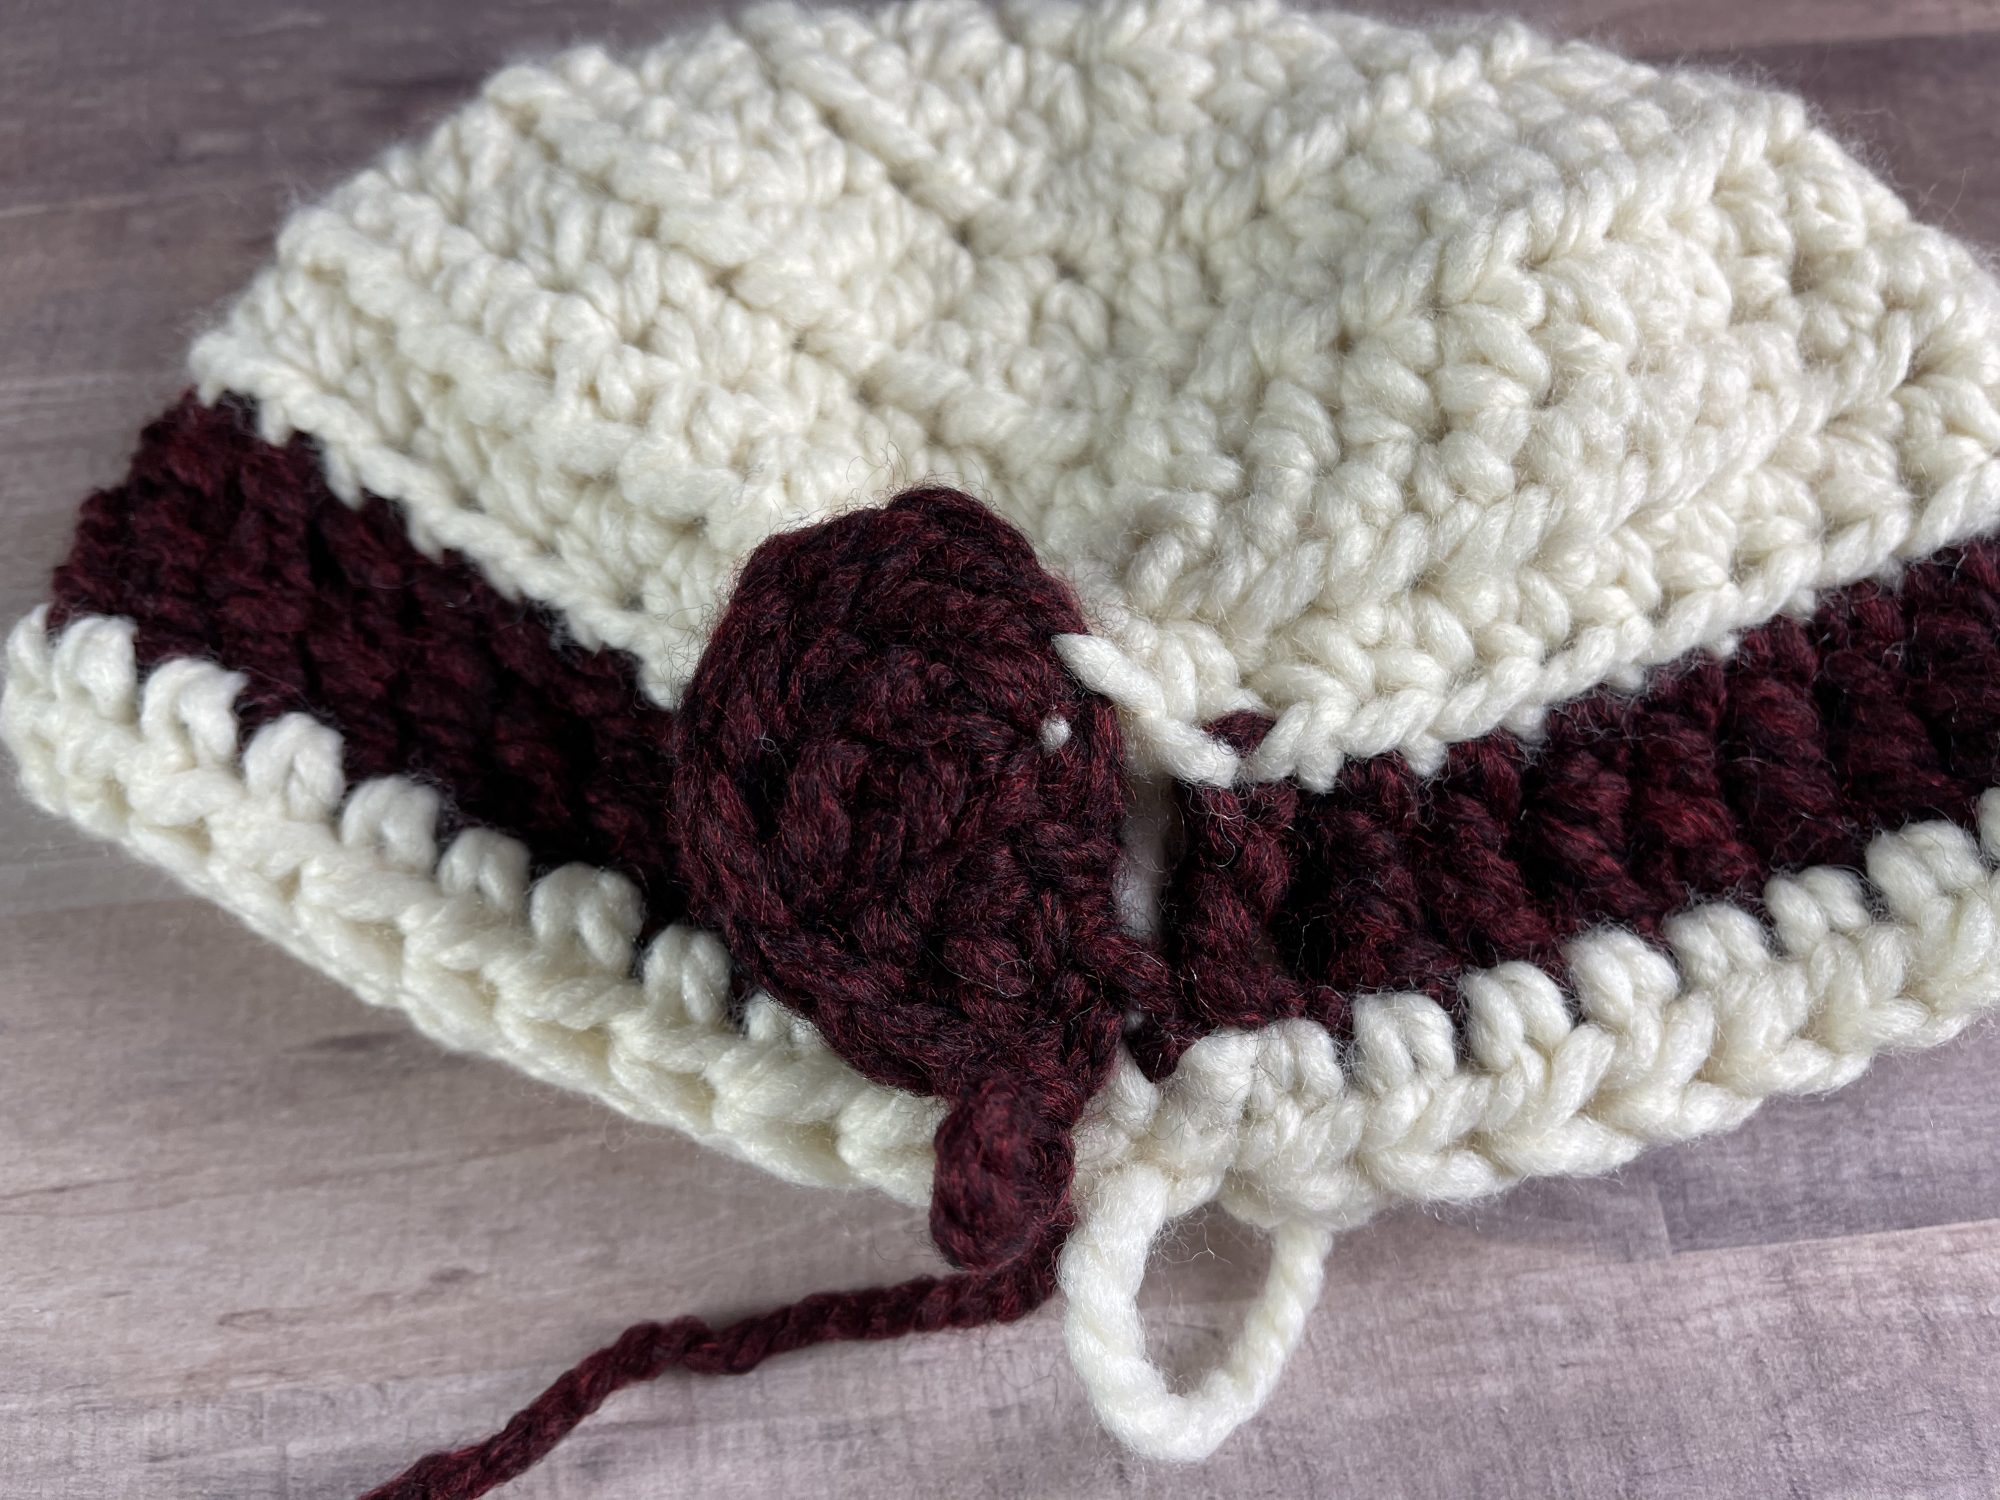
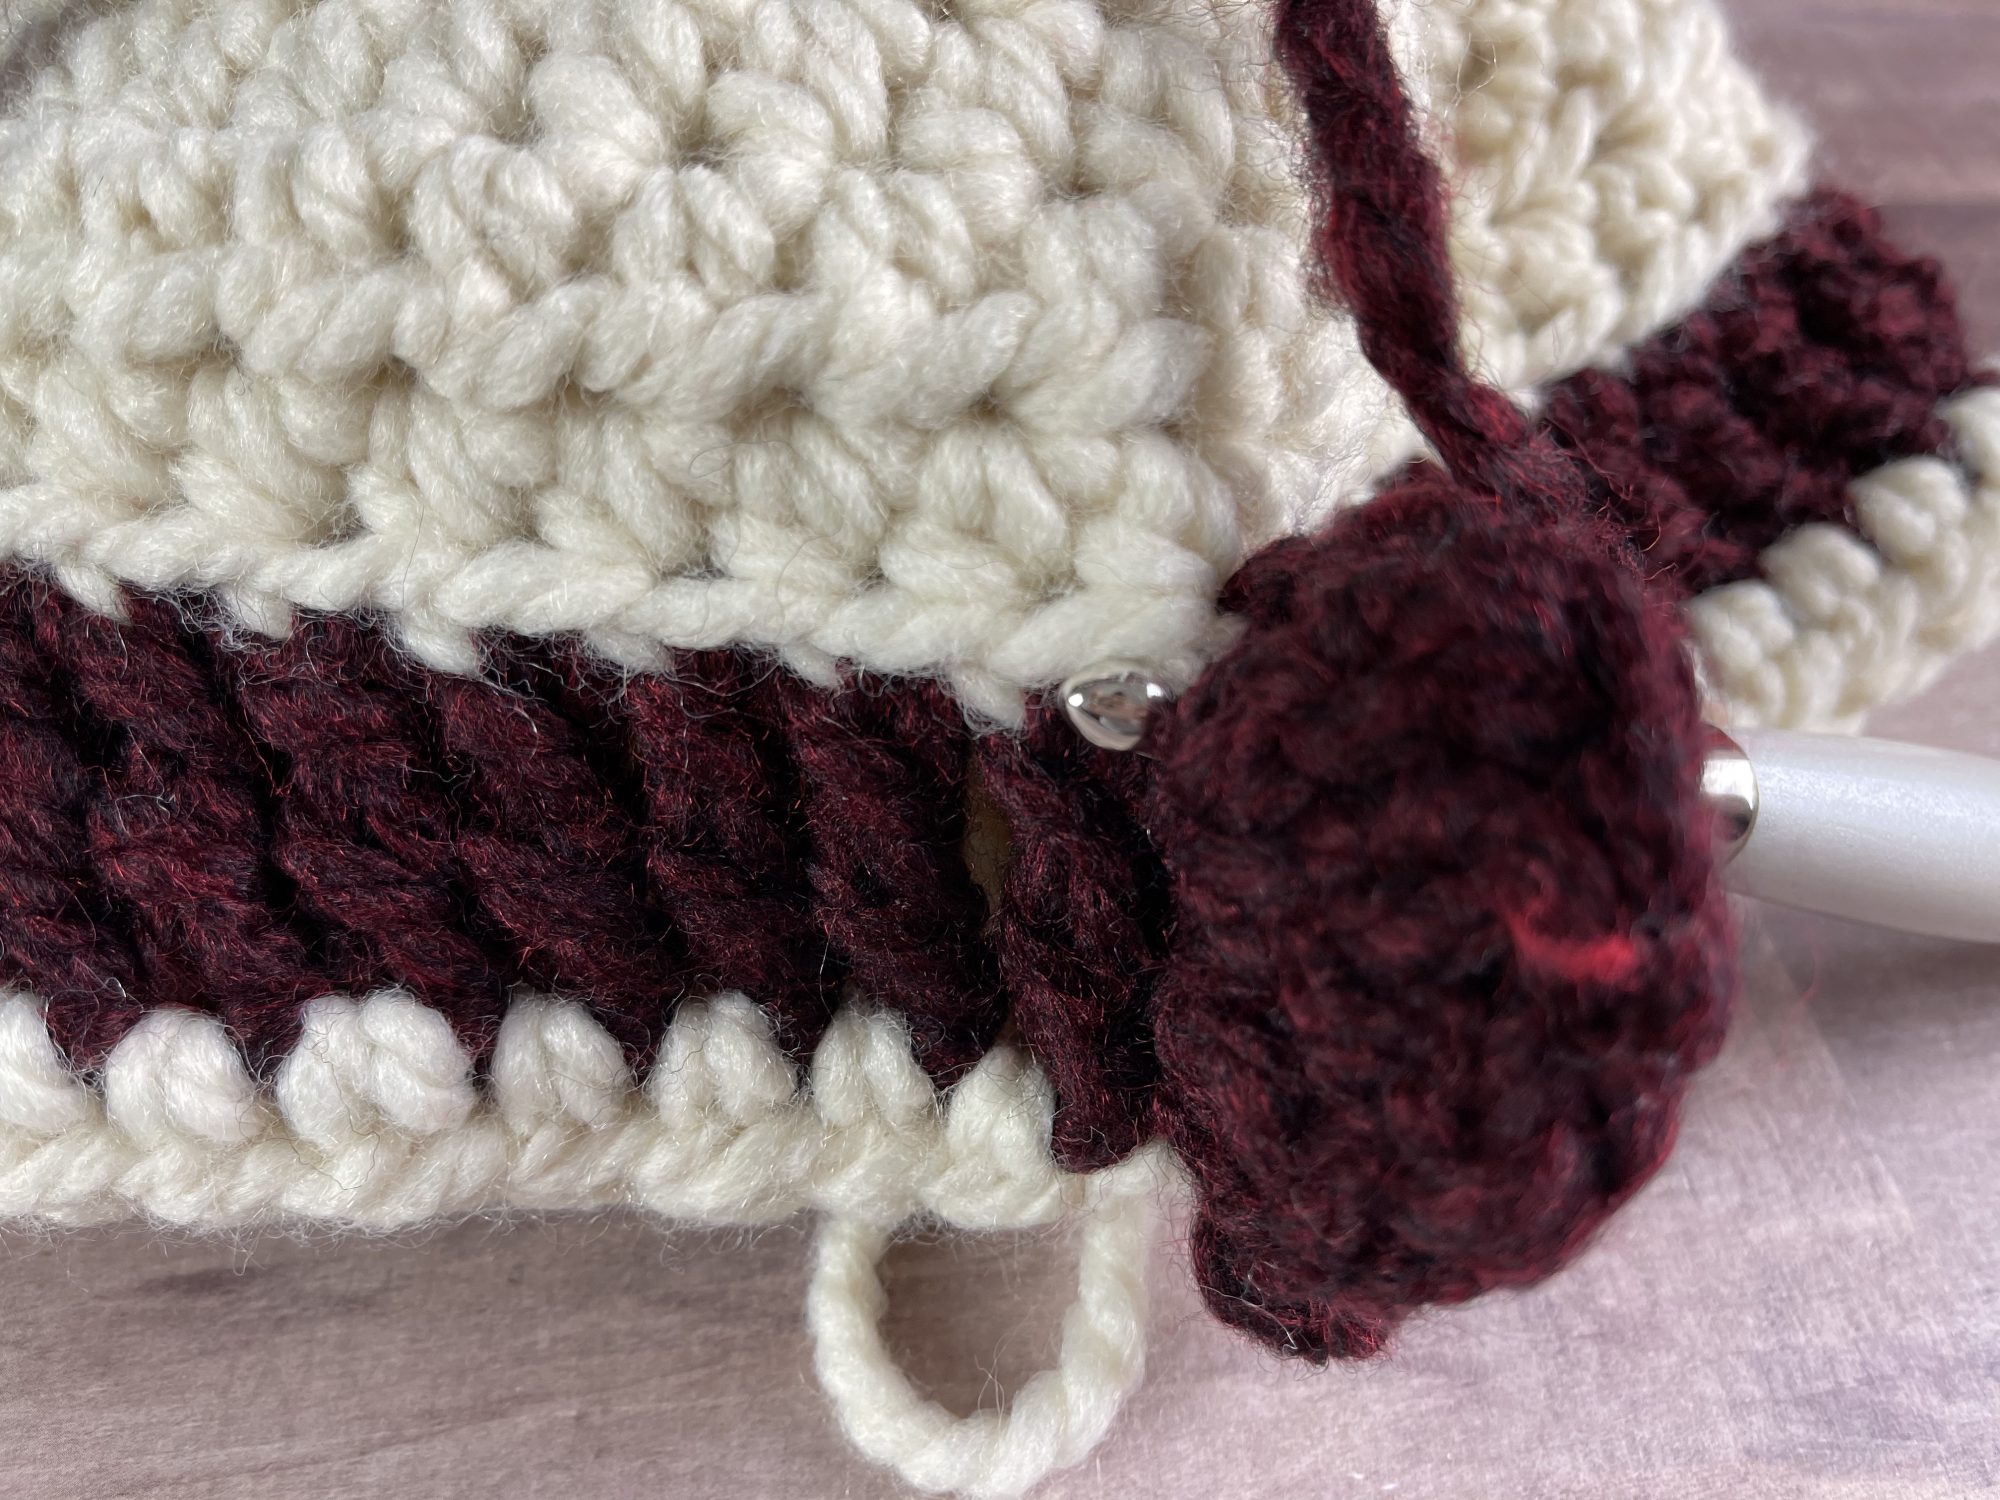
In designing the Wrapped in Love Hat, I wanted to include more than one heart, but I wasn’t happy with the outcome, so I frogged the row, and stopped at one heart that floats like a brooch. If you want more hearts, feel free to add them!
This is a top down constructed hat, which means that you start at the center of the crown, create the sides, and you can stop where it covers your ears or add the brim. I decided to offer two versions of the hat in an adult size, in case you don’t feel like bringing a 90’s vibe.
YARN
*Disclosure, for the use of affiliate links.
I chose Lion Brand Wool-ease Thick & Quick for this design for a few reasons. One reason is that it matches another design (coming soon 😉). A second reason is that it’s a classic yarn that I always have in my stash, especially after my mother scored A TON of it when a store closed years again in Atlanta a third reason is that it’s super soft and has great stitch definition. As a super bulky yarn, it doesn’t split when crocheting, so it’s a must use yarn, if you haven’t given it a try.
Each skein is a generous 106 yards/97 m, so there’s plenty leftover to make one of each style hat.
Add to Ravelry Queue
Materials
- Lion Brand Wool-Ease Thick & Quick, weight #6 yarn (80% acrylic, 20% wool; 106 yds/ 97 m; 6 oz/ 170 g): Claret (Color B), 1 skein or 19 yards; Fisherman (Color A), 1 skein or 96 yards
- Hook, US M/ 8.00 mm or size needed to meet gauge. I chose my Furls Odyssey in white.
- Scissors
- Stitch Marker
- Yarn needle
- Measuring tape
GAUGE
3 rounds of hdc = 4” [10 cm]
SIZES
Beanie: to fit circumference: 22-23.5 in, 8.75 in tall
Bowl: to fit circumference: 22-23.5 in, 5.5 in. tall
PATTERN KEY
- BL: back loop
- Ch: chain
- Dc: double crochet
- FL: front loop
- Hdc: half double crochet
- M: stitch marker
- Rep: repeat
- RS: right side
- Sk: skip
- Sl st: slip stitch
- Sc: single crochet
- Sp: space
- St(s): stitch(es)
- Tr: treble
- WS: wrong side
- YO: yarn over
SPECIAL STITCHES & TECHNIQUES
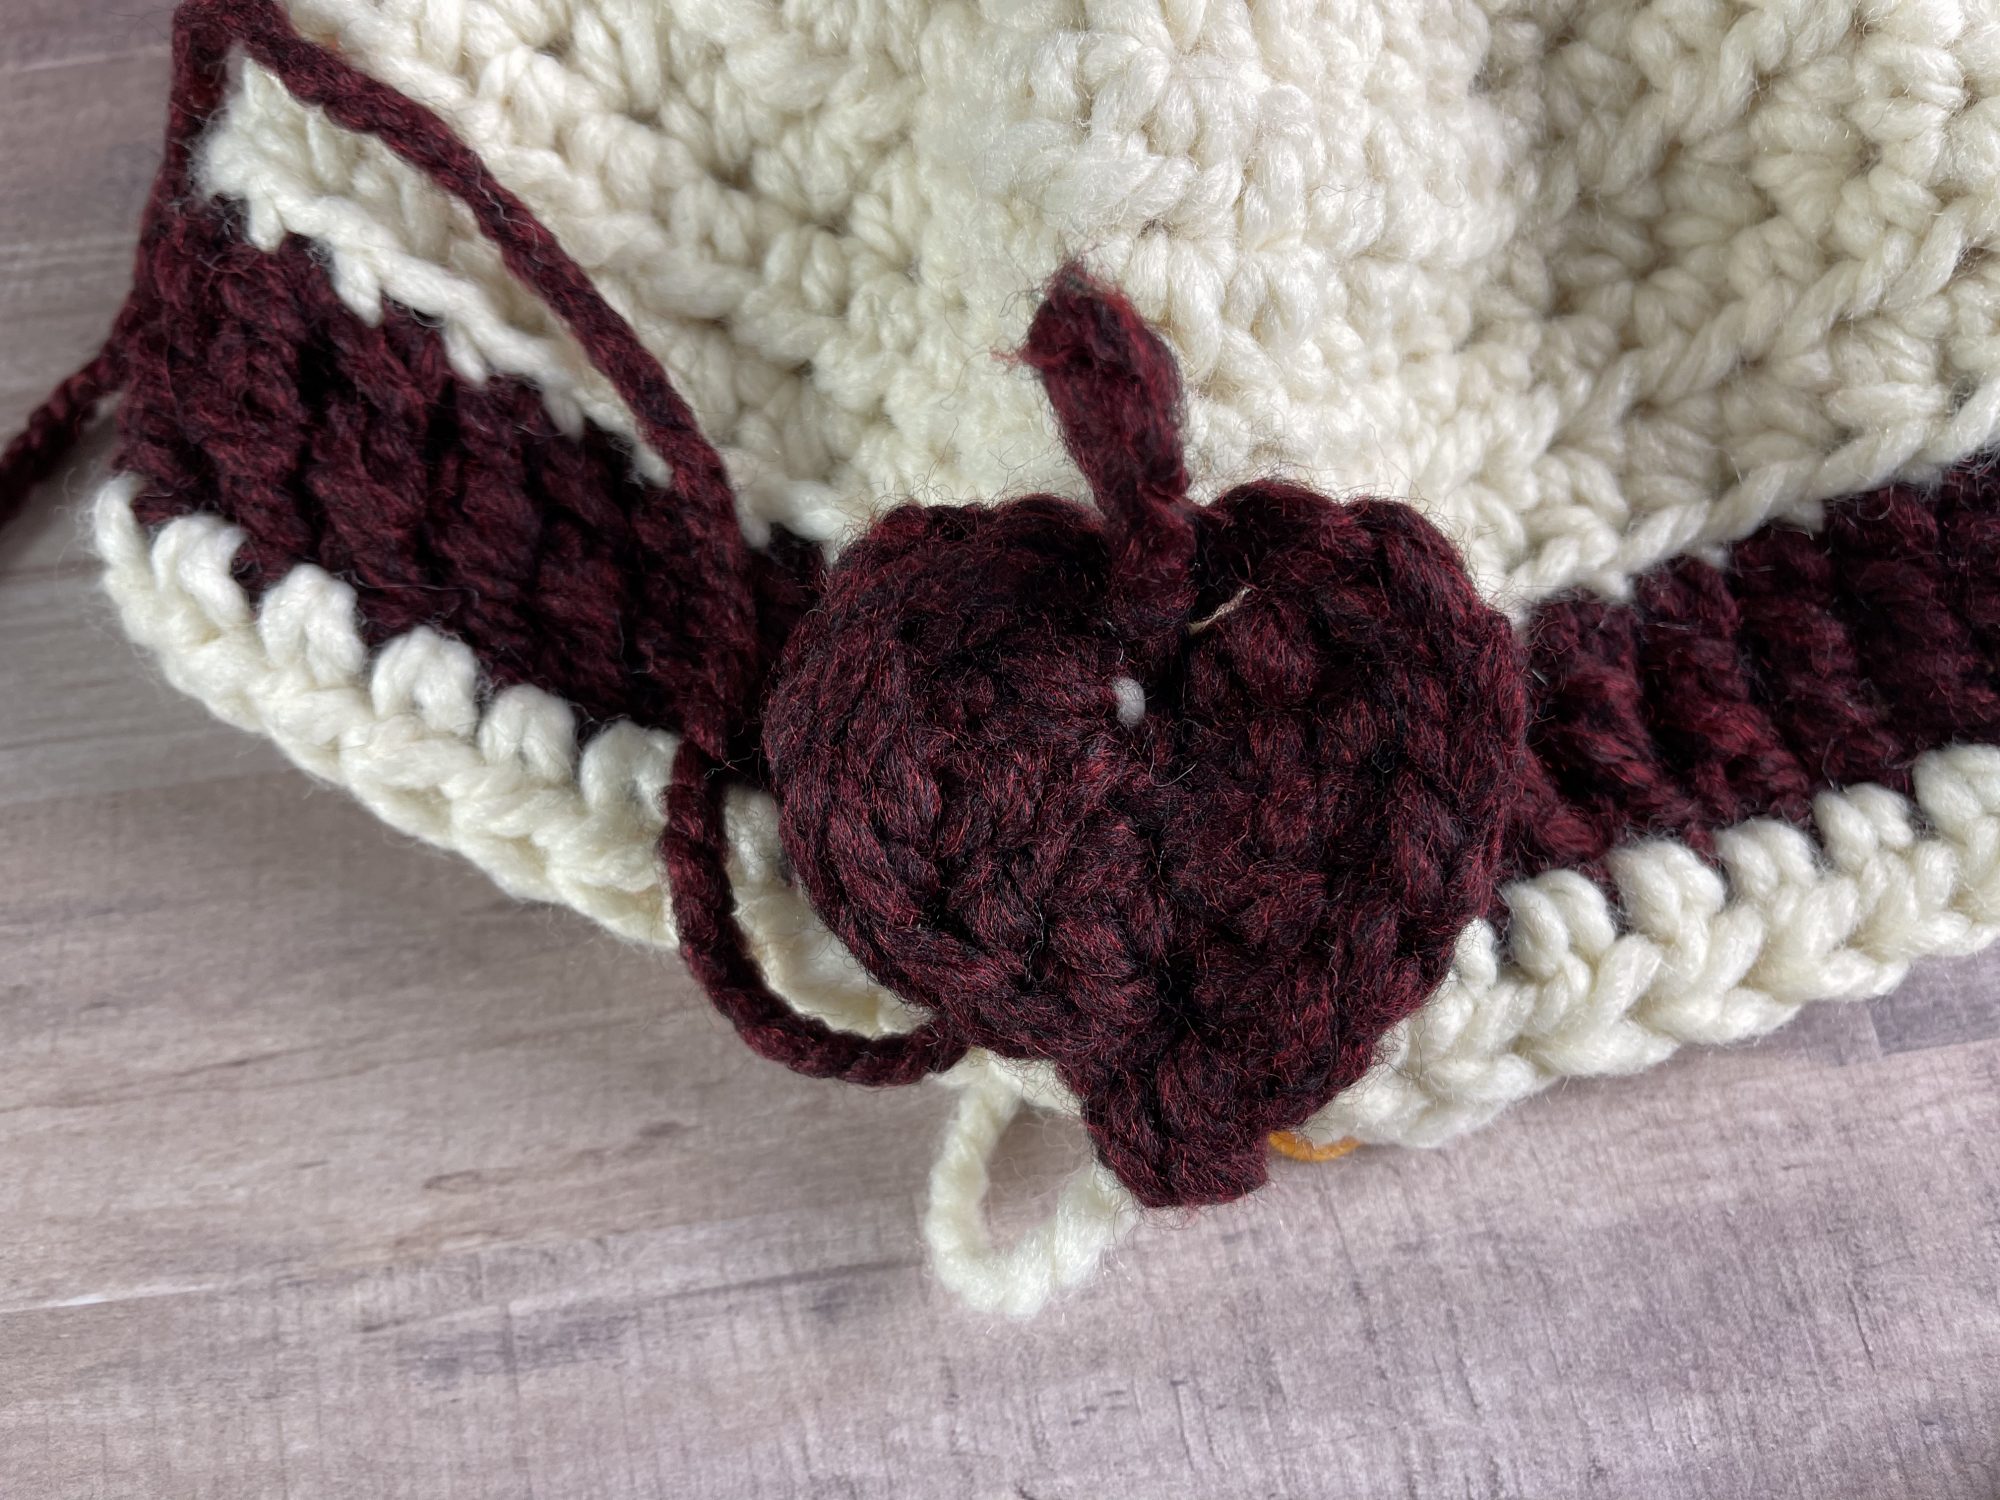
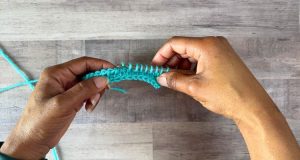
- Heart: Ch 2, inserting hook through the tr for the following steps, 3 tr in the first sp, 2 dc in middle of tr, 2 sc in the bottom of tr, picot; working along other side of tr and in same sp as previously made sts, 2 sc, 2 dc, 3 tr, ch 2, sl st in center, pull tight
- Tutorial can be found HERE
- Picot: ch 2, insert hook in side of last sc made, sl st
EXPERIENCE LEVEL
Easy
NOTES
- Pattern is written US terms.
- Read the entire pattern before beginning.
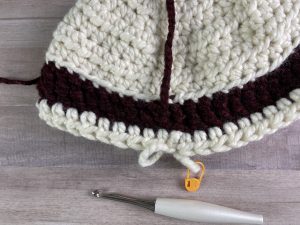
- This Hat is made in 4 parts: Crown and Side, Heart, Side, Brim
- Ch 1 does not count as a stitch.
- The Heart is created in 2 steps: the first row is the foundation and the second row is the creation of the heart.
- A picture tutorial can be found HERE
INSTRUCTIONS
Bowl Hat
Crown and Side
Rnd 1: With Color A, make a Magic Loop, 9 hdc in center, tighten center, sl st to join, turn – 9 hdc
Rnd 2: Ch 1 (does not count as a st here and throughout), 2 hdc in first st, 2 hdc in each st around, sl st to join, turn – 18 hdc
Row 3: Ch 1, 2 hdc in first st, hdc in next st,*2 hdc in next st, hdc in next st; rep from * around, sl st to join, turn – 27 hdc
Row 4: Ch 1, 2 hdc in first st, hdc in next 2 sts,*2 hdc in next st, hdc in next 2 sts; rep from * around, sl st to join, turn – 36 hdc
Row 5: Ch 1, 2 hdc in first st, hdc in next 3 sts, *2 hdc in next st, hdc in next 3 sts; rep from * to end, sl st to join, turn – 45 hdc
Row 6-8: Ch 1, hdc in first st, hdc in each st, sl st to join, turn. Do not turn and change to Color B after Rnd 8 only – 45 hdc
Row 9: Working in BL only, ch 4 (counts as tr), tr in each st until 1 st remains, tr in last st and change to Color A, sl st to join, drop Color B to the front, turn – 45 tr
Row 10: Ch 1, hdc in first st, hdc in same st, sl st to join, turn – 45 hdc
Note: The heart is made before continuing the side and then brim.
Heart
Row 1: Using a larger hook, pull Color B through the first FL, this will become the loop for your hook, make a Heart [refer to Special Stitches & Techniques], Fasten off Color B

Continue Side
Row 11: With Color A, ch 1, hdc in each st around, sl to join, turn – 45 hdc
Brim
Note: These rounds will not be turned, and are worked in a continuous spiral
Rnd 1: Working in FL only, *sc in next 4, 2 sc in next st; rep from * around, do not join – 54 sc
Rnd 2: Sc in first st, place M (first st of each rnd), sc in next 4 sts, 2 sc in next st, *sc in next 5 sts, 2 sc in next st; rep from * around until M – 63 sc
Rnd 3: Move the M each rnd; *sc in next 6 sts, 2 sc in next st; rep from * around until M – 72 sc
Rnd 4: *sc in next 7 sts, 2 sc in next st; rep from * around until M – 81 sc
Rnd 5: Sc in each st around – 81 sc
Rnd 6: *sc in next 18 sts, 2 sc in next st; rep from * around 4 more times, sc in remaining sts to M, remove M, sc in each st until the back of the hat is reached, sl st in 2 sts, FO
Finishing
Weave in all ends.
It’s February! Keep scrolling to find the button to grab the code and check out each of the crochet patterns in the Mother’s Day Gift Ideas blog hop.
Beanie
Crown and Side
Rnd 1: With Color A, make a Magic Loop, 9 hdc in center, tighten center, sl st to join, turn – 9 hdc
Rnd 2: Ch 1 (does not count as a st here and throughout), 2 hdc in first st, 2 hdc in each st around, sl st to join, turn – 18 hdc
Rnd 3: Ch 1, 2 hdc in first st, hdc in next st,*2 hdc in next st, hdc in next st; rep from * around, sl st to join, turn – 27 hdc
Rnd 4: Ch 1, 2 hdc in first st, hdc in next 2 sts,*2 hdc in next st, hdc in next 2 sts; rep from * around, sl st to join, turn – 36 hdc
Rnd 5: Ch 1, 2 hdc in first st, hdc in next 3 sts, *2 hdc in next st, hdc in next 3 sts; rep from * to end, sl st to join, turn – 45 hdc
Rnds 6-8: Ch 1, hdc in first st, hdc in each st, sl st to join, turn. Do not turn and change to Color B after Rnd 8 only – 45 hdc
Rnd 9: Working in BL only, ch 4 (counts as tr), tr in each st until 1 st remains, tr in last st and change to Color A, sl st to join, drop Color B to the front, turn – 45 tr
Rnd 10: Ch 1, hdc in first st, hdc in same st, sl st to join, turn – 45 hdc
Note: The heart is made before continuing the side
Heart
Rnd 1: Using a larger hook, pull Color B through the first FL, this will become the ch, make a Heart [refer to Special Stitches & Techniques], Fasten off Color B
Continue Side
Rnds 11-12: With Color A, ch 1, hdc in each st around, sl to join, turn – 45 hdc
Note: remove or add a row of hdc to change the length. Any changes in length are not accounted for in the yarn amounts.
Rnd 13: Ch 1, sc in each st around, sl st to join, FO – 45 sc
Finishing
Weave in all ends.
Mother’s Day Gifts Blog Hop
Don’t forget to grab the code from Me ‘N’ My Hook by clicking the button below before hopping over to the designer’s site to grab the pattern each day of February.

Pin It for Later
If we’re not hanging out on social media yet, come check me out on Facebook, Instagram and Pinterest.
Want to talk about yarn goodness, crochet tips, and exclusive weekly deals? Join my Facebook Group, Creations By Courtney Community.
Join my newsletter for sneak peeks, crochet tips, and more. HERE
Please use #CreationsByCourtney on social media when sharing your projects.
This pattern is not to be duplicated or resold, and not to be reproduced commercially. You may sell finished products on Etsy, at farmers markets, and craft fairs, but please credit Creations By Courtney as the pattern’s author.
9 Responses
Very cute! Thank you for sharing it.
Thank you! I hope you enjoy making Wrapped in Love Hats!
I love this pattern!! I know it will be a favorite of my family! Thank you…I admire your talent.
Thank you, Janice! I’m glad that your family will enjoy this hat! Please use #creationsbycourtney when sharing your finished hats.