Your first few rows of Tunisian crochet can feel awkward. The hook is longer, the fabric feels flimsy but yet thick, and you have a whole row of loops instead of finishing one stitch at a time.
If you already know regular crochet, you may try to bring those skills to help. Tunisian crochet is its own thing, and a few tidbits of info make the learning curve much easier.
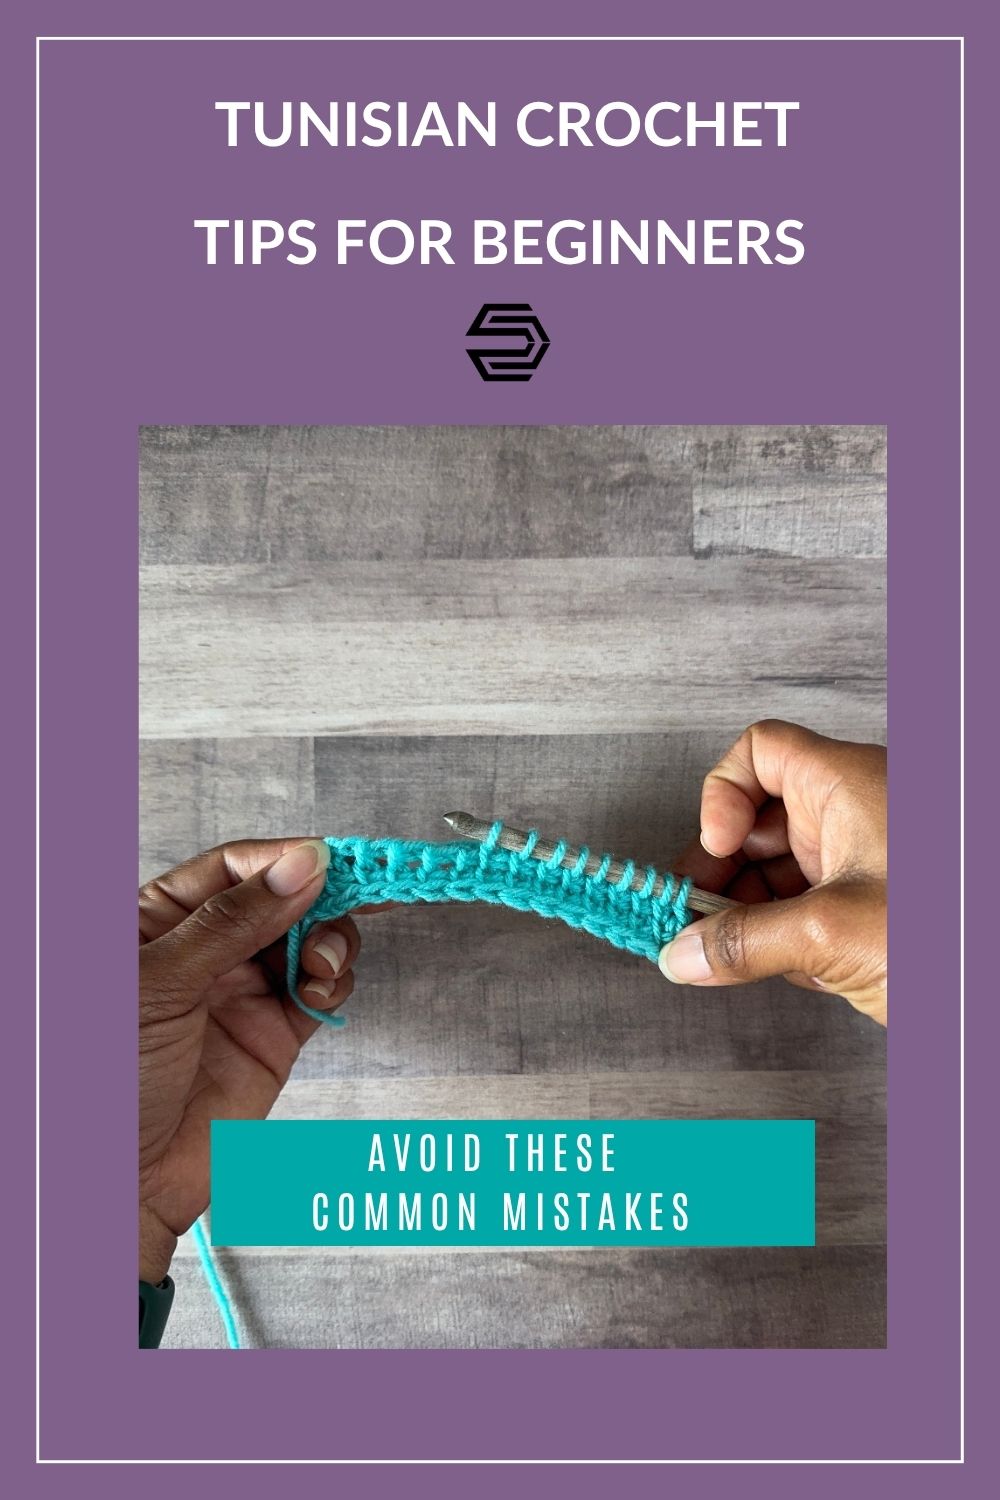
These beginner-friendly Tunisian crochet tips are here to stop common frustration before it starts. Once the forward pass and return pass click, the whole technique feels a lot less mysterious.
Why Tunisian Crochet Feels Different at the Start
What makes the fabric and motion feel unfamiliar
Regular crochet finishes each stitch before you move on. Tunisian crochet works in two parts. You pull up loops across the row on the forward pass, then work them off on the return pass. Think typewriter, if you’re old enough…
There’s no turning…ever… until you venture into tunisian in the round… That’s for another day.
You’re working with multiple loops on a long hook, and the fabric is more structured than regular crochet. That’s why Tunisian often feels like a mix of crochet and knitting, but it’s own unique technique. The setup row matters a lot as it creates the first edge that can be worked into later.
The fabric can also feel tighter than what you’re used to. That’s normal. Many tunisian stitches are denser, and some curl more than others. If you want another visual explanation of the basics, Yarnspirations has a helpful beginner’s guide to Tunisian crochet.
The one thing beginners should expect right away
The first challenge is almost always tension.
It’s one or two factors: tight loops and/or wrong hook size. Creating a consistent tension with the loops is a challenge for beginners in regular crochet, as well as tunisian crochet. Since we pull up multiple loops on the forward pass, if they are all too tight, it will increase the curl and stiffness of the fabric. Then the next row feels like a fight, because the hook won’t slide into the stitch bars easily.
Most often we grab a hook size listed on the yarn label. This works for regular crochet.
Tunisian crochet is a two-step technique, so using the recommended hook size from the yarn label means tighter loops.
Let each loop rest on the thicker part of the hook shaft, not crammed up at the tip. This helps with consistent loop sizes.
The eight Tunisian crochet tips that make learning easier
Start with a larger hook than you might expect
A bigger hook is one of the easiest fixes.
Tunisian fabric is dense from the forward and return passes, which contributes to the curling of some tunisian stitches.
For practice, go up two hook sizes from what you’d normally use with that yarn. The stitches will open up, the bars will be easier to see, and your hook will move more smoothly. It also helps reduce curl, which is a big win on those first swatches.
Use a straight hook before buying a full Tunisian set
You don’t need a full case of hooks and cables to try Tunisian crochet.
If you’re making a small swatch, coaster, or narrow headband, a straight hook can be enough as long as it has room to hold your loops. An afghan hook (the long ones) or a corded Tunisian hook becomes more useful when the row gets wider.
Start simple. If you end up loving the technique, then upgrade.
Choose a hook with a sharp tip for easier stitching
Much like in regular crochet, hook tip shape matters more than many beginners realize.
A sharper tip slips into vertical bars more easily, especially when your tension is still uneven. Blunter, round hooks work too, but it’s harder to insert the hook in the vertical bars. One word of caution with a pointy tip hook, it may increase yarn splitting as you learn where to insert the hook.
If Tunisian crochet has felt wonky and very slow going so far, the hook may be part of the problem. Sometimes the fix isn’t more practice, it’s a hook that gets into the stitch cleanly.
Remember that the hook only needs to be about one third the project width
A lot of beginners assume the hook has to be as wide as the whole project. It doesn’t.
A good rule of thumb is that the hook only needs enough room to hold the active loops comfortably, and that often means a hook that’s much shorter than the finished row, around a third of the project width for many flat pieces. Those loops bunch together on the hook while you work.
Yarn is pliable and the loops can be squished quite a bit onto the hook. You don’t need a hook the length of your forearm to learn tunisian crochet.
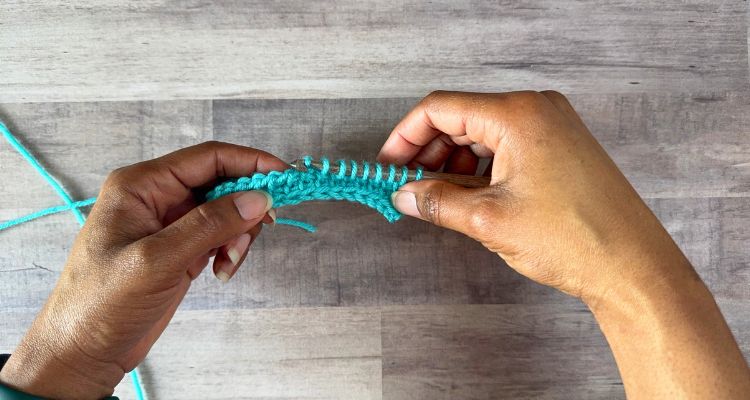
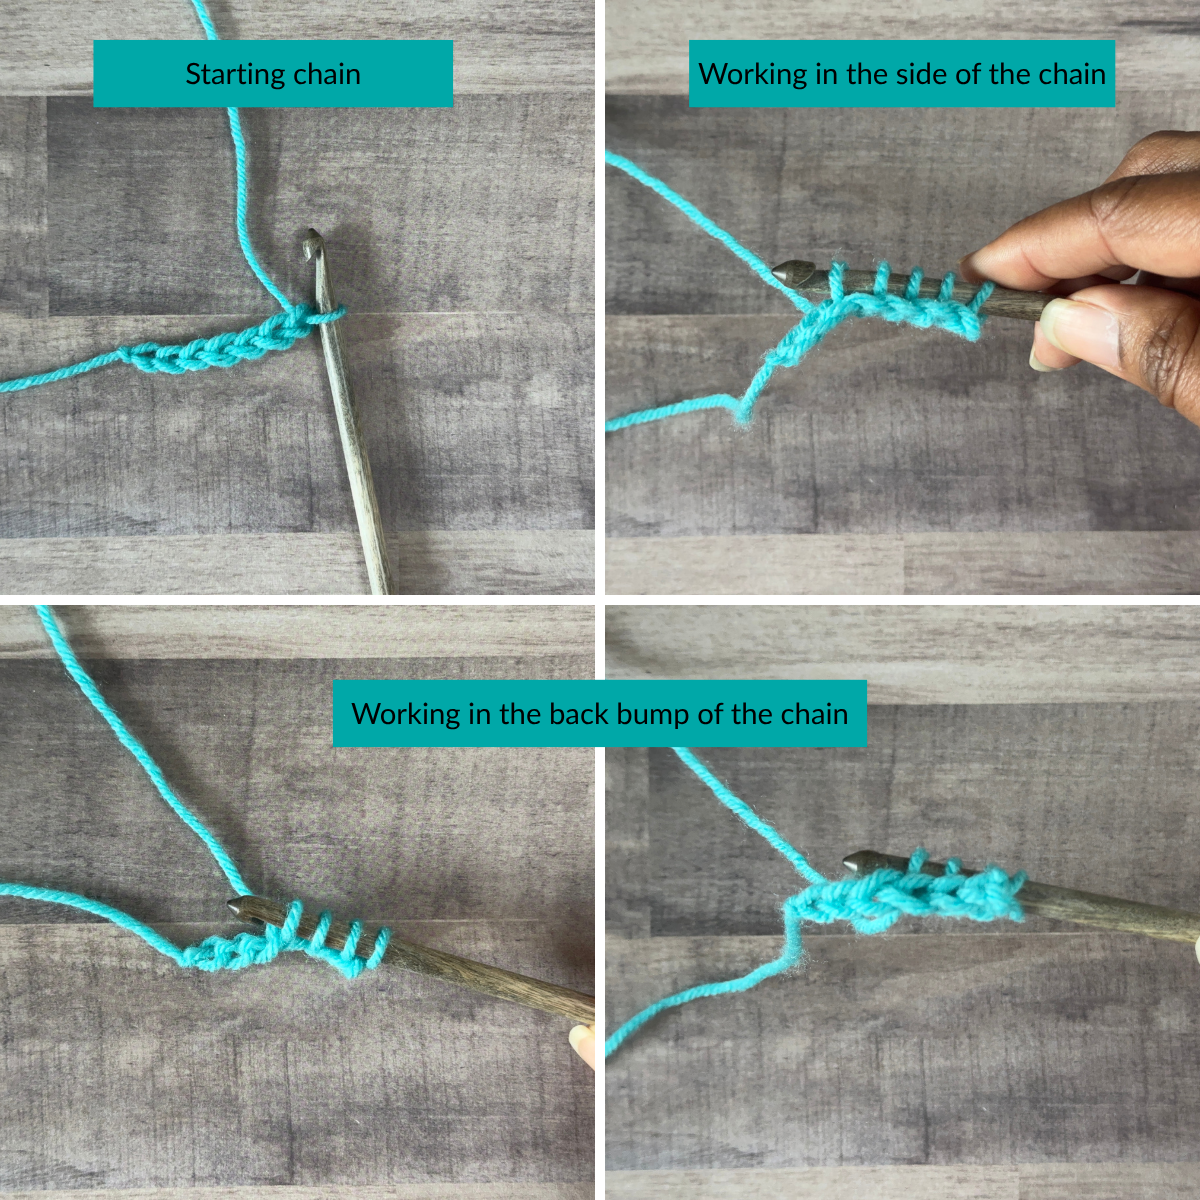
Work into the back bump for a cleaner foundation row
The back bump is the little ridge on the back of your starting chain. Working into it can give your foundation row a neater edge and a more polished look.
It’s a small detail, but it helps. The bottom edge looks cleaner, and is easier to see later, especially if adding an edging.
The back bump may be less fiddly than working in the side of a chain. It’s easier to see and count once you know what to look for.
Adjust the first loop of each row
That first loop impacts the length and “shape” for the whole project.
The first loop tends to loosen as you pick up loops across the row, and can throw off gauge (never measure gauge along the edge). It’s not often that the first loop will be too tight, unless you’re using a hook and fiber that is “sticky”. If it is too tight, it will prevent the hook from sliding as it needs for the forward and return passes.
After pulling up at least 2 loops on the forward pass, just gently tug the second loop to tighten the first loop around the hook shaft, and then gently tug the other loops to adjust around the hook before continuing with the forward pass.
This quick adjustment can save you a lot of annoyance later.
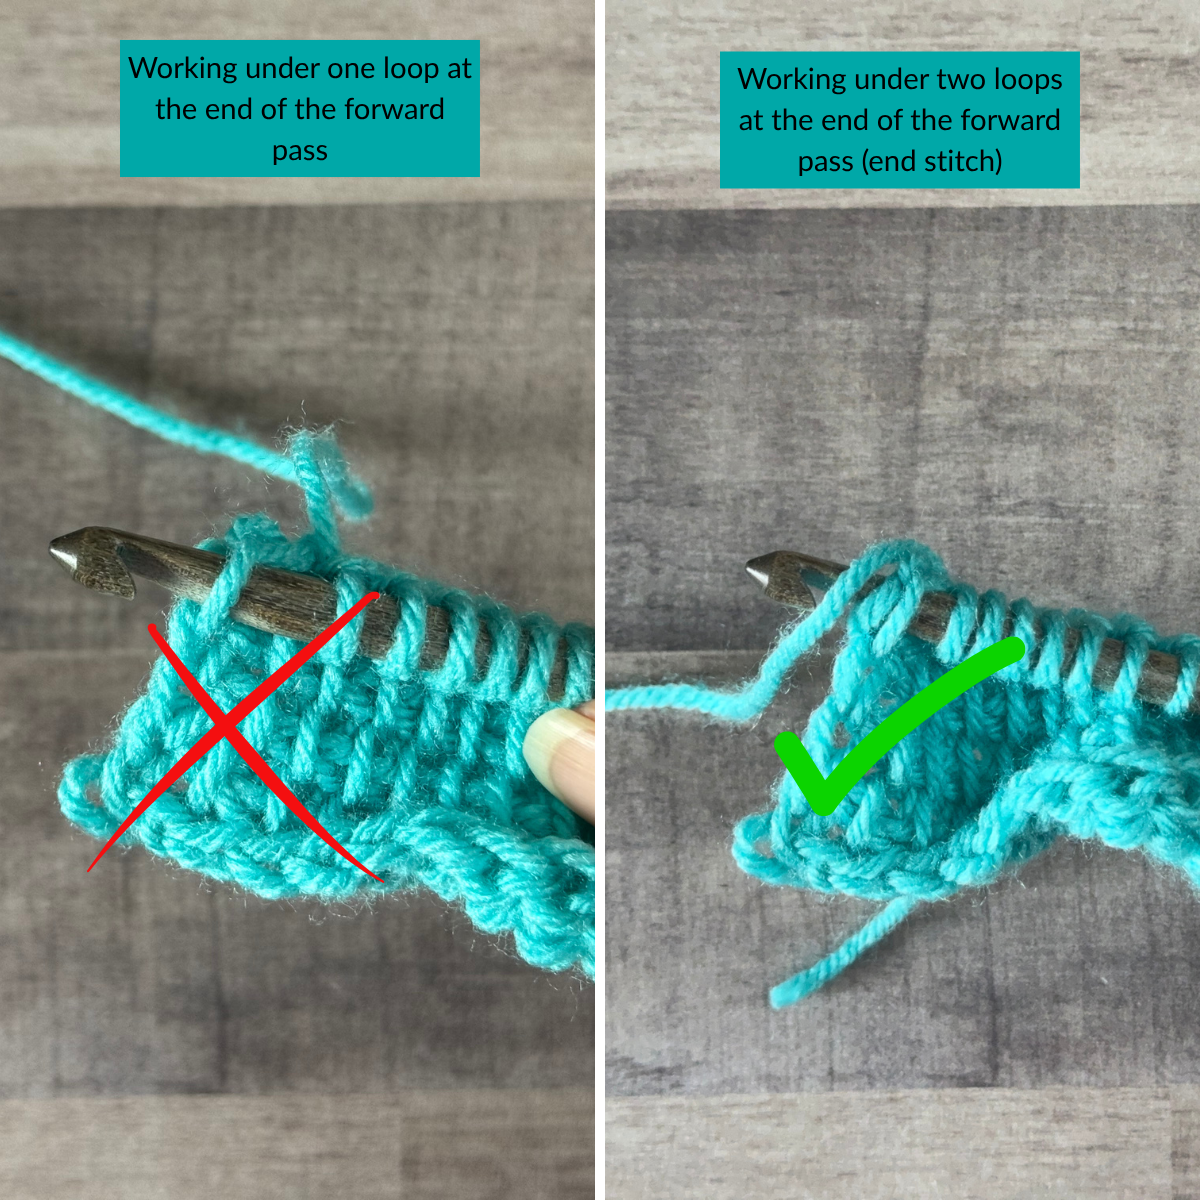
Always make an end stitch at the edge
The end stitch is one of the best habits you can build early.
This stitch counts as a tunisian simple stitch in most patterns. When pulling up the last loop, the hook is inserted under two vertical bars rather than one. This creates a neat, stable edge.
Before continuing with the rest of the return pass, do make sure that it is as tall as or slightly taller than the other loops. The chain 1 made at the beginning of the return pass can tighten the end stitch.
When it goes unchecked, the edge is shorter than the beginning edge, and can create a slightly sloped top edge.
Wait to invest in an interchangeable Tunisian hook set until you know you love the technique
A full interchangeable set or three is nice. But it isn’t step one.
As stated above, you can start with a straight hook that doesn’t have a thumb rest or has a small one to begin making simple projects like coasters, scarves, and even entrelac.
If you want to have more room for more loops, start with one or two afghan hooks. These hooks are typically available at a big craft store like Michaels.
And you don’t need fancy yarn. You can use a smooth, solid color yarn from your stash to practice. That’s enough to figure out whether Tunisian crochet feels fun to you or like a technique you’ll only use once in a while.
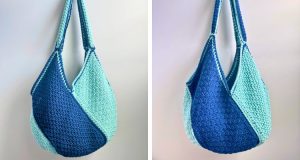
If you want a good next stitch after your basic swatch, try this Tunisian half double crochet stitch tutorial. It gives you a little more texture without feeling overwhelming. When you are ready for a first project, the Tunisian Crochet Windmill Tote uses beginner-friendly bamboo stitches to create a sturdy bag you will use every day.
How to keep your first Tunisian project from feeling overwhelming
Pick a small practice piece before a full garment or blanket
Your first project should be small enough that you can finish in a single or a few crochet sessions.
A washcloth, a mug rug, a narrow scarf, or even a plain practice swatch is perfect. You get to learn the motion without managing a giant pile of fabric or a hundred live loops on the hook. A blanket sounds cozy, but it’s a lot when the basics still feel new.
Use your first swatch to check tension, curl, and comfort
Your first practice swatch is for learning.
Pay attention to how the fabric feels in your hand. Is it stiff? Is it curling like a taquito? Can you find the next row easily? Tunisian simple stitch often curls, especially with tight tension, so don’t panic when that happens. A larger hook and blocking can help, but some curl is part of the fabric’s personality.
You also want to notice comfort. If your hand feels strained after a few rows and your shoulders are tight, take a slow deep breath, pause and tell yourself, “I am having fun learning a new technique and stitches,” before continuing to practice.
When to pause, frog, and try again
Mistakes are part of learning this technique. Extra-tight loops, dropped stitches, and wonky edges happen to almost everyone.
If a row looks off, stop to see if you can figure out what needs to be fixed. Frogging is a part of the learning process. It helps you recognize mistakes sooner when you stop and correct it.
If hand position or loop control still feels awkward, a quick video of Tunisian crochet hacks can help you see how other crocheters manage the hook and yarn.
What to remember before you cast on
Pick a larger hook with a smooth, solid color yarn. Check the size of the first loop. Work in the back bump of each chain for the foundation row, and make the end stitch.
You don’t need fancy tools, a perfect swatch, or speed. You need a little patience and a few rows of practice. Once a rhythm of the forward pass and return pass develops, Tunisian crochet gets easier.
Get the Tunisian Crochet Success Starter Kit
Need a little extra help before your first project? Download the free Tunisian Crochet Success Starter Kit and start with clearer steps, better setup, and less frustration.
Feel ready to start your first swatch in 10 minutes or less.
Conclusion
That odd, awkward first row won’t stay awkward for long. Most beginners don’t need more talent, they need better setup and a little breathing room in their tension.
Start small, let yourself practice slowly, and use these Tunisian crochet tips to make the first project smoother, not perfect. If wearables are on your list too, Get Your Free Garment Guide is a helpful next step.
Want to talk about yarn goodness, crochet tips, and connect with other Crochet Besties? Join my Facebook Group, Confidently Crochet with Creations By Courtney.
If we’re not hanging out on social media yet, come check me out on Facebook, Instagram and Pinterest. I would love to see what you’re stitching.
Use #CreationsByCourtney on social media when sharing your projects from any tutorials, tips or patterns by Creations by Courtney.
This post may contain affiliate links. If you make a purchase through these links, I may earn a small commission at no extra cost to you.