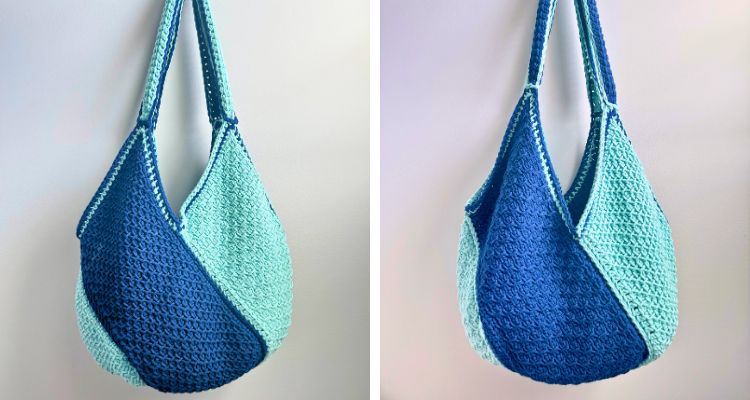
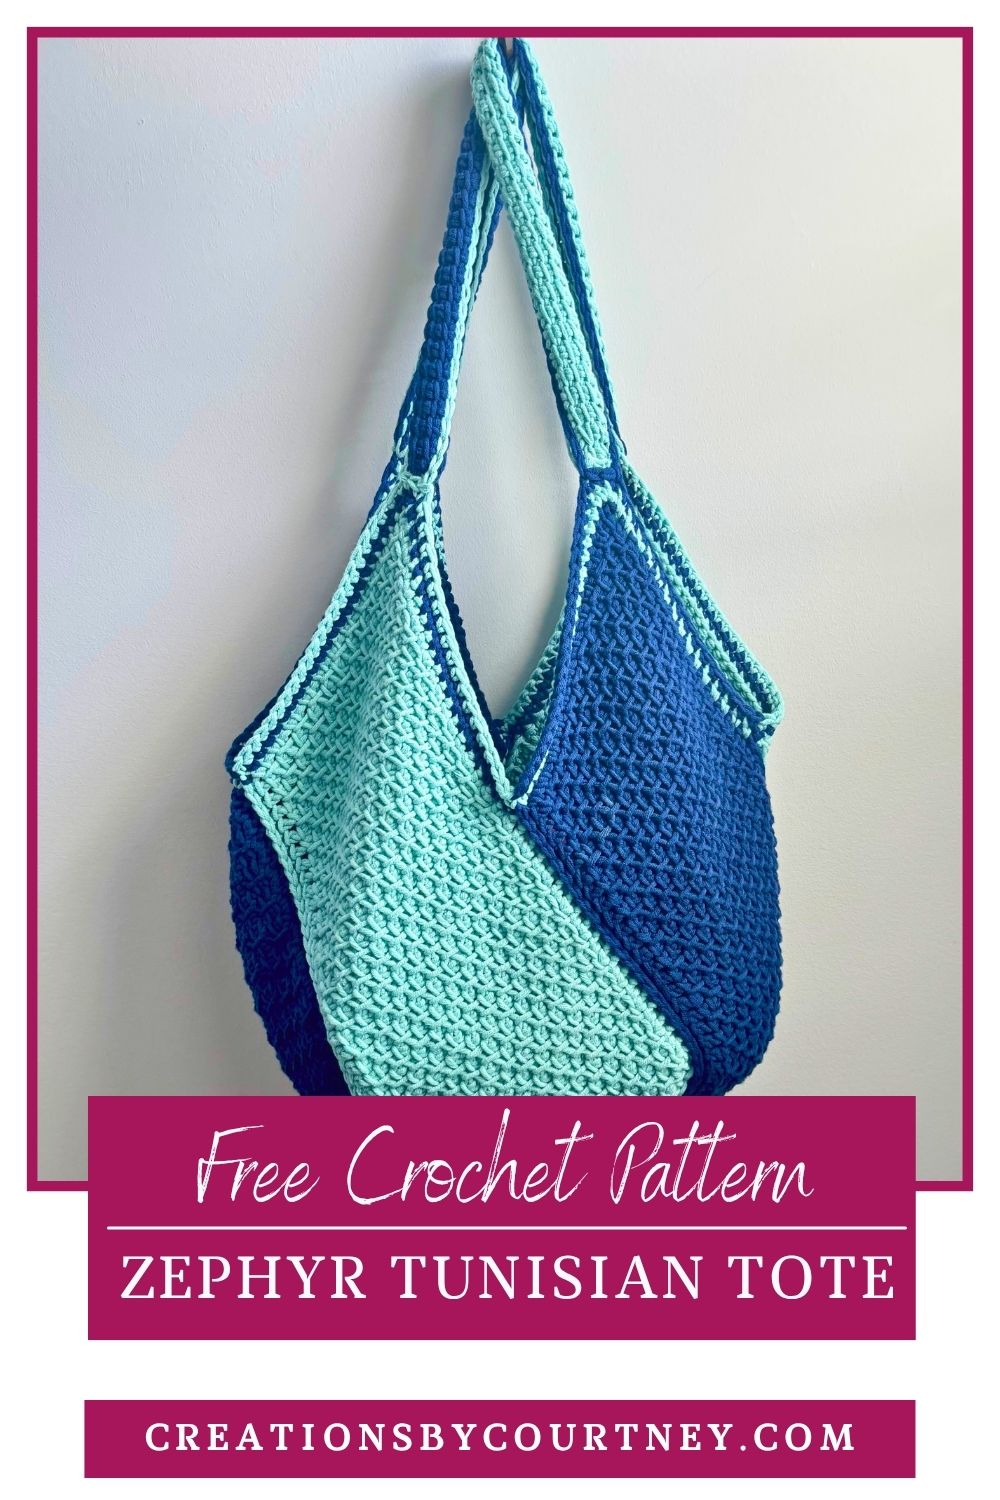
A tunisian crochet windmill tote is a great project for crocheters who want a bag that is practical and looks good. The windmill layout gives the tote its eye-catching shape, while tunisian crochet creates a dense fabric that can handle daily use better than resorting to single crochet or lining lighter crochet fabrics.
The Zephyr Tunisian Crochet Tote inspired by gifts for women, as part of the Underground Crafter Christmas in July Make Along. The MAL features new crochet and knit patterns throughout the month of July, plus a giveaway at the end of the month. It is a fun time to make something useful, giftable, and seasonal.
TL;DR
- Cotton yarn is usually the best choice for a sturdy tote.
- Using the recommended hook size will create a denser fabric, and produce a smaller tote.
- Gauge is not crucial for this pattern.
- Tunisian crochet naturally curls, but the seaming and edging will reduce it.
- A slip stitch seam prevents over stretching of the fabric, and slip stitch edging reinforces the straps.
- A lining adds to the style and structure for a bag that lasts longer.
Why tunisian crochet works so well for a windmill tote
A windmill tote is a classic style that creates a large bottom from four panels that appear to rotate. Tunisian crochet creates a dense fabric with minimal space between stitches that appears woven when compared to some regular crochet fabrics.
Fewer chances of your chapstick falling out or being poked by a pencil (there’s a story from my teen years as a crocheter…).
The density and texture of tunisian crochet stitches offer a polished, unique look that gives off “its expensive” vibes.
If you are familiar with the dreaded curl common to the tunisian simple stitch, you have nothing to worry about. The two bamboo stitches used in this tunisian crochet windmill tote barely curl before assembling the bag.
You may also notice while stitching that one side is slightly shorter than the other. This is common due to the first loop on the hook and the end stitch.
If you are newer to Tunisian crochet, check out these 8 tips before starting.
Choose yarn and hook for strength
For a handmade bag, the yarn will do the heavy lifting of maintaining the structure. This is not a scarf, shawl or sweater, so a flowy drape is not the goal. Instead, structure is important for a tunisian crochet windmill tote. That does not mean the bag should feel stiff or rough. It should simply hold its shape and not stretch too much over time.
Here is a simple comparison to help you choose yarn:
| Yarn choice | How the fabric feels | Best use in a tote |
|---|---|---|
| 100% cotton | Can be firm, great stitch definition | Any size, can handle heavy loads |
| Chunky or Worsted cotton | Dense and sturdy | Everyday tote, strong choice |
| Cotton blend | Softer, more drape | Casual bag, might need lining |
| Acrylic | Can be sturdy or have more drape | Small to medium bags, not ideal for heavy loads |
| Wool | soft, warm, will stretch | Felting with virgin wool |
Cotton is often the best choice for a tote. It gives the stitches good definition and wears well over time. Specifically, a mercerized cotton is even better, as the yarn has been pre-treated and won’t stretch. Sadly, there are not as many options for mercerized cotton in various weights.
Typically, a smaller hook can also help. If you go down a hook size from what the yarn label recommends, you will usually get a tighter fabric with less stretch. That is helpful for a tote that needs to carry daily items. But since we’re dealing with tunisian crochet, if you would prefer a tighter fabric, use one size up instead of two sizes larger than what is on the yarn label.
You do not need a super long hook to make this tote. You can use a standard straight crochet hook with a rubber band on the end. No need to let loops slide off while stitching.
If the stitches are new to you, making a swatch will be helpful in understanding how to make the stitches. It will help you check the following too:
- fabric density
- stitch definition
- drape
- curl
- panel size
Build the panels without fighting tunisian curl
Most windmill totes are made from four rectangles. Some use rectangles, while others use squares or modular pieces arranged around a center point.
Start with one panel and measure the finished fabric. If the first panel feels too loose or too tight, adjust the hook size before making the rest. It is much easier to fix the fabric early than after assembly.
Pay close attention to your edge stitches. In Tunisian crochet, the first and last stitch of each forward pass help define the shape of the fabric. Adjusting the edge stitches will keep the panels neat.
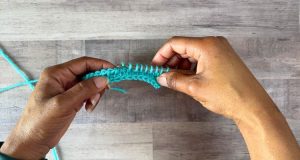
If you are new to Tunisian crochet, place a stitch marker in the end stitch to ensure you make the next end stitch in the right place, and pull up a little before starting the return pass.
Curling is normal in Tunisian crochet, especially with simpler stitches. To help reduce it:
- use a slightly larger hook for the foundation chain if needed
- keep your tension even
- add a border later
- block each panel before assembly
Blocking is especially helpful when you want all the pieces to match. Cotton usually responds well to steam or damp blocking. If you use acrylic, be careful with heat, since too much can flatten the texture.
If you want a more sophisticated look, choose one color to make the Zephyr Tunisian Crochet Tote. Or choose two contrasting colors and alternate the placement for an eye catching tote.
For more help with shaping and blocking, see how to block crochet pieces.
Join the windmill layout so the bag keeps its shape
Assembling some crochet bags can feel intimidating. A windmill tote offers a unique shape from one of the easiest construction methods. Before seaming, lay out the panels in the desired order of stitches and color, ensure the center point is neat.
When seaming the pieces together, the sides will not line up. This creates the four points for attaching the straps, and creates the appearance that the panels are twisting.
Seaming can make or break this project. You can cut a long length of yarn and use the mattress stitch. It creates a clean seam that blends in well with the fabric. If you want more structure, a slip stitch or single crochet join adds to the structure to prevent overstretching. This added strength at the seams is a must if you’re going to carry heavier items like books and water bottles.
The center join deserves special care. This is where several seams meet, so it takes more stress than the rest of the bag. Reinforce that spot if needed, and weave in the yarn tails securely so they do not work loose over time.
You’ll add two rounds of single crochet around the top opening. You can also choose to use a reverse single crochet or other edging pattern. Prefer something simple? Just make slip stitch in each stitch around.
Handle options
Handles need to be strong enough to support the weight of the bag.
Save your shoulders, and do not rush to finish this project by making chain straps.
For the size of the tunisian crochet windmill tote, the straps are an opportunity to add to the overall look while being practical. These straps will be reinforced with slip stitches.
You could add a little razzle dazzle to your bag by using store bought handles, such as the ones that look like a row of small granny squares or MUUD leather purse handles. These options can give the tote more support and reduce stretching.
Lining options
A lining is not required, but it is often a very good idea. It can:
- add structure
- protect the stitches
- help the bag keep its shape
- keep small items from slipping through
- create a cleaner interior
Lightweight cotton is a great choice for the lining. Stiff craft felt is another great option that will add to the structure.
If you want to add a lining, add the fabric to each piece before seaming the panels together.
Small details to elevate the tote
Whether with fabric, felt or yarn, consider adding a small pocket or two to the inside that can hold your phone and other small items. A lining is not required to add a pocket for the small items.
Magnetic snaps are a favorite to add to a crochet bag. They are an easy way to keep your items secure when setting the bag down. If you want to secure your items, and don’t have a magnetic snaps available, consider adding chain ties in the valley between two pieces.
Can I use acrylic yarn for my tunisian crochet windmill tote?
Yes, but it may stretch more than cotton. If you use acrylic, choose a firmer yarn and consider adding a lining for extra support.
How do I prevent the panels from curling while I work?
Curling is normal in Tunisian crochet, but these stitches do not curl much. You can reduce it by using a slightly larger hook for the foundation chain, keeping your tension even, and blocking the panels before assembly, if it curls alot.
Is a lining necessary for a tunisian crochet bag?
Not always, but it is highly recommended if you want the tote to hold heavier items or keep its shape over time.
Can I use thinner yarn?
Yes, the size of each panel, and therefore the overall size will be smaller. The size will be determined by the yarn.
Add this Pattern to your Favorites
Materials
- Loops & Threads Bulky Twist, #5 bulky weight yarn (50% cotton, 50% acrylic; 153 yds/ 140 m; 3.5 oz/ 100 g):
- Color A: Navy x 2
- Color B: Pastel Turquoise x 2
- US 9.00 mm hook or hook to meet gauge
- US 6.00 mm hook
- Scissors
- Yarn Needle
- Measuring Tape
Gauge
Bamboo St 3 Offset: 4 (B-St3, tss) sts x 9 rows = 4.25” x 4.25” [11 cm x 11 cm]
Bamboo St 2 w/ YU Offset: 7 B-St2U x 9 rows = 4” x 4.125” [10 cm x 10.5 cm]
Finished Size
Each Piece: 7.25” W x 18” L [18.5 cm W x 46 cm L]
Purse Strap: 1.5” W x 19” L [4 cm W x 48 cm L]
Pattern Key
BO: bind off
B-St2U: bamboo stitch 2 with yarn under
B-St3: Bamboo stitch 3
Btw: between
Ch: chain
Dc: double crochet
FO: fasten off
Inc: increase
M: stitch marker
PM : place stitch marker
Rem: remain(s)
Rep: repeat
RetP: return pass
Sl st: slip stitch
Sc: single crochet
Sk: skip
Sl st: slip stitch
St(s): stitch(es)
Tss: tunisian simple stitch
Tss2tog: Tunisian simple stitch 2 together
YO: yarn over
YU: yarn under
Special Stitches and Techniques
B-St2U: YU, tss in next 2 sts, pull YU over 2 loops on hook
B-St3: YO, tss in next 3 sts, pull YO over 3 loops on hook
End St: insert hook under both loops of last vertical bar, YO and pull up a loop
RetP: Ch 1, *YO and pull through 2 loops
Tss2tog: insert hook under the next 2 vertical bars, YO and pull up a loop
Notes
- Pattern is written in US terms.
- Read entire pattern before beginning.
- This tote is constructed in 8 parts: Pieces 1-4, Seam, Edging, Straps, and Finishing.
- A schematic is included in the PDF to demonstrate the required layout before seaming.
Purchase the ad-free PDF with the schematic from your favorite pattern shop


You may enjoy these pattern too

Instructions
Piece 1
With Color A, ch 26
Row 1: [B-St3, tss] rep until 1 st rem, end st. RetP. 6 B-St3, 8 tss
Row 2: Tss in nest 2 sts, [B-St3, tss] rep until 3 sts rem, tss in next sts, end st. RetP. 11 tss, 5 B-St3
Rep Rows 1-2 until piece measures 18”/ 46 cm
BO: Change to 6.00 mm hook, ch 1, sc in each st to end, FO.
Rep for Piece 2 in Color B
Piece 3
With Color A, ch 24,
Row 1: B-St2U across, end st. RetP. 10 B-St2U, 2 tss
Row 2: Tss in first st, B-St2U across until 2 sts rem, tss in next st, end st. RetP. 4 tss, 9 B-St2U
Rep Rows 1-2 until piece measures 18” / 46 cm
Rep for Piece 4 in Color B
Seam
- Lay Piece 1 vertically; Piece 2 extends horizontally from Piece 1 by lining up the short side of Piece 2 with the lower left corner of Piece 1 (looks like a backwards L); Piece 3 extends vertically from Piece 2 by lining up the short side of Piece 3 with the lower right corner of Piece 2; Piece 4 extends horizontally from Piece 3 by lining up the short side with the upper right corner of Piece 3. It helps to PM in the center and the corners to hold placement of Pieces.
- Cut a long length of yarn to seam x 4
- Make a slip knot with the length of yarn, and pull it through a corner stitch in the center and starting along the short side, sl st through the front loop of both pieces to attach. Do not FO.
- Repeat 3 more times.
Edging
Row 1: Continuing with yarn and using smaller hook, *sc in each stitch to corner, 2 sc to make corner, sc in each stitch until next piece, switch color, rep from * 3 more times. Do not sl st.
Row 2: *Sc in each st to corner, sc in first st of corner, ch 1, sc in 2nd st of corner, sc in each st to next Piece, switch color, rep from * 3 more times. FO.
Purse Strap
Foundation Row: With Color A, make a slip knot and pull from back to front in st before a ch-1 sp of a corner and place on Tunisian hook, pull up a loop in ch-1 sp, YO, pull up loop in next 2 sts. RetP. 5 tss
Row 1: Tss in each st, end st. RetP. 5 tss
Next Rows: Rep Row 1 until Strap measures 19” [48 cm]
Last Row: TSS in first st, tss2tog, end st. RetP. FO with tail to sew. 4 tss
Rep for second Purse Strap in color B
Finishing
Attach handles to opposite side at a corner.
Sl st in each edge stitch of each strap, FO.
Weave in all ends.
Pin it for Later
Want to talk about yarn goodness, crochet tips, and exclusive weekly deals? Join my Facebook Group, Confidently Crochet with Creations By Courtney.
If we’re not hanging out on social media yet, come check me out on Facebook, Instagram and Pinterest.
Join my newsletter for sneak peeks, crochet tips, and more.
Use #CreationsByCourtney on social media when sharing your projects.
This pattern is not to be duplicated or resold, and not to be reproduced commercially. You may sell finished products on Etsy, at farmers markets, and craft fairs, but please credit Creations By Courtney as the pattern’s author.