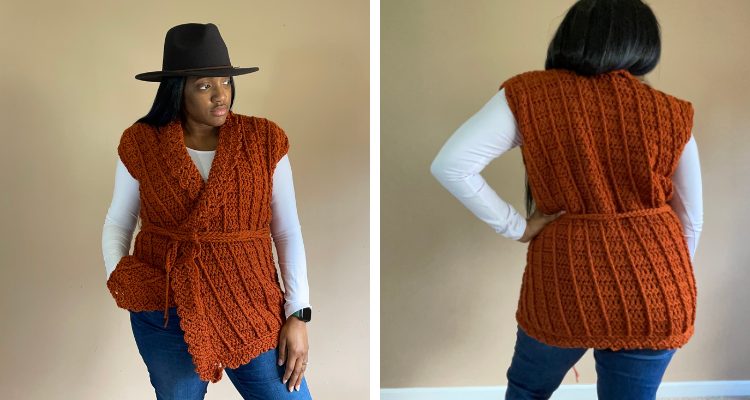
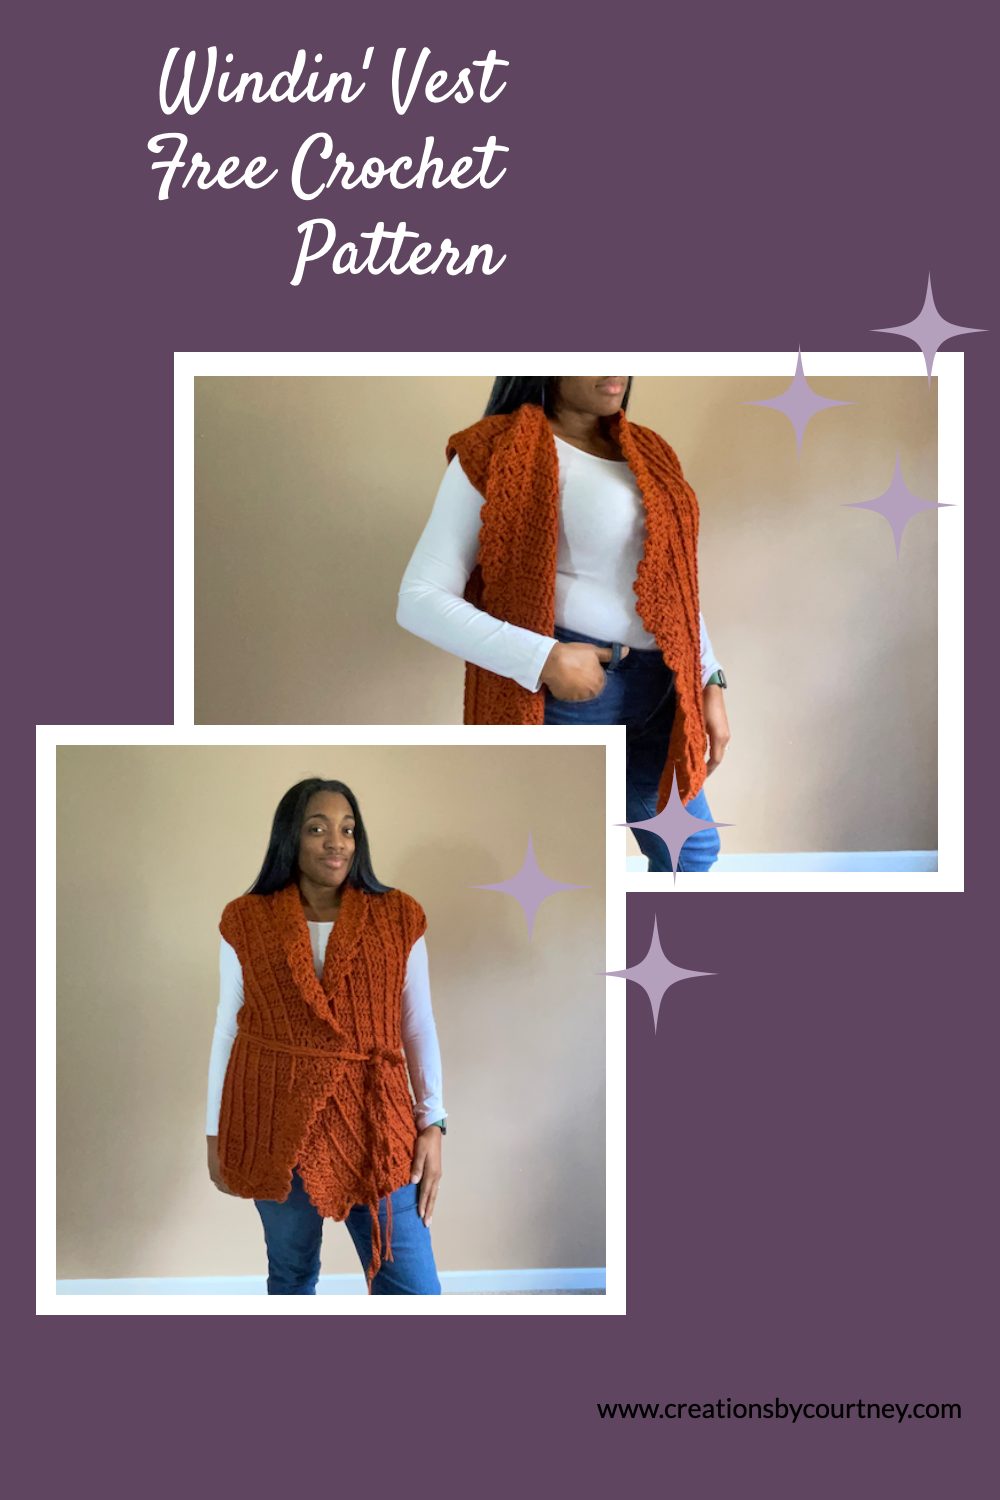
Every closet needs a crochet sweater vest for autumn and winter, especially a handmade vest. The Windin’ Vest is what your closet needs!
On occasion, Creations by Courtney enjoys looking through the stitch dictionaries in her digital library and actual shelves for inspiration, and that is where this crochet vest was born. As usual, Courtney had to put her own touch to the stitch she chose and play with words to name this design.
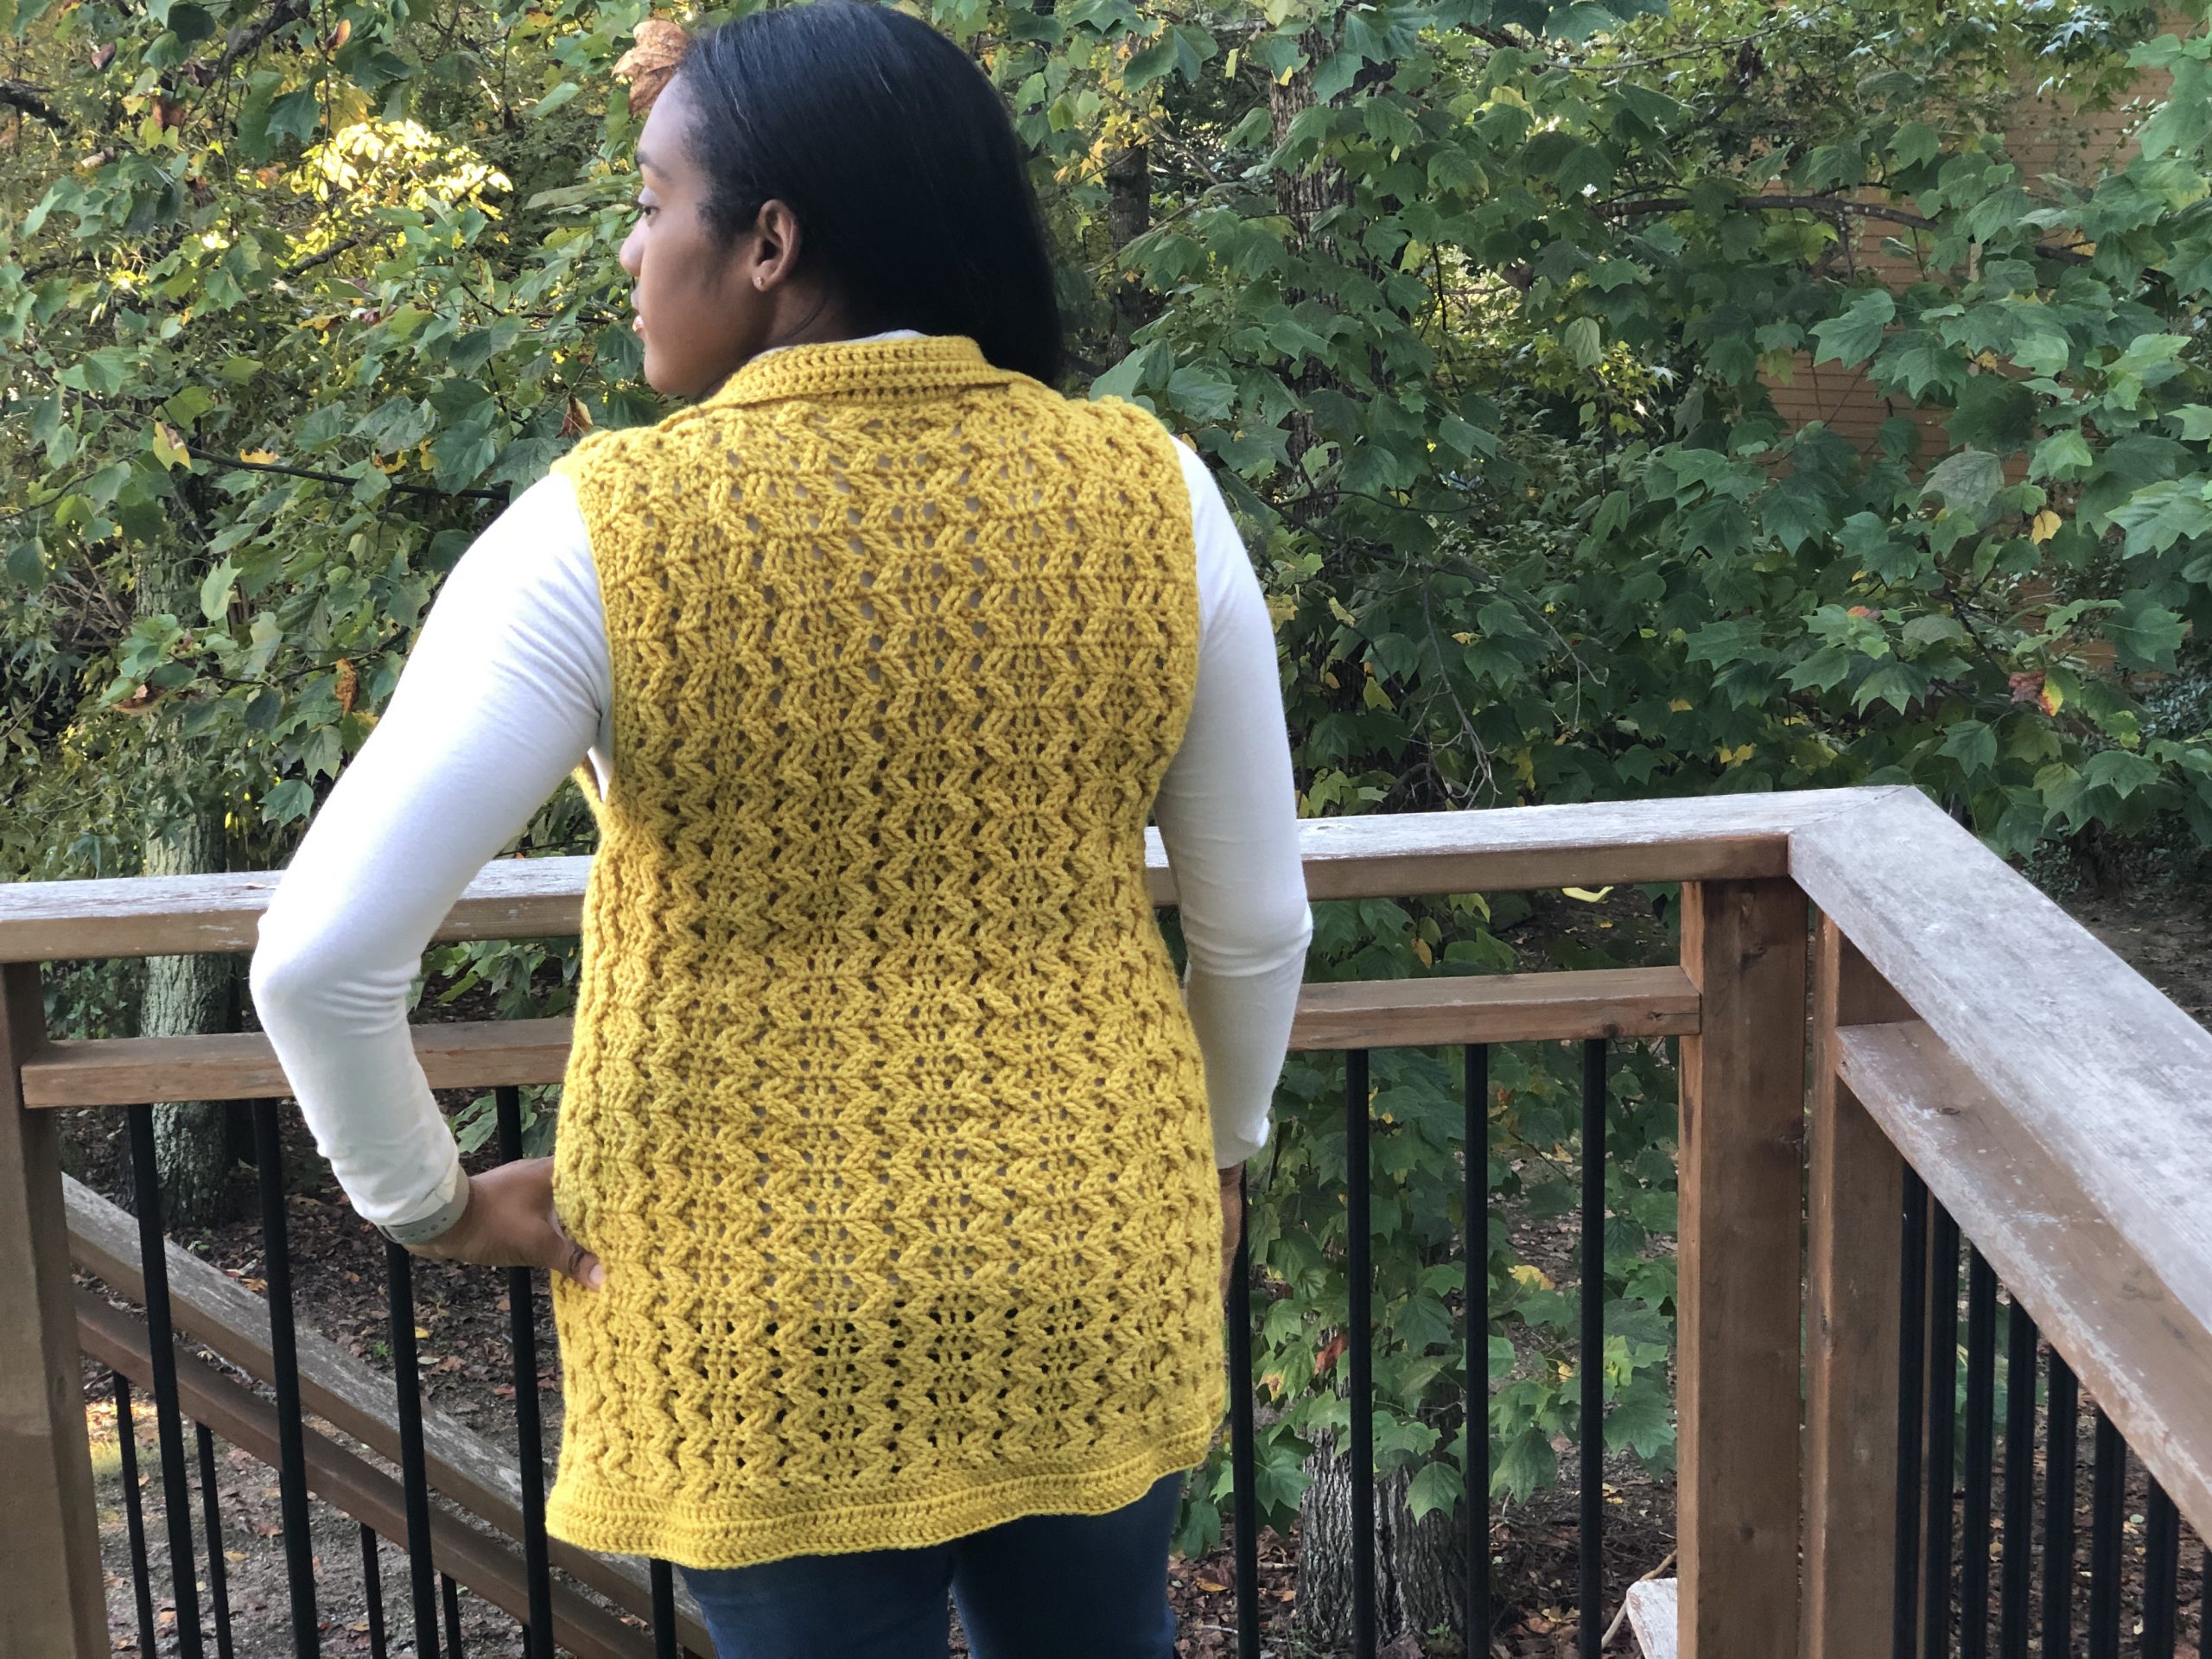
This chunky crochet vest pattern features just a few stitches, double crochet and front post stitches, to create diagonals. The diagonals draw the eyes up toward the face and elongates the body, even as a garment with positive ease.
The original stitch pattern uses single crochet and front post double crochet, but it was modified to use all double crochets and front post extended treble stitches to remove the gaps from the wrong side of the vest. Who doesn’t love textured crochet?
When it came to naming this women’s crochet vest, it was simple to choose Windin’ Vest. If you’re familiar with Caribbean music and dance styles, there is a dance move called winding. It may be easier to make this chunky crochet vest than it is to wind one’s hips. ?
Shaping
The Windin’ Vest is an oversized crochet sweater vest that does not have any shaping within the body. It does include the appearance of shaping based on the back width being closer to one’s actual back width, and the front width is based upon one’s bust. This creates minor shaping of the shoulders for a cap sleeve appearance once seamed.
Although there is no shaping in the Edging, several rows of a leaning cluster stitch creates a collar that can be work up for added warmth around the neck. It’s long enough to roll down like a classic crochet sweater.
Seamless Crochet Vest
If you are new to Creations by Courtney crochet patterns, she enjoys reducing the number of seams in a garment, and even in accessories. This easy crochet sweater vest is really meant to be easy with the post stitches being the “hardest” part.
This crochet vest pattern is worked from the bottom up, and then the fronts and back are made to continue the winding post stitches. The only seams are at the shoulder. Even the edging is worked around the vest with a nearly invisible seam.
Also, one could flip the vest inside out to create a different look, as the wrong side of the fabric is smooth without skipped stitches. How is that possible??
Check out the special stitches to find out!
Yarn
Let’s talk yarn!
The Windin’ Crochet Vest was designed specifically for the Winter Wonder’s blog hop hosted by Ned & Mimi, HanJan Crochet and Itchin’ for Some Stitchin’. As the amazing hosts that they are, each participating designer in the USA, UK, Canada and Australia had the option to receive yarn support from WeCrochet.
In designing a fun, quick crochet garment, it was easy to choose a bulky weight yarn. It was a bit harder to decide on which bulky weight yarn, as WeCrochet has an amazing selection of yarns. Once narrowing down the options, Wool of the Andes Bulky was chosen in marsala. Marsala is the dark orange for fall and winter, and makes me think of wearing knee high boots with jeans and the Windin’ Vest.
Wool of the Andes Bulky is 100% Peruvian Highland Wool that comes in a 100g hank of 137 yards. At this time of this post, it’s on sale for $4.19-6.29, and normally only $6.99 per hank. That’s a steal of a price for a 100% wool yarn. With 20 rich color ways from shades of blue to green to neutrals, there is a option that works when making a wardrobe piece.
If you don’t often use animal fiber yarns, take note that this Peruvian Highland Wool does require hand washing and drying flat. It has not been pre-treated to handle machine washing, which means that it would be perfect for a felting project.
In choosing wool, it means that it is soft and warm with natural wicking capabilities. I found this yarn a dream to work with, and occasional splitting. The splitting may have been encouraged from the pointy tip of my Furls Streamline Metal hook, and I think a more rounded crochet hook tip with work even better.
Also, there was no shedding! Some yarns are amazingly soft and squishy but shed when crocheting. There were no shedding with how these fibers are plied. The stitch definition is amazing, and I hope you add some Wool of the Andes Bulky to your stash to make the Windin’ Vest.
Yarn Alternatives
In case you’re new to using 100% wool, and prefer a superwash wool or non-animal fiber yarn, here are a few suggestions.
Swish Bulky, 100% Fine Superwash Merino, 100 g/ 137 yds
Wool of the Andes Superwash Bulky, 100% Superwash Wool, 100 g / 137 yds
Brava Bulky, 100% Premium Acrylic, 100 g / 136 yds
Billow, 100% Pima Cotton, 100 g / 120 yds
*Disclosure: This post may contain affiliate links to products that I use, and think you will enjoy using too. Should you decide to use any such link, I will earn a small commission at no cost to you. Thank you for supporting this small business.
ADD TO RAVELRY FAVORITES
Match your wardrobe
I just had to show off the wonderful Windin’ Crochet Vests of the pattern testers!! They each chose a different color, and several chose other fibers besides wool. The joy of being a crocheter is that you can put your own touch to each project with just the color choice.
Can you pick one that you love more than another??
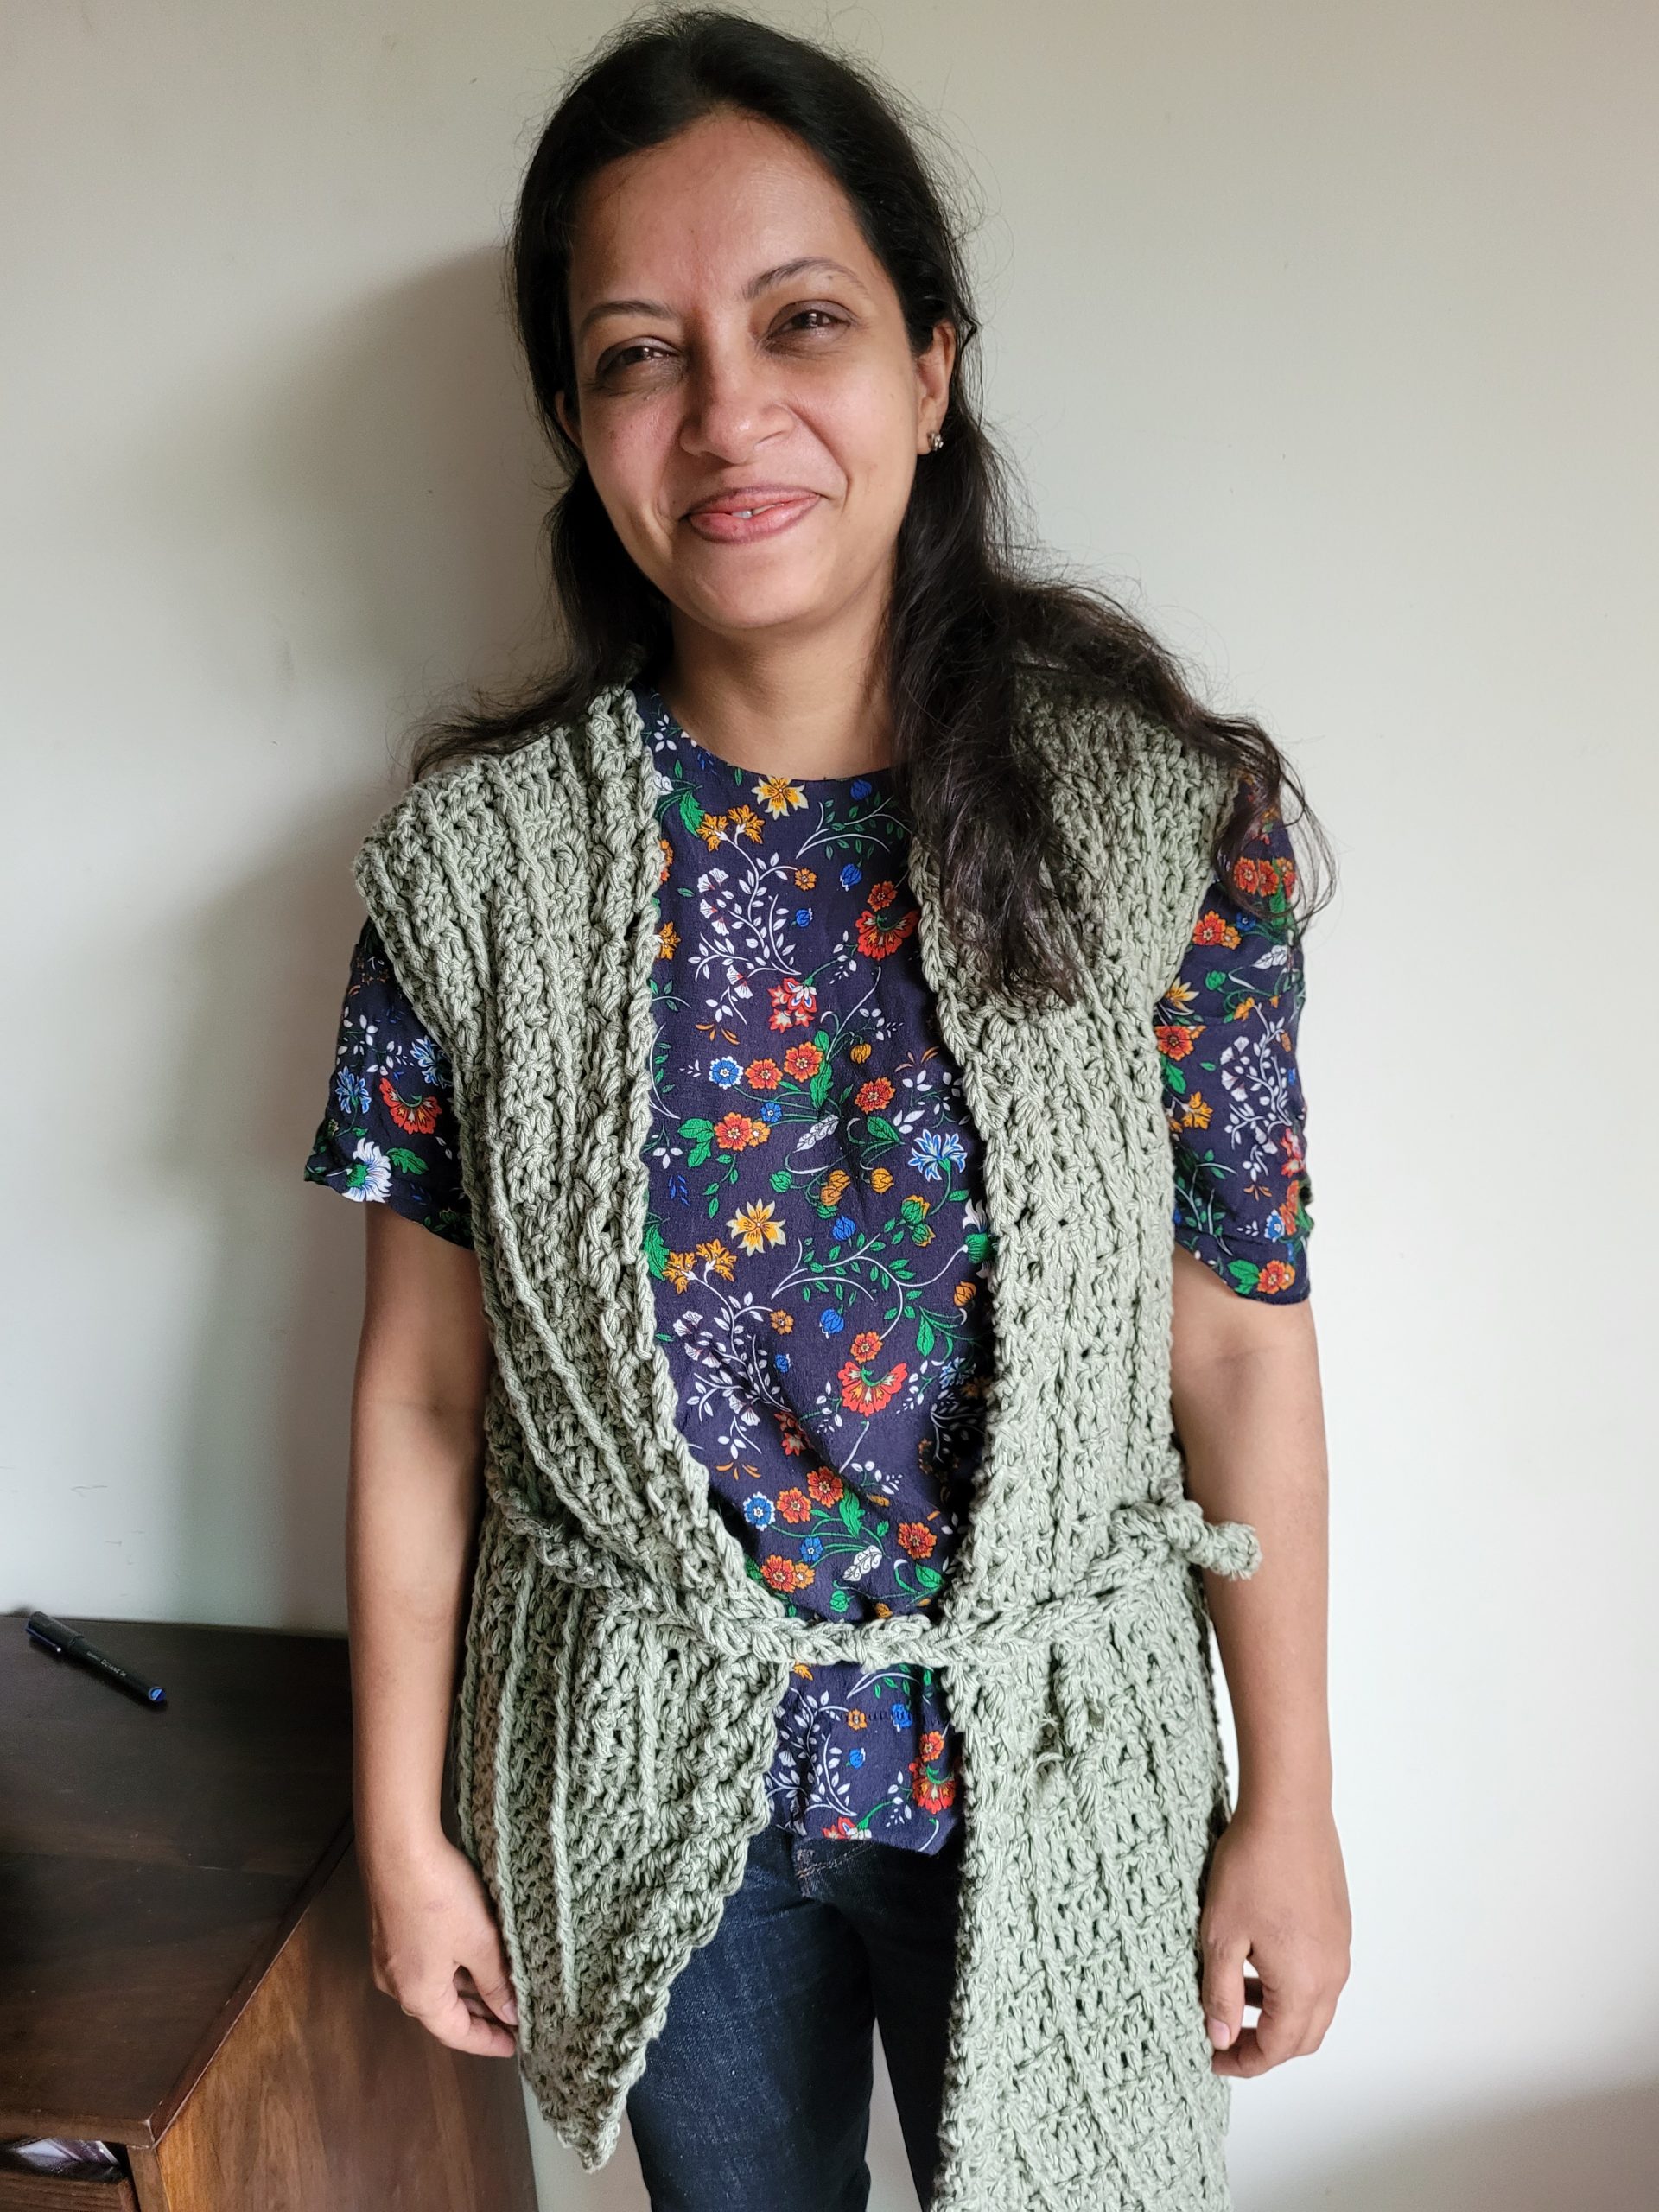
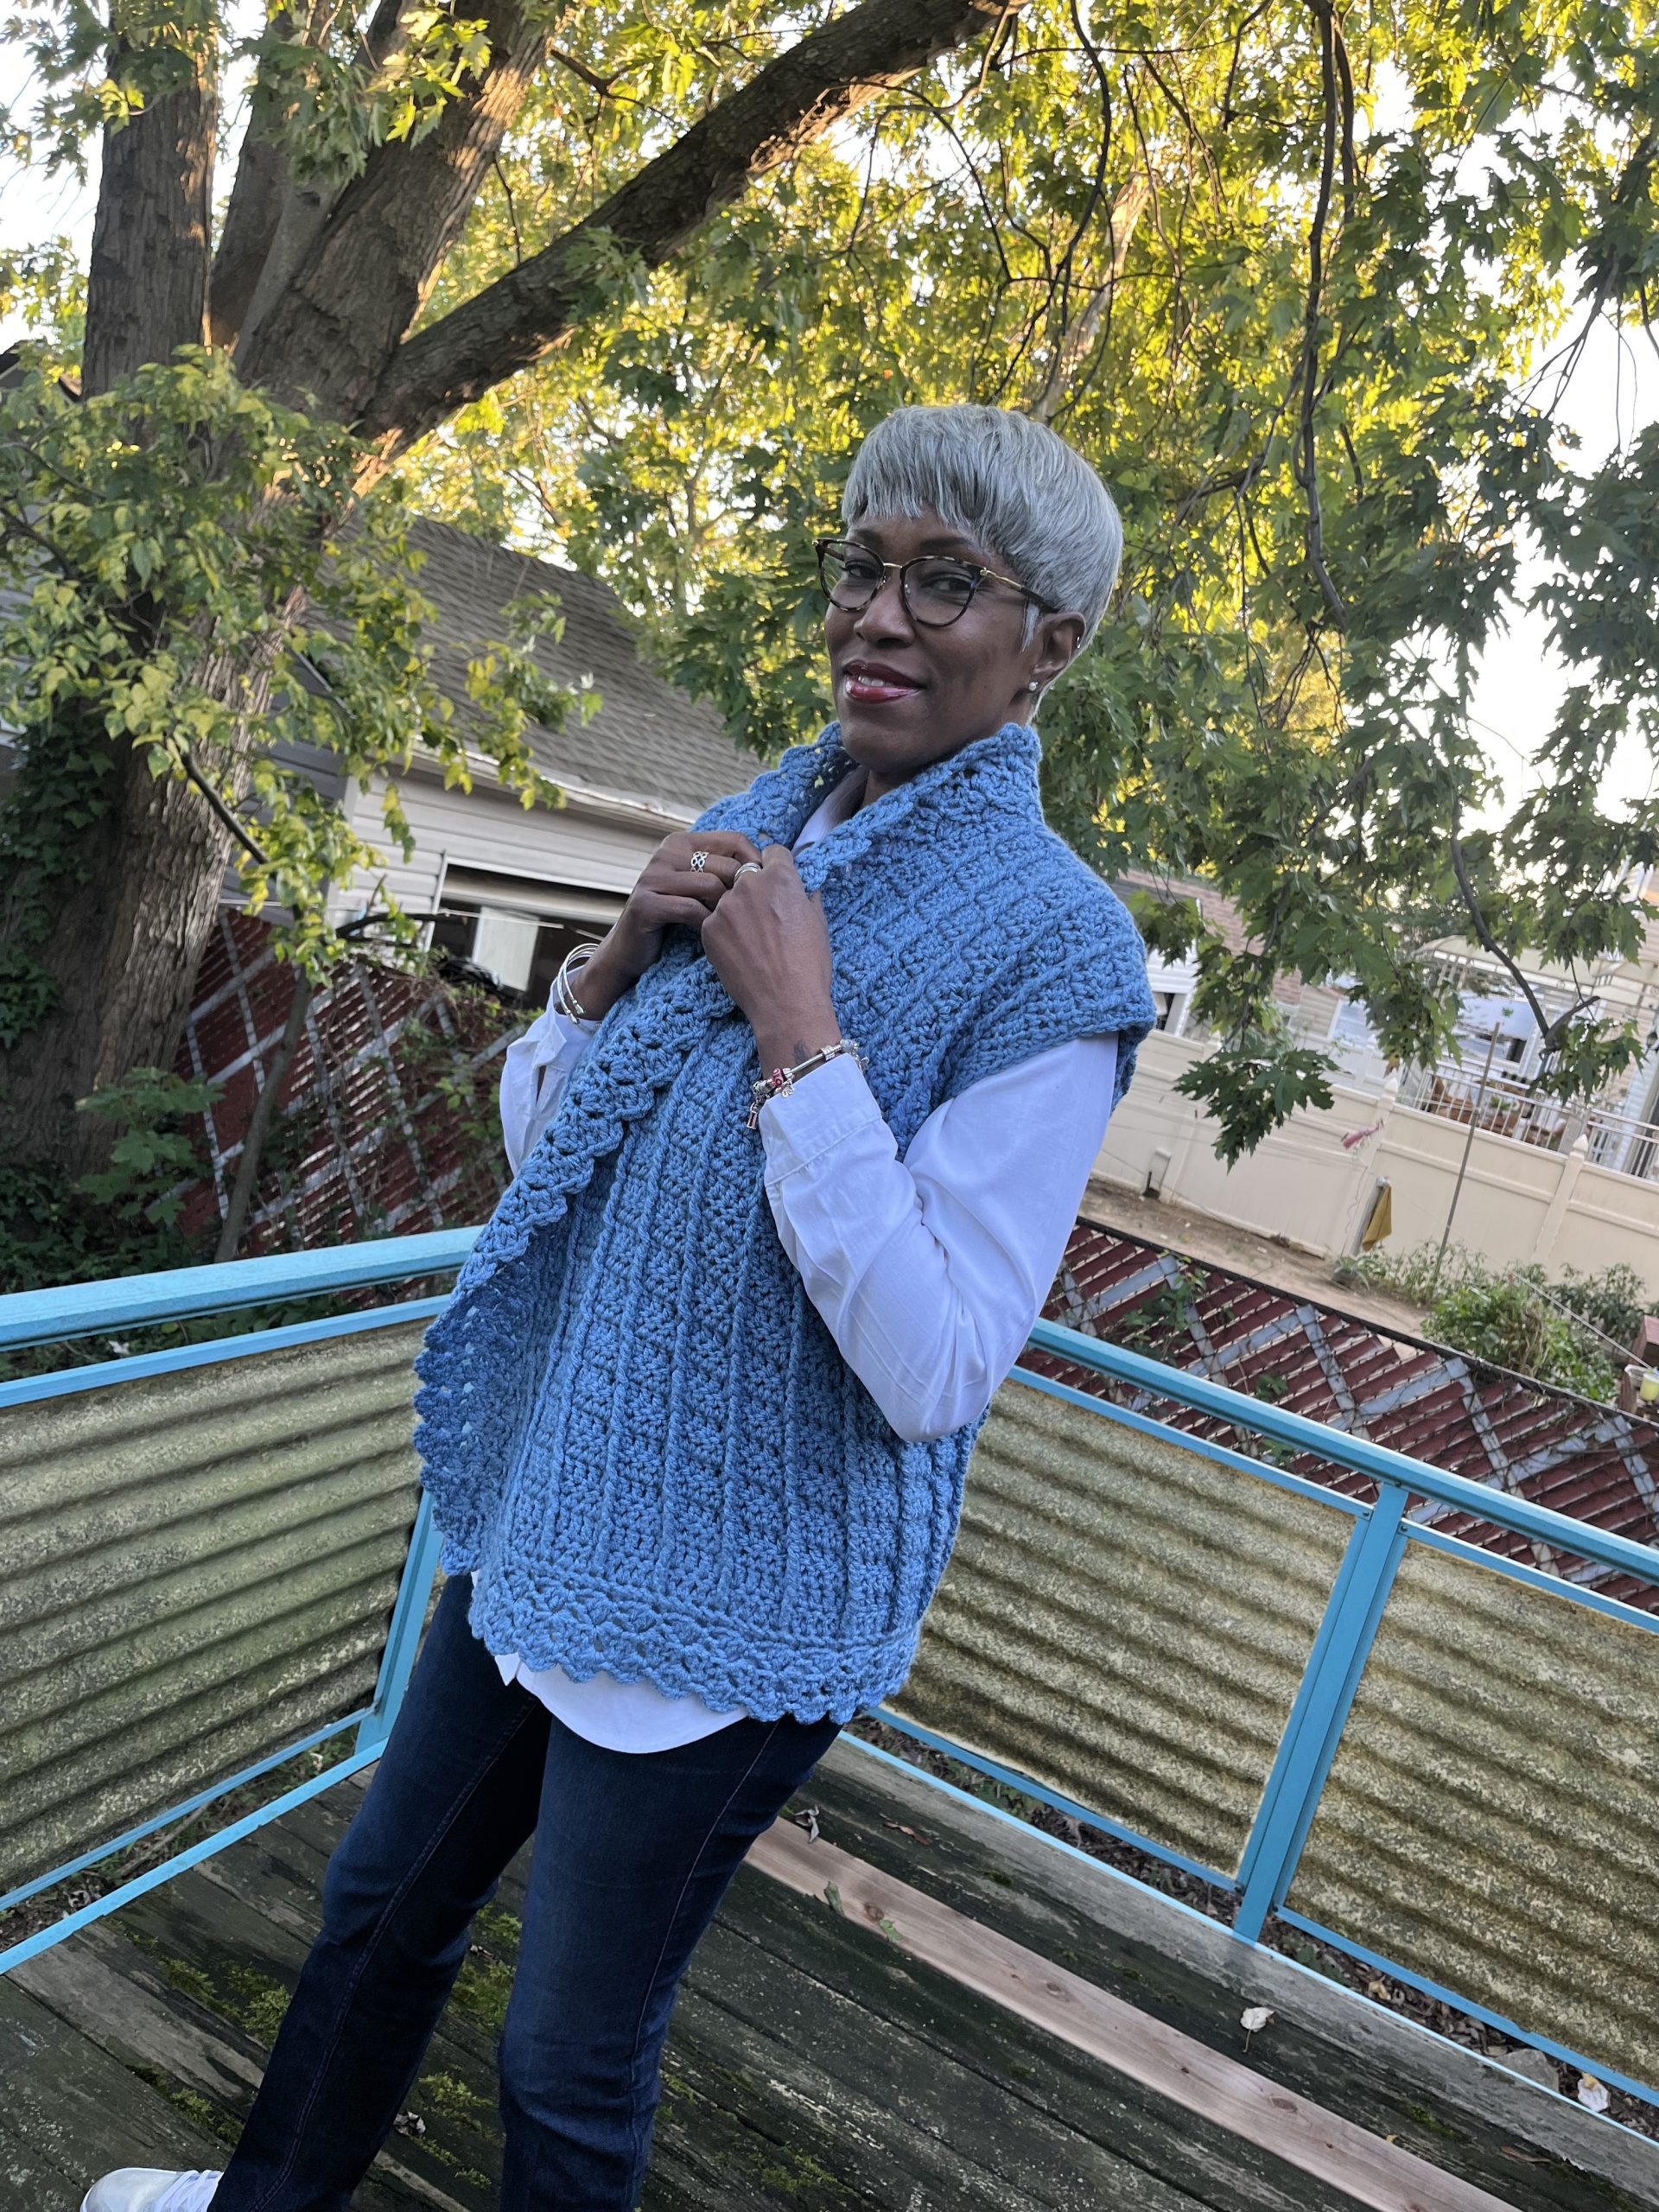
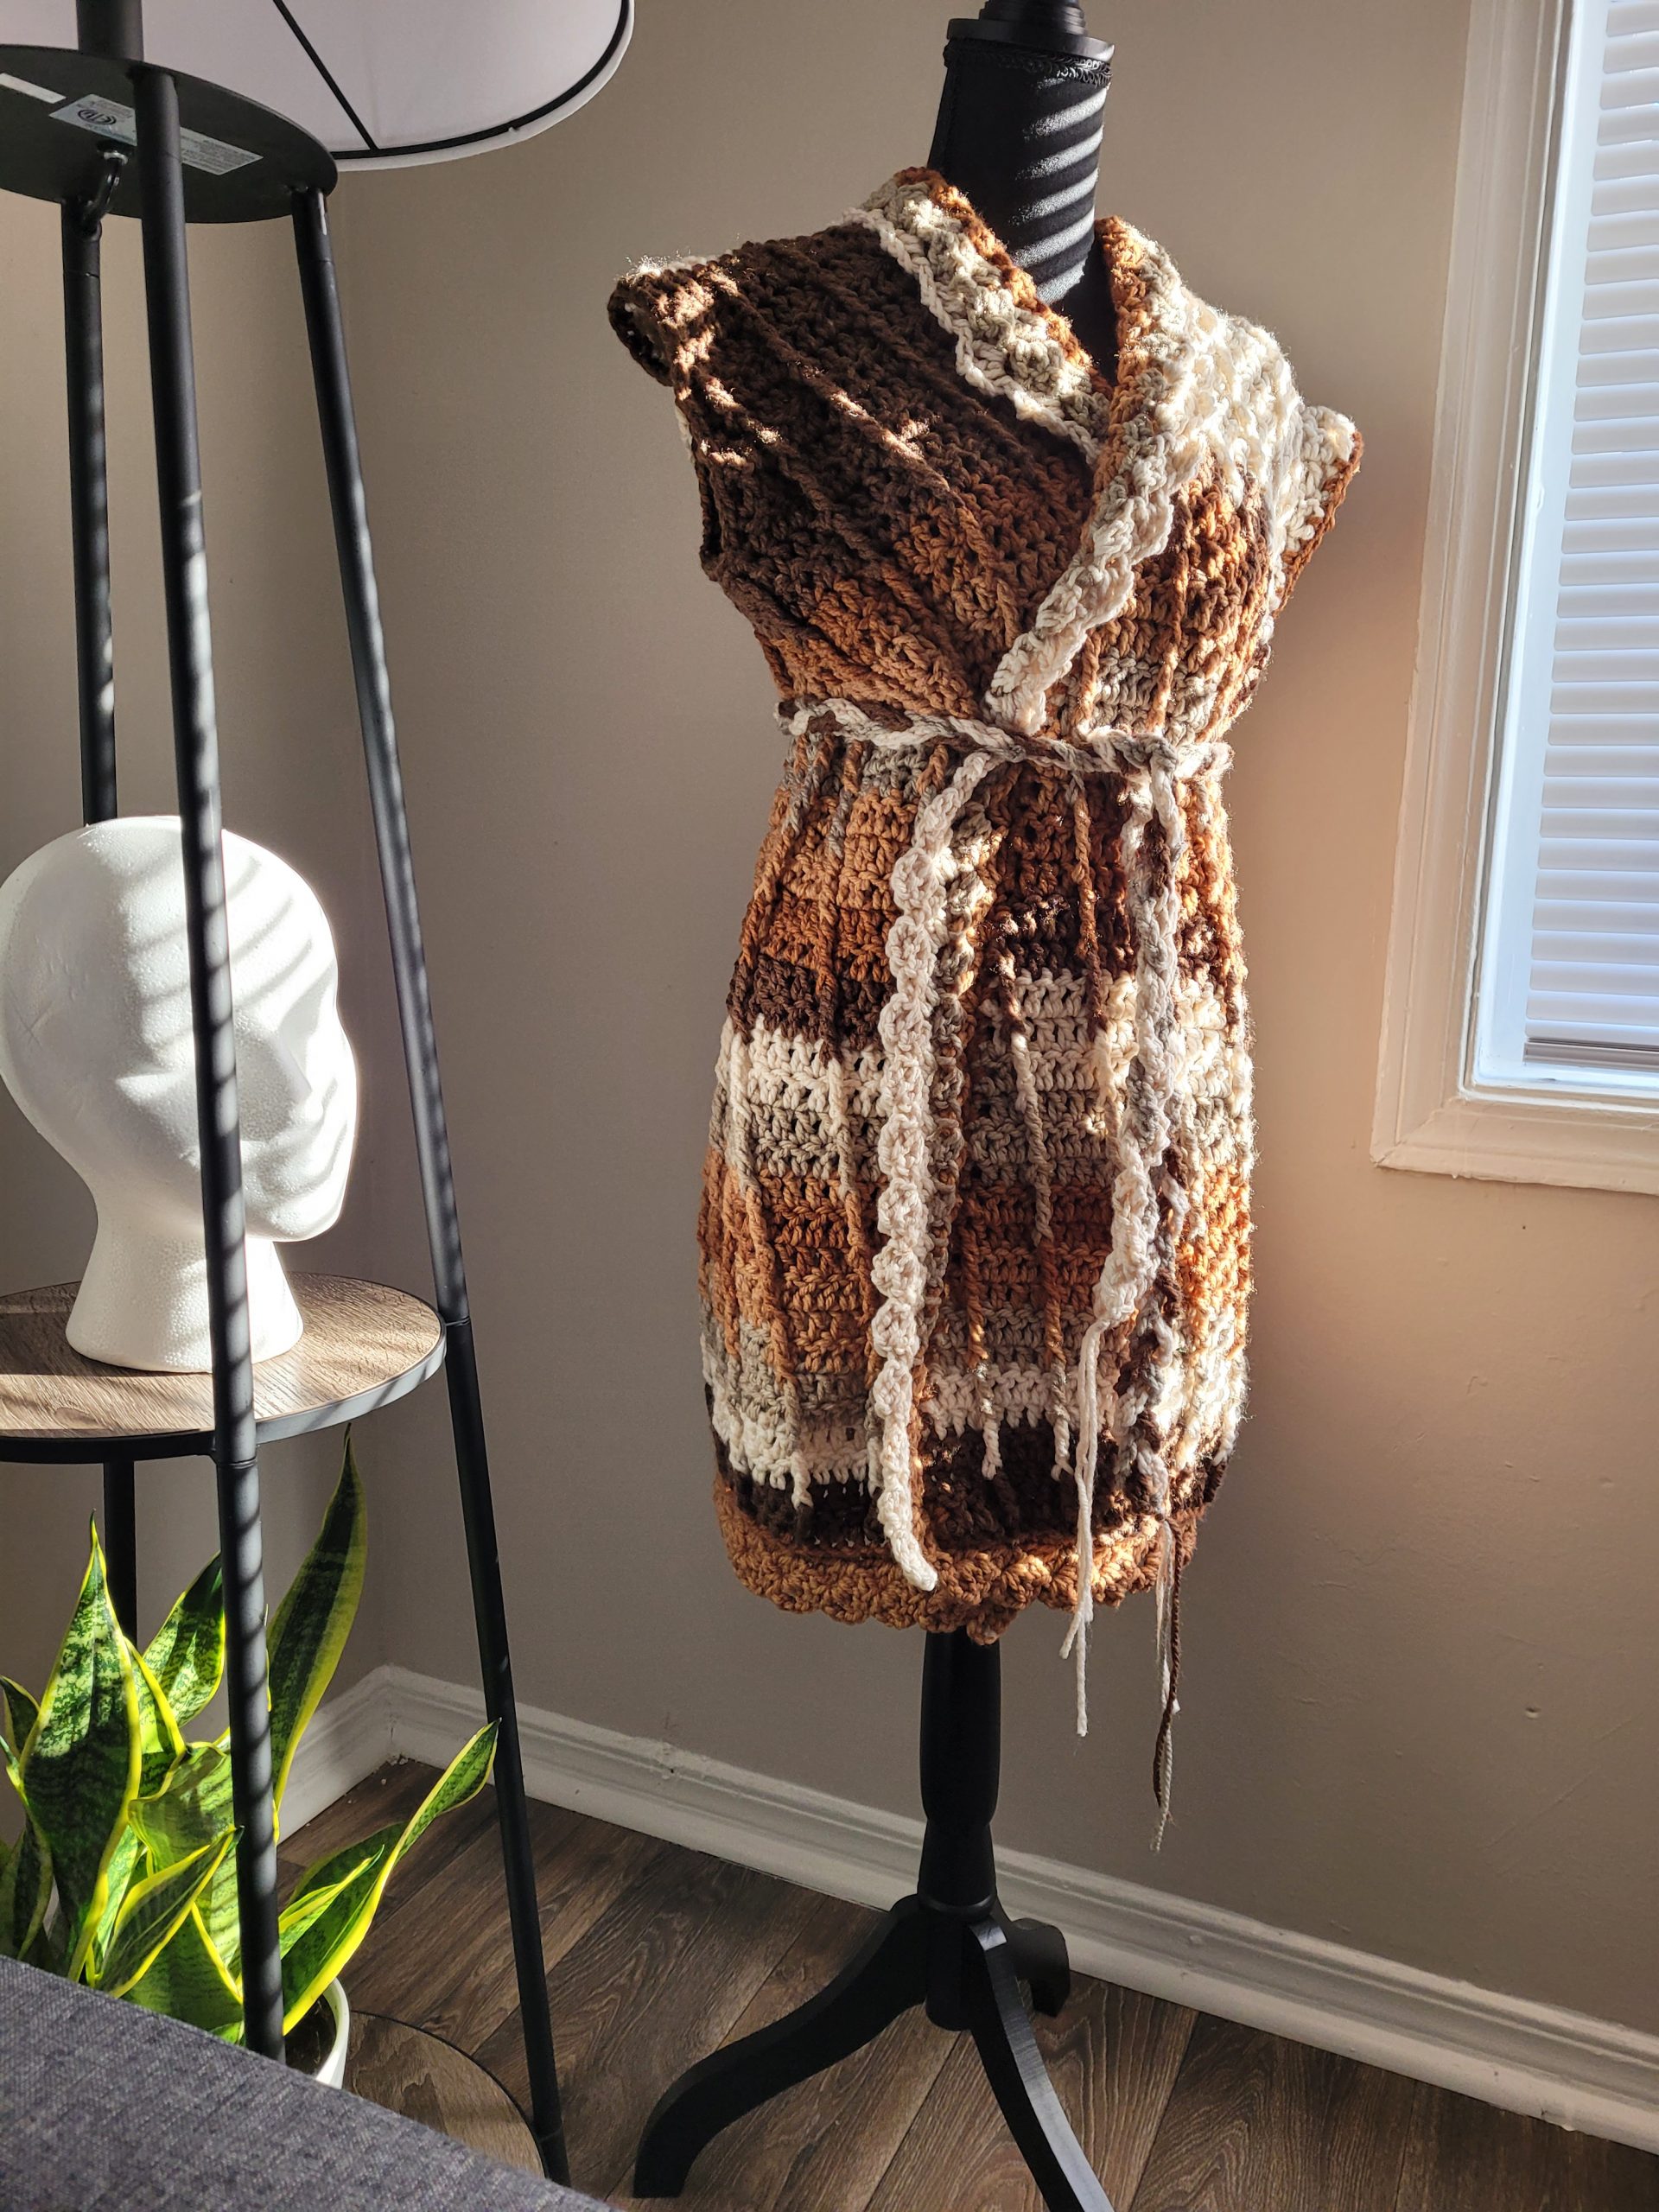
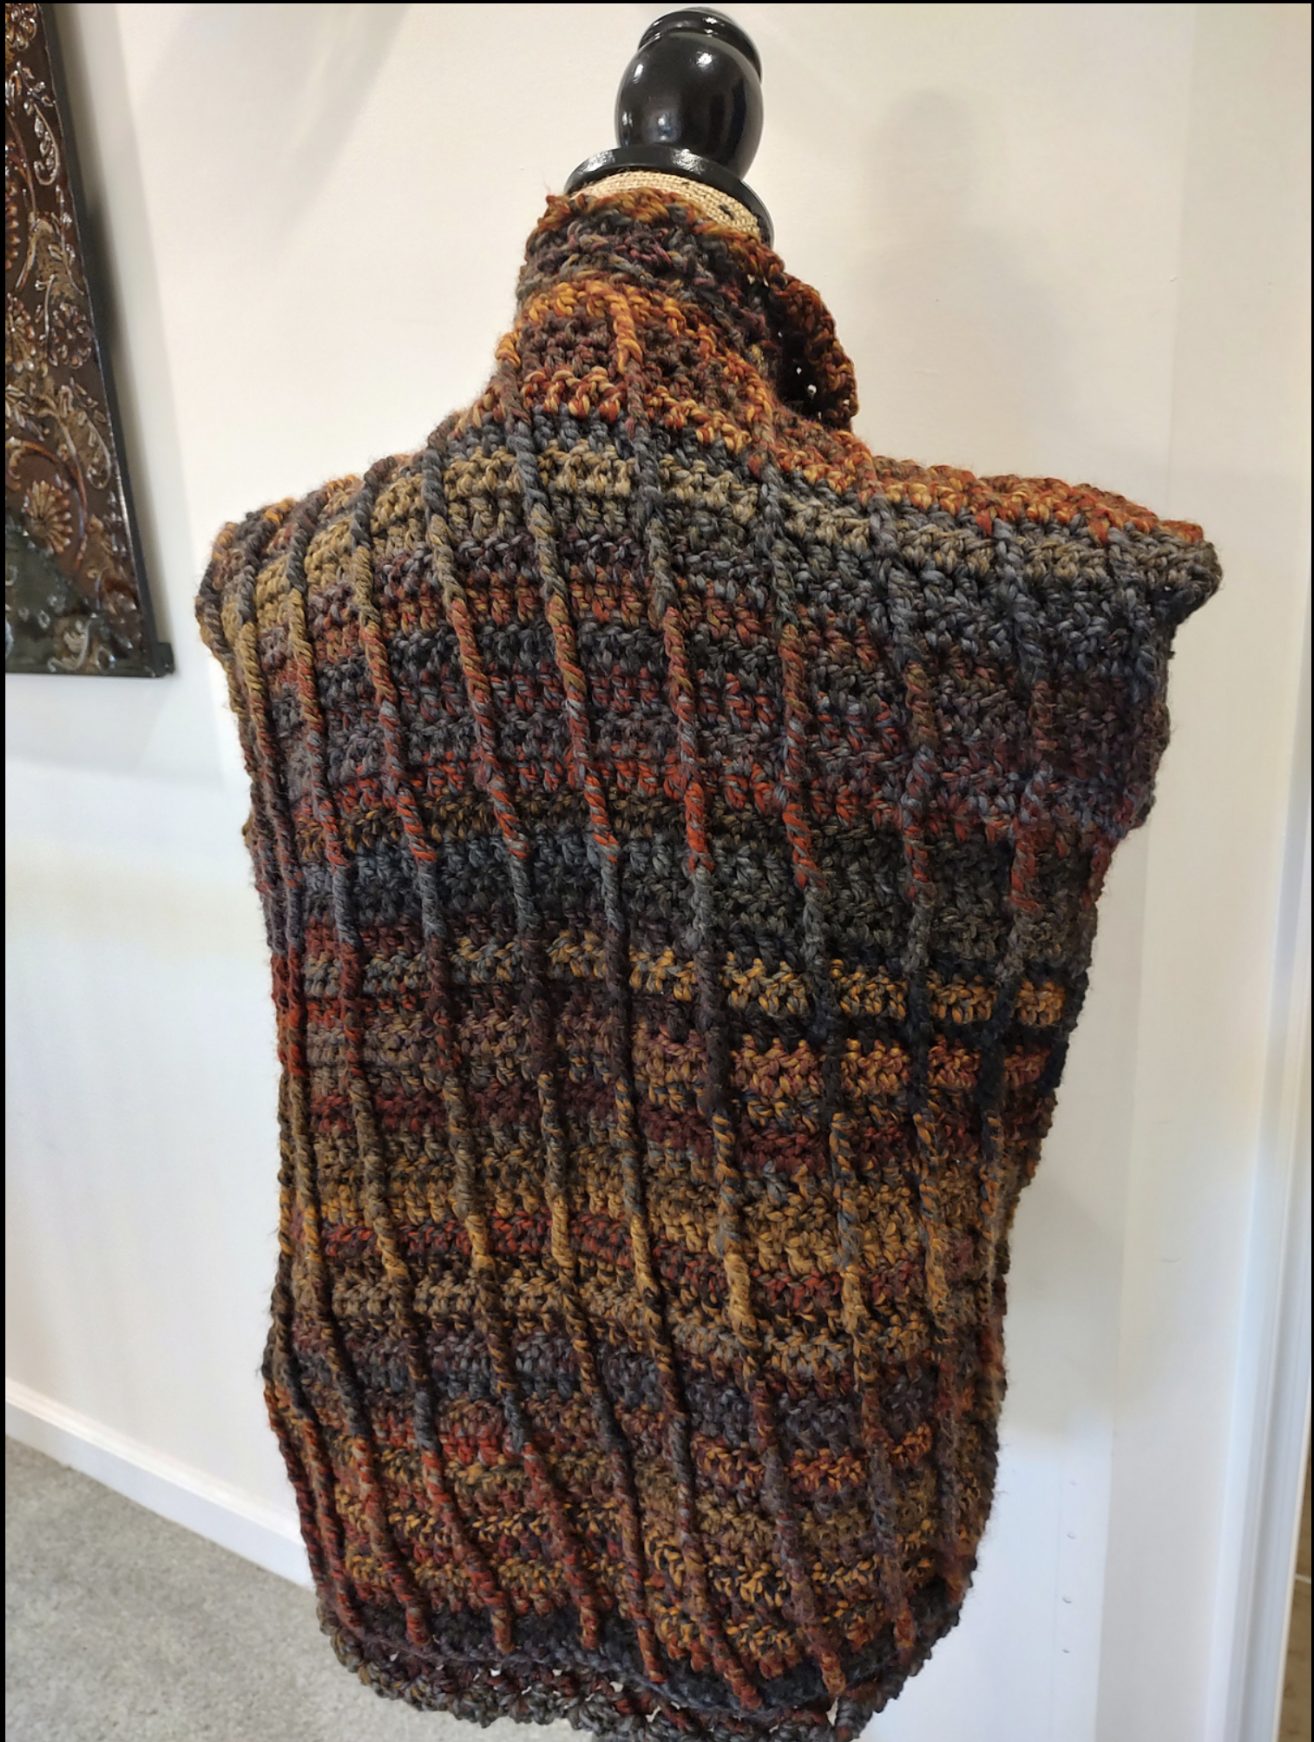
MATERIALS
- WeCrochet Wool of the Andes Bulky, weight #5 (100% wool, 137 yds/ 125.3 m, 3.5 oz/ 100 g): 6 (7, 7, 8, 8) (10, 10, 11, 12) in Marsala
- Total yardage: 759 (843, 928, 1056, 1195) (1260, 1426, 1497, 1568) yds
- US L /8.00 mm hook or hook to meet gauge
- Stitch Markers
- Scissors
- Yarn Needle
- Measuring Tape
GAUGE
Approx. 10 sts in pattern x 7 rows = 4” x 4” [10 cm x 10 cm]
Make a gauge swatch with this tutorial
FINISHED SIZE(S)
| Finished Bust | Finished Length | |
| X-Small | 36” [76 cm] | 27” [69 cm] |
| Small | 40” [86 cm] | 27” [69 cm] |
| Medium | 44” [97 cm] | 27” [69 cm] |
| Large | 48” [107 cm] | 27” [69 cm] |
| X-Large | 52” [117 cm] | 27” [69 cm] |
| 2X-Large | 56” [127 cm] | 29” [74 cm] |
| 3X-Large | 60” [137 cm] | 29” [74 cm] |
| 4X-Large | 64” [147 cm] | 29” [74 cm] |
| 5X-Large | 68” [158 cm] | 29” [74 cm] |
PATTERN KEY
BL: back loop
Ch: chain
Cnr: corner
CSDC: chainless starting double crochet
Dc: double crochet
FPetr: front post extended treble crochet
FL: front loop
FO: fasten off
Fsc: foundation single crochet
Hdc: half double crochet
Inv dec: invisible decrease
M: stitch marker(s)
Prev: previous
Rem: remain(s)
Rep: repeat
RS: right side
Sl st: slip stitch
Sc: single crochet
Sc2tog: single crochet 2 together
Sk: skip
Sp: space
St(s): stitch(es)
Tr: treble crochet
WS: wrong side
YO: yarn over
SPECIAL STITCHES & TECHNIQUES
CSDC: pull up a loop that is row height, holding loop in place and wrap yarn around hook (yarn over), insert hook in first st, YO, pull up a loop, [YO, pull through 2 loops] twice
FPetr: YO 2 times, insert hook from front to back to front around indicated st, YO, pull up a loop (4 loops on hook), YO, pull through 1 loop, [YO, pull through 2 loops] 2 times (2 loops on hook), working in st behind the post (that would be skipped), YO, insert hook in st, YO, pull up a loop (4 loops on hook), YO, pull through 3 loops (hdc made; 2 loops on hook), YO, pull through 2 loops
Inv dec: insert hook in FL only of next 2 sts, YO and pull up a loop (2 loops on hook), YO, pull through 2 loops
– follow same first step for dec3tog
EXPERIENCE LEVEL
Intermediate
NOTES
- Pattern is written in US terms.
- Read entire pattern before beginning.
- Each size is color-coded to ease of reading.
- Changes in size are listed in parentheses in the following format Size XS (Small, Medium, Large, X-Large) (2X-Large, 3X-Large, 4x-Large, 5X-Large)
- If one number is listed, it applies to all sizes.
- The Windin’ Crochet Vest is made in 7 parts: Body, Left Front, Back, Right Front, Seam, Edging, and Belt.
- The Windin’ Crochet Vest includes 6” of positive ease.
- The SCHEMATIC and picture tutorials are only included in the ad-free PDF.
- The Windin’ Crochet Vest will have slanted sides based on the diagonal post stitches.
- The Edging is work in 3 rounds and then in 2 rows just around the front and neck.
Purchase the color coded, ad-free PDF with picture tutorials from your favorite pattern shop
INSTRUCTIONS
Body
Row 1: 83 (91, 103, 111, 119) (131, 139, 151, 159) fsc, turn. 83 (91, 103, 111, 119) (131, 139, 151, 159) sc
Row 2: CSDC in first st, dc in each st, turn. 83 (91, 103, 111, 119) (131, 139, 151, 159) dc
Row 3: CSDC in first st, dc in next 2 sts, *FPetr around 3rd st 2 rows below, dc in next 3 sts, sk 3 sts 2 rows below, rep from * to end, turn. 20 (22, 25, 27, 29) (32, 34, 37, 39) FPetr, 63 (69, 78, 84, 90) (99, 105, 114, 120) dc
Row 4: Rep Row 2, turn. 83 (91, 103, 111, 119) (131, 139, 151, 159) dc
Row 5: CSDC in first st, dc in next 3 sts, FPetr around post 2 rows below, *dc in next 3 sts, FPetr around next post 2 rows below, rep from * until 2 sts rem, dc in last 2 sts, turn. 20 (22, 25, 27, 29) (32, 34, 37, 39) FPetr, 63 (69, 78, 84, 90) (99, 105, 114, 120) dc
Row 6: Rep Row 2, turn
Row 7: CSDC in first st, FPetr around first st 2 rows below, *dc in next 3 sts, FPetr around post 2 rows below, rep from * until 1 st rem,
dc in last st, turn. 21 (23, 26, 28, 30) (33, 35, 38, 40) FPetr, 62 (68, 77, 83, 89) (98, 104, 113, 119) dc
Row 8: Rep Row 2, turn
Row 9: CSDC in first st, dc in next st, FPetr around post 2 rows below, * dc in next 3 sts, FPetr around next post 2 rows below, rep from * to end of row, turn. 21 (23, 26, 28, 30) (33, 35, 38, 40) FPetr, 62 (69, 77, 84, 89) (98, 104, 113, 119) dc
Sizes X-Small (Small) Only
Rows 10-33 (10-33): Rep [Rows 2-9] 3 (3) times, turn. 20 (22) FPetr, 63 (69) dc
Sizes Medium (Large, X-Large) (2X-Large, 3X-Large, 4X-Large, 5X-Large) Only
Rows 10-31 (10-29, 10-29) (10-31, 10-31, 10-29, 10-29): Rep [Rows 2-9] 2 times, then rep Rows 2-7 (2-5, 2-5) (2-7, 2-7, 2-5, 2-5), turn. 26 (27, 29) (33, 35, 37, 39) FPetr, 77( 84, 90) (98, 104, 114, 120) dc
NOTE: The Windin’ Vest can be shortened by making fewer rows, or lengthened by continuing to follow the pattern. If any adjustments to length are made, end on an odd row to maintain the pattern, and make note of the row repeat. Yarn amounts do not include any adjustments in length.
Left Front
Starting from each side, place M in the following sts when counted from the end; 4 M placed. This indicates where the Fronts and Back will be made:
| SIZE | STITCH COUNT FROM EACH END | STITCH COUNT FROM EACH END | SKIPPED STS BTW M FOR UNDERARM |
| X-Small | 15th | 23rd | 7 |
| Small | 19th | 25th | 5 |
| Medium | 23rd | 30th | 6 |
| Large | 27th | 33rd | 5 |
| X-Large | 31st | 37th | 5 |
| 2X-Large | 35th | 41st | 5 |
| 3X-Large | 39th | 45th | 5 |
| 4X-Large | 43rd | 49th | 5 |
| 5X-Large | 47th | 53rd | 5 |
Sizes X-SMALL (SMALL) Only
Row 1: CSDC in first st, dc in each st to the first M, leave rem sts unworked, turn – 15 (19) dc
Row 2: CSDC in first st, dc in next 2 sts, *FPetr around post 2 rows below, dc in next 3 sts, rep from * to end, turn – 3 (4) FPetr, 12 (15) dc
Row 3: CSDC in first st, dc in each st, turn – 15 (19) dc
Row 4: CSDC in first st, dc in next 3 sts, *FPetr around post 2 rows below, dc in next 3 sts, rep from * until 2 sts rem, dc in last 2 sts, turn – 3 (4) FPetr, 12 (15) dc
Row 5: Rep Row 3
Row 6: CSDC in first st, FPetr around first st 2 rows below, *dc in next 3 sts, FPetr around post 2 rows below, rep from * until 1 st rem, dc in last st, turn – 4 (5) FPetr, 11 (14) dc
Row 7: Rep Row 3
Row 8: CSDC in first st, dc in next st, FPetr around post 2 rows below, * dc in next 3 sts, FPetr around next post 2 rows below, rep from * to end of row, turn. Do not FO – 4 (5) FPetr, 11 (14) dc
Sizes MEDIUM (2X-LARGE, 3X-LARGE) Only
Row 1: CSDC in first st, dc in each st to the first M, leave rem sts unworked, turn. 23 (35, 39) dc
Row 2: CSDC in first st, dc in next st, FPetr around post 2 rows below, * dc in next 3 sts, FPetr around next post 2 rows below, rep from * to end of row, turn. 6 (9, 10) FPetr, 17 (26, 29) dc
Row 3: CSDC in first st, dc in each st, turn
Row 4: CSDC in first st, dc in next 2 sts, *FPetr around post 2 rows below, dc in next 3 sts, rep from * to end, turn – 5 (8, 9) FPetr, 18 (27, 30) dc
Row 5: Rep Row 3, turn
Row 6: CSDC in first st, dc in next 3 sts, FPetr around post 2 rows below, *dc in next 3 sts, FPetr around next post 2 rows below, rep from * until 2 sts rem, dc in last 2 sts, turn – 5 (8, 9) FPetr, 18 (27, 30) dc
Row 7: Rep Row 3, turn
Row 8: CSDC in first st, FPetr around first st 2 rows below, *dc in next 3 sts, FPetr around post 2 rows below, rep from * until 1 st rem, dc in last st, turn – 6 (9, 10) FPetr, 17 (26, 29) dc
Row 9: Rep Row 3, turn
Row 10: Rep Row 2, turn
STOP HERE FOR SIZE MEDIUM Only, Do not FO
Rows 11-14: Rep Rows 3-6, turn – 8( 9) FPetr, 27( 30) dc
Sizes LARGE (X-LARGE, 4X-LARGE, 5X-LARGE) Only
Row 1: CSDC in first st, dc in each st to the first M, leave rem sts unworked, turn – 27 (31, 43, 47) dc
Row 2: CSDC in first st, FPetr around post 2 rows below, *dc in next 3 sts, FPetr around post 2 rows below, rep from * until 1 st rem, dc in last st, turn – 7 (8, 11, 12) FPetr, 20 (23, 32, 35) dc
Row 3: CSDC in first st, dc in each st, turn
Row 4: CSDC in first st, dc in next st, FPetr around post 2 rows below, * dc in next 3 sts, FPetr around next post 2 rows below, rep from * to end of row, turn – 7 (8, 11, 12) FPetr, 20 (23, 32, 35) dc
Row 5: Rep Row 3
Row 6: CSDC in first st, dc in next 2 sts, *FPetr around post 2 rows below, dc in next 3 sts, rep from * to end, turn – 6 (7, 10, 11) FPetr, 21 (24, 33, 36) dc
Row 7: Rep Row 3
Row 8: CSDC in first st, dc in next 3 sts, FPetr around post 2 rows below, *dc in next 3 sts, FPetr around next post 2 rows below, rep from * until 2 sts rem, dc in last 2 sts, turn – 6 (7, 10, 11) FPetr, 21 (24, 33, 36) dc
Row 9: Rep Row 3
Row 10: Rep Row 2
Row 11: Rep Row 3
Row 12: Rep Row 4
STOP HERE FOR SIZE LARGE (X-LARGE) ONLY, do not FO
Rows 13-16: Rep Rows 5-8, do not FO after Row 16
Purchase the ad-free PDF with picture tutorial and color coded sizes
Back
Sizes X-SMALL Only
Row 1: Sk 7 sts, attach yarn in next st with 2nd M, CSDC in first st, dc in each st to 3rd M, turn – 39 dc
Row 2: CSDC in first st, FPetr around post 2 rows below, *dc in next 3 sts, FPetr around post 2 rows below, rep from * until 1 st rem, dc in last st, turn – 10 FPetr, 29 dc
Row 3: CSDC in first st, dc in each st, turn – 39 dc
Row 4: CSDC in first st, dc in next st, FPetr around post 2 rows below, * dc in next 3 sts, FPetr around next post 2 rows below, rep from * to end of row, turn – 10 FPetr, 29 dc
Row 5: Rep Row 3
Row 6: CSDC in first st, dc in next 2 sts, *FPetr around post 2 rows below, dc in next 3 sts, rep from * to end, turn – 9 FPetr, 30 dc
Row 7: Rep Row 3
Row 8: CSDC in first st, dc in next 3 sts, *FPetr around post 2 rows below, dc in next 3 sts, rep from * until 2 sts rem, dc in last 2 sts, FO – 9 FPetr, 30 dc
Size SMALL Only
Row 1: Sk 5 sts, attach yarn in next st with 2nd M, CSDC in first st, dc in each st to 3rd M, turn – 43 dc
Row 2: CSDC in first st, dc in next st, FPetr around post 2 rows below, * dc in next 3 sts, FPetr around next post 2 rows below, rep from * to end of row, turn – 11 FPetr, 32 dc
Row 3: CSDC in first st, dc in each st, turn – 43 dc
Row 4: CSDC in first st, dc in next 2 sts, *FPetr around post 2 rows below, dc in next 3 sts, rep from * to end, turn – 10 FPetr, 33 dc
Row 5: Rep Row 3
Row 6: CSDC in first st, dc in next 3 sts, *FPetr around post 2 rows below, dc in next 3 sts, rep from * until 2 sts rem, dc in last 2 sts, turn – 10 FPetr, 33 dc
Row 7: Rep Row 3
Row 8: CSDC in first st, FPetr around first st 2 rows below, *dc in next 3 sts, FPetr around post 2 rows below, rep from * until 1 st rem, dc in last st, FO – 11 FPetr, 32 dc
Size MEDIUM Only
Row 1: Sk 6 sts, attach yarn in 2nd M, CSDC in first st, dc in each st to 3rd M, turn – 45 dc
Row 2: CSDC in first st, FPetr around first st 2 rows below, *dc in next 3 sts, FPetr around post 2 rows below, rep from * until 1 st rem, dc in last st, turn – 12 FPetr, 33 dc
Row 3: CSDC in first st, dc in each st, turn
Row 4: CSDC in first st, dc in next st, FPetr around post 2 rows below, * dc in next 3 sts, FPetr around next post 2 rows below, rep from * to end of row, turn – 12 FPetr, 33 dc
Row 5: Rep Row 3, turn
Row 6: CSDC in first st, dc in next 2 sts, *FPetr around post 2 rows below, dc in next 3 sts, rep from * to end, turn – 11 FPetr, 34 dc
Row 7: Rep Row 3, turn
Row 8: CSDC in first st, dc in next 3 sts, FPetr around post 2 rows below, *dc in next 3 sts, FPetr around next post 2 rows below, rep from * until 2 sts rem, dc in last 2 sts, turn – 11 FPetr, 34 dc
Row 9: Rep Row 3, turn
Row 10: Rep Row 2, FO
Sizes 2X-LARGE (3X-LARGE) Only
Row 1: Sk 5 (5) sts, attach yarn in 2nd M, CSDC in first st, dc in each st to 3rd M, turn – 51 (51) dc
Row 2: CSDC in first st, dc in next st, FPetr around post 2 rows below, * dc in next 3 sts, FPetr around next post 2 rows below, rep from * to end of row, turn – 13 (13) FPetr, 38 (38) dc
Row 3: CSDC in first st, dc in each st, turn
Row 4: CSDC in first st, dc in next 2 sts, *FPetr around post 2 rows below, dc in next 3 sts, rep from * to end, turn – 12 (12) FPetr, 39 (39) dc
Row 5: Rep Row 3, turn
Row 6: CSDC in first st, dc in next 3 sts, FPetr around post 2 rows below, *dc in next 3 sts, FPetr around next post 2 rows below, rep from * until 2 sts rem, dc in last 2 sts, turn – 12 (12) FPetr, 39 (39) dc
Row 7: Rep Row 3, turn
Row 8: CSDC in first st, FPetr around first st 2 rows below, *dc in next 3 sts, FPetr around post 2 rows below, rep from * until 1 st rem, dc in last st, turn – 13 (13) FPetr, 38 (38) dc
Row 9: Rep Row 3, turn
Row 10: Rep Row 2, turn
Rows 11-14: Rep Rows 3-6, turn. FO after Row 14 – 12 (12) FPetr, 39 (39) dc
Sizes LARGE (X-LARGE, 4X-LARGE, 5X-LARGE) Only
Row 1: Sk 5 (5, 5, 5) sts, attach yarn in 2nd M, CSDC in first st, dc in each st to 3rd M, turn – 47 (47, 55, 55) dc
Row 2: CSDC in first st, FPetr around post 2 rows below, *dc in next 3 sts, FPetr around post 2 rows below, rep from * until 1 st rem, dc in last st, turn – 12 (12, 14, 14) FPetr, 35 (35, 41, 41) dc
Row 3: CSDC in first st, dc in each st, turn
Row 4: CSDC in first st, dc in next st, FPetr around post 2 rows below, * dc in next 3 sts, FPetr around next post 2 rows below, rep from * to end of row, turn – 12 (12, 14, 14) FPetr, 35 (35, 41, 41) dc
Row 5: Rep Row 3
Row 6: CSDC in first st, dc in next 2 sts, *FPetr around post 2 rows below, dc in next 3 sts, rep from * to end, turn – 11 (11, 13, 13) FPetr, 36 (36, 42, 42) dc
Row 7: Rep Row 3
Row 8: CSDC in first st, dc in next 3 sts, FPetr around post 2 rows below, *dc in next 3 sts, FPetr around next post 2 rows below, rep from * until 2 sts rem, dc in last 2 sts, turn – 11 (11, 13, 13) FPetr, 36 (36, 42, 42) dc
Row 9: Rep Row 3
Row 10: Rep Row 2
Row 11: Rep Row 3
Row 12: Rep Row 4
STOP HERE FOR SIZE LARGE (X-LARGE) ONLY, FO
Rows 13-16: Rep Rows 5-8, turn, FO after Row 16
Right Front
Size X-SMALL Only
Row 1: Sk 7 sts, attach yarn in 4th M, CSDC in first st, dc in each st to end, turn – 15 dc
Row 2: CSDC in first st, dc in next 2 sts, *FPetr around post 2 rows below, dc in next 3 sts, rep from * to end, turn – 3 FPetr, 12 dc
Row 3: CSDC in first st, dc in each st, turn – 15 dc
Row 4: CSDC in first st, dc in next 3 sts, *FPetr around post 2 rows below, dc in next 3 sts, rep from * until 2 sts rem, dc in last 2 sts, turn – 3 FPetr, 12 dc
Row 5: Rep Row 3
Row 6: CSDC in first st, FPetr around first st 2 rows below, *dc in next 3 sts, FPetr around next post 2 rows below, rep from * until 1 st rem, dc in last st, turn – 4 FPetr, 11 dc
Row 7: Rep Row 3
Row 8: CSDC in first st, dc in next st, FPetr around post 2 rows below, * dc in next 3 sts, FPetr around next post 2 rows below, rep from * to end of row, do not FO – 4 FPetr, 11 dc
Sizes SMALL (MEDIUM) Only
Row 1: Sk 5 (6) sts, attach yarn in st with 4th M, CSDC in first st, dc in each st to end, turn – 19 (23) dc
Row 2: CSDC in first st, dc in next st, FPetr around post 2 rows below, * dc in next 3 sts, FPetr around next post 2 rows below, rep from * to end of row, turn – 5,(6) FPetr, 14 (17) dc
Row 3: CSDC in first st, dc in each st, turn
Row 4: CSDC in first st, dc in next 2 sts, *FPetr around post 2 rows below, dc in next 3 sts, rep from * to end, turn – 4 (5) FPetr, 15 (18) dc
Row 5: Rep Row 3, turn
Row 6: CSDC in first st, dc in next 3 sts, FPetr around post 2 rows below, *dc in next 3 sts, FPetr around next post 2 rows below, rep from * until 2 sts rem, dc in last 2 sts, turn – 4 (5) FPetr, 15 (18) dc
Row 7: Rep Row 3, turn
Row 8: CSDC in first st, FPetr around first st 2 rows below, *dc in next 3 sts, FPetr around post 2 rows below, rep from * until 1 st rem, dc in last st, turn – 5(6) FPetr, 14 (17) dc
STOP HERE FOR SIZE SMALL Only, do not FO
Row 9: Rep Row 3, turn
Row 10: Rep Row 2, turn
STOP HERE FOR SIZE MEDIUM Only, do not FO
Sizes LARGE (X-LARGE, 2X-LARGE, 3X-LARGE,4X-LARGE, 5X-LARGE) Only
Row 1: Sk 5 (5, 5, 5, 5, 5) sts, attach yarn in 4th M, CSDC in first st, dc in each st to end, turn – 27 (31, 35, 39, 43, 47) dc
Row 2: CSDC in first st, FPetr around post 2 rows below, *dc in next 3 sts, FPetr around post 2 rows below, rep from * until 1 st rem, dc in last st, turn – 7 (8, 9, 10, 11, 12) FPetr, 20 (23, 26, 29,32, 35) dc
Row 3: CSDC in first st, dc in each st, turn
Row 4: CSDC in first st, dc in next st, FPetr around post 2 rows below, * dc in next 3 sts, FPetr around next post 2 rows below, rep from * to end of row, turn – 7 (8, 9, 10, 11, 12) FPetr, 20 (23, 26, 29, 32, 35) dc
Row 5: Rep Row 3
Row 6: CSDC in first st, dc in next 2 sts, *FPetr around post 2 rows below, dc in next 3 sts, rep from * to end, turn – 6 (7, 8, 9, 10, 11) FPetr, 21 (24, 27, 30, 33, 36) dc
Row 7: Rep Row 3
Row 8: CSDC in first st, dc in next 3 sts, FPetr around post 2 rows below, *dc in next 3 sts, FPetr around next post 2 rows below, rep from * until 2 sts rem, dc in last 2 sts, turn – 6 (7, 8, 9, 10, 11) FPetr, 21 (24, 27, 30, 33, 36) dc
Row 9: Rep Row 3
Row 10: Rep Row 2
Row 11: Rep Row 3
Row 12: Rep Row 4
STOP HERE FOR SIZE LARGE and X-LARGE ONLY
2X-LARGE, 3X-LARGE ONLY
Rows 13-14: Rep Rows 5-6. Do not FO
4X-LARGE, 5X-LARGE Only
Rows 13-16: Rep Rows 5-8. Do not FO
Buy the ad-free PDF with picture tutorial and color coded sizes
Seam Shoulder
- Mark center 9 sts along the Back by PM in 15th (17th, 18th, 19th, 19th) (21st, 21st, 23rd, 23rd) st from each end.
- Fold Right and Left sides over onto the Back with RS touching; line up edge along arm opening.Refer to PIC. 4
- Follow instruction below for each side by pulling the loop from Left Front through last st of Back and pulling the loop from Right Front through first st of Back, then proceed with instructions.
- It may help to review this tutorial for invisible single crochet 2 together.
X-Small
- Ch 1, working through both fabrics, sc in next 15 sts to M, FO. 17 sc
Small
- Ch 1, working through both fabrics, *sc in next 6 sts, working through next st of Back and inv dec2tog through BL of Front, sc, rep from * one more time, sc in next st to M, FO. 17 sc
Medium
- Ch 1, working through both fabrics, [sc in next 2 sts, working through next st of Back and inv dec2tog through BL of Front, sc] 5 times, working through both fabrics, sc in next 4 sts to M, FO. 18 sc
Large
- Ch 1, working through both fabrics, [sc in next st, working through next st of Back and inv dec2tog through BL of Front, sc] 4 times, working through both fabrics, sc in next 7 sts to M, FO. 19 sc
X-Large
- Ch 1, working through both fabrics, sc in first st, [working through next st of Back and inv dec2tog through BL of Front, sc] 13 times, working through both fabrics, sc in next 5 sts to M, FO. 19 sc
2X-Large
- Ch 1, working through both fabrics,[working through next st of Back and inv dec2tog through BL of Front, sc] 14 times, working through both fabrics, sc in next 7 sts to M, FO. 21 sc
3X-Large
- Ch 1, working through both fabrics, [working through next st of Back and inv dec2tog through BL of Front, sc] 18 times, working through both fabrics, sc in next 3 sts to M, FO. 21 sc
4X-Large
- Ch 1, working through both fabrics, [working through next st of Back and inv dec2tog through BL of Front, sc] 20 times, working through both fabrics, sc in next 3 sts to M, FO. 23 sc
5X-Large
- Ch 1, working through both fabrics, working through first st of Back and inv dec3tog through BL of Front, sc, [working through next st of Back and inv dec2tog through BL of Front, sc] 22 times to M, FO. 23 sc
Arm Edging
Rnd 1: Attach yarn at bottom of Arm Opening in any st, sc in each st, evenly sc around, sl st to join, FO
Rep on second side
Edging
Rnd 1: Attach yarn to lower left corner, ch 1, sc in each st to next cnr, ch 1 and turn cnr, evenly 79 (79, 79, 79, 79, 92, 92, 92, 92) sc up the Right side, sc2tog across next cnr, sc in next 9 sts, sc2tog across next cnr, evenly 79 (79, 79, 79, 79, 92, 92, 92, 92) sc down the Left side to next cnr, ch 1, sl st to join. Do not turn.
Rnd 2: **(2 dc, ch 3, sl st) in 4th st, *sk next 2 sts, (2 dc, ch 3, sl st) in next st, rep from * to next cnr **, sc in ch-1 sp; rep from * to ** 2 more times, sc in next st, rep from * to **, sc in ch-1 sp, turn.
Rnd 3: CSDC in sc, *(2 dc, ch 3, sl st) in next ch-3 sp, rep from * to next cnr, dc in next sc; rep from *, dc in cnr sp 2 rows below; rep from * to next cnr, dc in next sc; rep from * to next cnr, dc in cnr, FO.
Note: The next 2 lines of instruction are worked up the Right Front around the neck and down the Left Front only. If you prefer to continue to work in the round, do not FO after Rnd 3, and follow Rnd 4 starting at CSDC.
Row 4: Attach yarn to top of ch 3 in the lower right cnr of Right side (refer to picture below), CSDC in same st, *[2 dc, ch 3, sl st] in next ch-3 sp, rep from * to lower cnr of Left side, [2 dc, ch 3, sl st] in top of first dc, dc in top last dc of prev row, turn.
Row 5: Ch 3 (counts as dc), *(2 dc, ch 3, sl st) in next ch-3 sp, rep from * around to next cnr, FO.
Belt
Make 3
- Create a foundation chain at least 12” longer than waist circumference following this tutorial, https://creationsbycourtney.com/crochet-tutorial-foundation-chain/
- Knot all 3 chains together at one end, and then braid together, and knot at the other end.
You may enjoy these patterns too
Pin it for Later
Winter Wonders Blog Hop
I’m so excited to be today’s featured designer in the Winter Wonder’s Blog Hop hosted by Ned & Mimi, HanJan Crochet and Itchin’ for Some Stitchin’. This has been a wonderful event so far with more crochet patterns to come.
The code is now expired, but the pattern can be purchased through the Download button.
The PDF does include a special code in the Notes section for adding the pattern to you Ravelry library. If you do enjoy using Ravelry, please add it to your favorites, so other crocheters don’t miss out on the Winter Wonders blog hop.
NOTE: THERE HAVE BEEN SOME TECHNICAL ISSUES IN ACCESSING THE PATTERN. I HAVE TRIED EVERYTHING THAT I KNOW TO RESOLVE EACH ONE BROUGHT TO MY ATTENTION AND WITHIN MY ABILITY. Before commenting that it is not working, please try refreshing your browser and clearing the cache; a different browser (Microsoft edge, Safari, Firefox, Chrome), or a different device. The error is not consistent, so there isn’t a single option to recommend. I appreciate your understanding that sometimes technology just doesn’t work like it’s supposed to.

If you haven’t seen all of the gorgeous crochet patterns that have already been shared, make sure that you head back to the Roundup post to check them all out.
If you see at least 4 patterns that you LOVE and missed out on downloading the free PDF, then definitely purchase the bundle. It includes every crochet pattern that is featured in the Winter Wonders blog hop, even the patterns that have yet to be featured.
Don’t forget to enter the giveaway for a chance to win amazing prizes from WeCrochet.
Want to talk about yarn goodness, crochet tips, and exclusive weekly deals? Join my Facebook Group, Creations By Courtney Community.
If we’re not hanging out on social media yet, come check me out on Facebook, Instagram and Pinterest.
Join my newsletter for sneak peeks, crochet tips, and more. HERE
Use #CreationsByCourtney on social media when sharing your projects.
This pattern is not to be duplicated or resold, and not to be reproduced commercially. You may sell finished products on Etsy, at farmers markets, and craft fairs, but please credit Creations By Courtney as the pattern’s author.





36 Responses
DOWN LOAD BUTTON NOT WORKING
Hi Chantel,
I’m sorry that you’ve had difficulty with getting the pattern. The button was tested prior to the event, and sometimes, the issue may be the version of browser. When the download button is clicked, a box should pop up that looks like a check out, and that’s where you put in the code. If that does not show, clearing your cache should allow it to show.
Courtney
I put the code and didn’t get the pattern. Jackie_hagerman@yahoo.com
Hi Jackie,
The download can be accessed from the email that you receive once completing all steps. It should also be accessible from the success checkout page. If you need more assistance with those steps, please send me an email with a screenshot so we determine the steps for your device.
Courtney
thank you for the directions. unfortunately the code does not work
Hi K,
The code is active all day. I will check my settings, and refresh the page for you to try again.
Can’t get coupon download button to work
Hi Debbie,
Please try refreshing your browser and clearing the cache.
When you click the download button, a box should appear for check out to apply the coupon. Once clicking “complete order,” the next screen will have a button to download the pattern. When you click that button, it will automatically download for you to save to your device.
Courtney
The download button is not working
Hi M,
Please try refreshing your browser or clearing the cache.
When clicking on the download button, it will open a box in the blog post. You’ll see a picture of the Windin’ Vest, and scroll down a little to the Coupon box to enter the code. Hit apply, and it will show the amount as $0.Then hit Continue, and then hit Complete Order. The last screen after “completing order” will show a check mark and a button that says “Download Windin’ Vest Crochet Pattern.” Once you click that button, it will come up automatically to save to your device.
Courtney
Hi Courtney,
Thank you for the free pattern download! I can’t wait to make it?
You’re welcome! I can’t wait to see your finished Windin’ Vest. Please tag me on social media, #creationsbycourtney, so I can share it too.
Happy Holidays,
Courtney
The code doesn’t work for me either. I enter it on ravelry and it doesn’t do anything. 🙁
Hi Annie,
The code is not setup on Ravelry. It is only set for the built in cart on this blog post.
From what I have been able to determine, is that some browsers may need to be updated or refreshed, or the cache on the device needs to be cleared for the cart to generate properly. I have tested it several times from my phone, an iPad, Chrome and Safari browsers, and had others to check. Are you able to clear your cache and browsing history?
Downloadknop werkt niet
Hi,
Please read the replies on the previous comments and try each method in order to access the download. If those steps have not worked, and neither has restarting your devices, there may be a tech issue that is beyond my control or ability to address, but I have provided the steps for what I do know.
Happy Holidays,
Courtney
I’m trying to get my pattern . It did not download on first try but I did get order number. I next went to email and clicked the link there. The only thing that downloaded was the invoice but no pattern. Help please.
Hi Noel,
The download link was provided on the success screen (purple button). If you still have that browser window open, you can click it and it will download automatically and prompt you to save it to your device. I am still trying to get the download link to show up on the invoice. In the meantime, it will be quicker to go through the cart again to get to the success page to then download.
Hi!
I tried to download the pattern through Ravelry and it didn’t work either… Help please! TIA! ???
Hi there! I cleared my cache and refreshed my browser and the download box didn’t work. Next, I downloaded Chrome and tried again – still no luck. Thank you anyway. It’s a nice looking vest.
Hi Lisa,
Thanks for the compliment.
Was that on a computer? I would try your phone or a tablet, if you haven’t already. Sometimes, restarting the device will work.
If you haven’t signed up for my newsletter, consider joining to know about other events this week.
Courtney
Thank you Courtney, after a few tries and finally finding the right area to go to, everything worked find for me with the download. It’s a lovely vest and I look forward to making one. Thank you for sharing and making this vest “free” for the blog hop! Being on a fixed/tight income this really helps me out and I really appreciate it. Take care, stay safe and hope you have a great week-end. Happy crocheting…
Hi Rio,
I’m glad that you’re looking forward to making the Vest. I look forward to seeing it. Please tag me on Facebook and Instagram when you’re done.
Keep Stitchin’,
Courtney
Tried the code twice. Never got the email
The pattern can be downloaded from the success screen as well. It has a purple button and a written link, if the order processed correctly. Did you check your spam folder? Some inbox filters may treat the email as spam.
I tried to download the windin vest earlier today and I thought it went through but I didn’t receive an email to download pattern.. so I tried again now but it won’t accept the code Dance22cbc. I tried several times. Am I doing something wrong?
Hi Jessica,
That’s not the correct code. I suggest copying it from Hannah’s post and then pasting it in the cart on the blog post.
Happy holidays,
Courtney
The download button didn’t work.
Hi Chris,
If you have tried of the suggested steps listed in the previous comments and the note above the download button, I’m not sure what else to suggest in order to access the cart. From my understanding, the most recent version of a browser is best on any device, but it may not work on some devices. I’ve only had one report of it not working on an android phone.
Keep stitchin’,
Courtney
I have cleared my cache, refreshed the page, used 3 different browsers, turned my firewall and anti-virus off and this download button will not work. I went straight to ravelry and put the pattern in my cart and tried to use the code that way. It does not work. Can you help?
I love your designs, they are very beautiful. Thank you for Windin’ Crochet Vest
Hi Ruthie!
I appreciate the love and support of my crochet designs. I hope you enjoy making the Windin’ Vest. Please tag me when you have finished. I would love to share it with everyone.
This sweater vest would be a great addition to a fall wardrobe…I like the concept of the diagonals drawing the eye upward
A nice layering piece
Yes, we always need layering pieces in our handmade closet. Especially when the weather can’t make up its mind.
Excited to try this pattern after the shawl CAL. ????????????????
Happy Birthday Cortney! I really like the leaning stitches featured on the front!