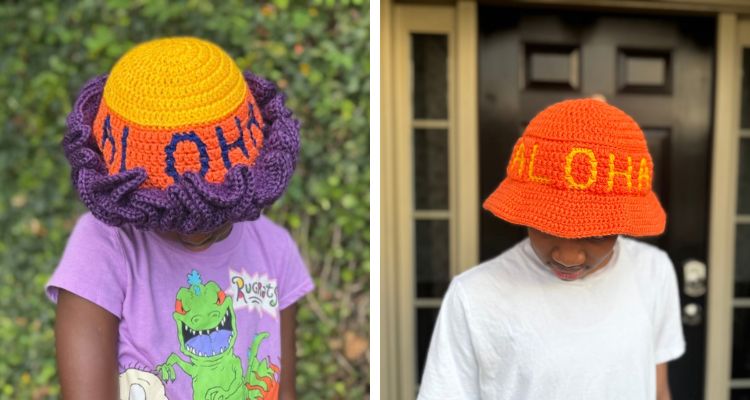
Some patterns start with a stitch idea. This one started with an eight-year-old’s favorite things: Stitch and the color purple.
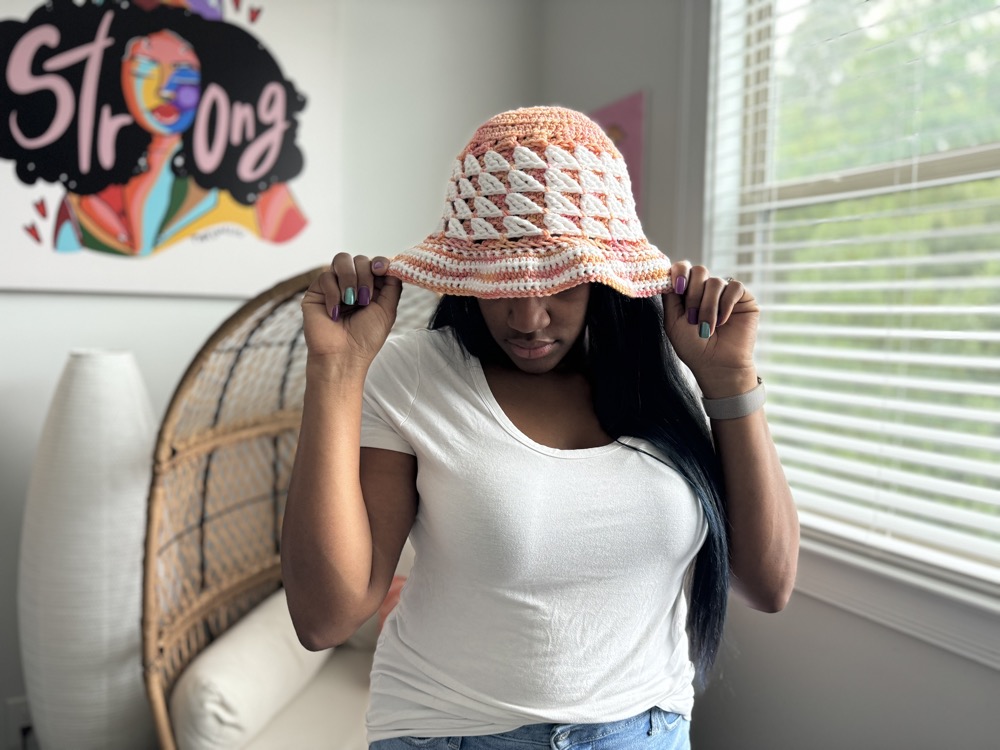
The Aloha Crochet Ruffle Hat is a family-sized, top-down overlay mosaic crochet ruffle hat that spells “ALOHA” right into the fabric. It uses just two stitches, so there’s no chart-reading anxiety once you get the rhythm down. The pattern comes in four sizes, from toddler to adult large, and you can make it in two colors for crisp lettering or go scrappy with a mix of colors.
Aloha means more than hello and goodbye. It carries love, affection, peace, compassion, and mercy, which is exactly what this hat is named for. It’s a reminder of the compassion of an oncology medical team, and the love of parents and friends, when a child faces kidney cancer, specifically Wilms tumor, like my second cousin Kayla did. She was diagnosed at not quite seven years old; she’s eight now. The orange in every size of this hat isn’t just a color I liked. It’s the color for kidney cancer and Wilms tumor awareness, worn for her.
Why Orange: Kayla’s Story
A note before this section: I wrote this from what Kayla’s mom, Ashley, shared with me. I kept it close to her words on purpose — this is her family’s story to tell.
Wilms tumor. Before Kayla’s diagnosis, Ashley and Kyle had never heard of it. It’s a kidney cancer, and kidney cancer in children is already rare — Kayla’s specific type is ultra-rare. It’s also usually caught early, typically by 18 months old. Kayla was almost seven.
It started with side pain. A virtual appointment first, some minor medication, no improvement. Everyone assumed she just needed a bowel movement — until she didn’t have one, and the lack of one is what finally sent them to the ER for an X-ray. That’s when they saw it wasn’t what anyone expected.
Ten doctors were waiting for Kayla. Blood tests, ultrasounds, and Kyle and Ashley arriving the next day to a surgery that was supposed to take five to six hours and ended up taking eleven — the tumor was attached to her diaphragm, and doctors removed nearby lymph nodes to check whether it had spread. Stage 2. From there: 42 weeks of chemo, 6 rounds of radiation, and a move from St. Jude’s to CHOA partway through treatment.
Through all of it, Ashley and Kyle worked to keep things as normal as possible — Kayla stayed enrolled in school, missing days here and there, with a school that was understanding about what her family was navigating. Kayla herself adapted in a way that still gets me: accessing her port was shocking and traumatic at first, and she found ways to work with other medical devices to trick her own brain into being okay with it. This is just what it is. Ashley describes waves of emotion through the whole thing — uncertainty, and then a strange kind of second-nature routine, checking for fevers, tracking medications, until it became just what their days looked like. There were still moments of uncontrollable crying. And there were also moments where watching how Kayla handled it helped Ashley manage her own feelings.
Kayla completed treatment on May 4, 2026. Her port has been removed, and she’s doing great. She’s in survivorship monitoring now — every three months for the first year, then every six months, then a final check at year five. Statistically, she’s not likely to see a relapse. When treatment ended, the whole neighborhood celebrated with her, ringing the bell together.
One thing Ashley mentioned has stuck with me: how much it’s helped to connect with other families going through this, or who’ve already been through it. Hearing what their kids are doing now is reassuring in a way that’s hard to describe unless you’ve needed that reassurance yourself.
That’s why this hat carries her colors — orange most of all.
The Colors, Explained
The two sample colorways use yarn colors chosen for meaning, not at random.
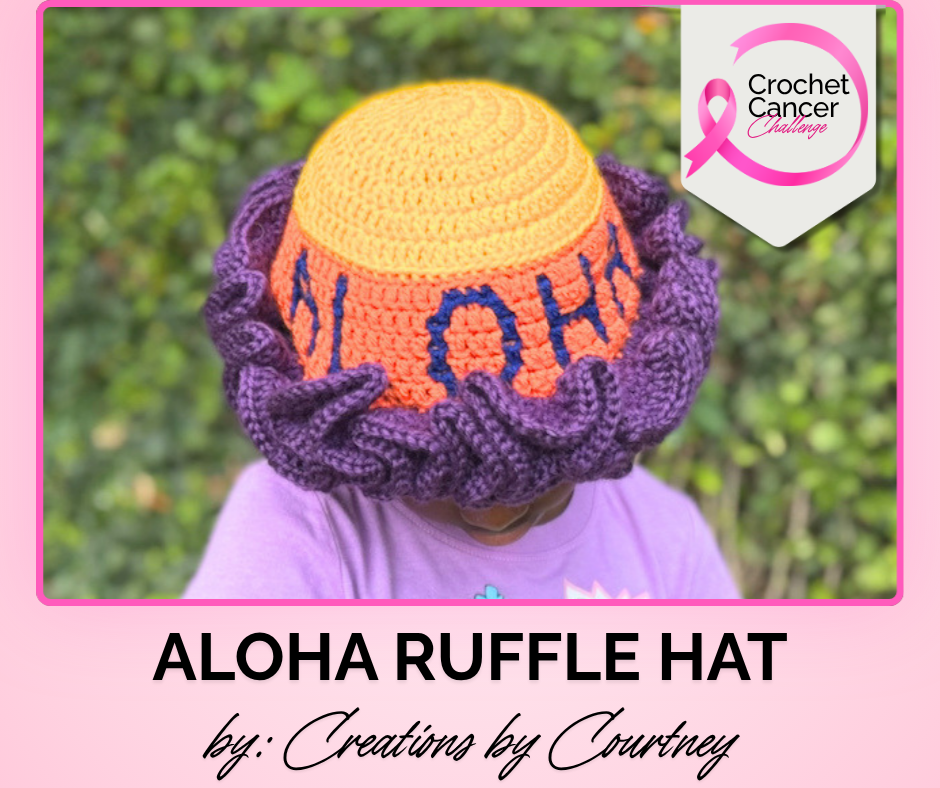
The Ruffle Brim version features four meaningful colors. The yellow crown represents childhood cancer awareness, while the orange side represents Wilms tumor and kidney cancer awareness. Blue mosaic letters honor Stitch, Kayla’s favorite character, and the purple ruffle brim reflects her favorite color.
The Simple Brim version uses just the two awareness colors, orange and yellow.
You’re welcome to make this hat in colors that mean something to you or the recipient, or follow the samples exactly.
Part of the 2026 Crochet Cancer Challenge
This pattern isn’t just inspired by Kayla’s story — it’s my contribution to the Crochet Cancer Challenge, an annual event run by Sweet Potato 3 that’s been going strong since 2014. Every October, a group of designers releases free crochet hat patterns, and crocheters everywhere are invited to make at least one and donate it to a hospital, cancer center, or someone going through treatment. It’s grown into thousands of hats pledged and donated worldwide each year, and I’m genuinely honored to be part of it with a hat that means this much to me personally.
The Aloha Crochet Ruffle Hat is free to download from October 6 through October 31, 2026. You’ll find all of the featured patterns, updated each day throughout the month, over at the Crochet Cancer Challenge event page. Grab the pattern, make a hat (or several), and consider donating it to someone who could use a little handmade warmth.
This is my 8th year joining the Challenge. If you want to see where it started, last year’s Granny Crochet Baseball Cap was inspired by my friend Channy’s breast cancer journey, the Peachy Purpose Crochet Bucket Hat supported endometrial cancer awareness, and the Free Crochet Bucket Hat Pattern raised awareness for Hodgkin’s lymphoma.
Keep scrolling for the download button to download via ThriveCart. Just enter your name and email address to receive your copy of the ad-free PDF.
At a Glance
Skill level: Intermediate
Size range: Toddler, Child, Teen/Adult Small, and Adult Large
Yarn weight & fiber: Worsted weight (#4) acrylic, Brava Worsted
Hook size: US H/8 (5.00 mm) crochet hook, or the hook you need to meet gauge
Construction method: Worked top-down in the round, with a choice of ruffle or simple brim
Key techniques: Overlay mosaic crochet, reverse slip stitch color change, chainless starting double crochet
Why You’ll Love This Crochet Ruffle Hat Pattern
The “ALOHA” lettering isn’t done with intarsia or a stranded colorwork chart. It’s built with overlay mosaic crochet, working one color per round. If you’ve been intimidated by colorwork, this is an approachable next step.
It’s sized for real people. Four sizes mean you can make this for a toddler, your own kid, a teen, or yourself, without relearning the technique as you size up.
You get to choose your finish. A ruffle brim adds fun texture, while a simple style brim makes an everyday hat. Same crown, two completely different personalities.
And every stitch of it means something.
Construction Overview
The crown of the hat starts with a magic circle, or the starting chain alternative, and grows into a flat circle. Work increase rounds in double crochet, adding double crochets until it reaches the right diameter for your size. Stop at the round marked for your size, then move on to the Side.
The Side is where the mosaic technique happens: eleven rounds worked in the round without turning, alternating Color A and Color B. Use back-loop single crochet and front loop double crochet to build the “ALOHA” lettering as a raised, textured design, not a flat print. A reverse slip stitch color change carries the working color up cleanly between rounds.
From there, choose your brim and finish the hat.
Fit, Sizing & Customization Notes
Ease and fit philosophy. This hat is meant to fit at size — the crown measurements (5″ to 8″ diameter across the four sizes) are built around a comfortable, wearable fit for each age range. Fit depends on meeting gauge and following the size-specific instructions, including the stated stitch count.
Customization options. The brim is where you get to make this hat your own. The Ruffle Brim adds a playful, textured edge in just three rounds. The Simple Brim gives you a cleaner, more classic look and takes a few more rounds to build. Both use the same crown and Side, so you’re not locked into one choice until the very end.
Color. Whether you choose 2 or 4 solid yarn colors, make the hat your own. With the yarn amounts listed by section, this can be a great stash-busting project. Just remember to choose contrasting colors so the letters stand out, rather than choosing 2 shades of pink. For example, you can use a variegated or striping yarn paired with a solid color. Color A and Color B are just placeholders for whichever colors you pick, and the pattern works exactly the same no matter what’s on your hook.
Yarn, Fiber & Fabric Behavior
Brava Worsted was the right call for practical and meaningful reasons. It’s an affordable acrylic with excellent stitch definition, which matters for mosaic work. Clear contrast between yarn colors keeps “ALOHA” legible instead of letting the letters blur into texture.
For a substitute, choose a smooth worsted weight yarn with good stitch definition. A fuzzy halo can compete with the mosaic design, while chunky yarn would change the gauge and finished fit.
If you’re making this one to donate through the Crochet Cancer Challenge, Sweet Potato 3’s own yarn guide for these hats is worth a look. Their standard is simple: soft, breathable, and sturdy enough to hold its shape through repeated washing. Brava Worsted meets that bar, which is part of why it’s the yarn used here. A soft cotton-blend yarn is a good substitute too. Skip anything with wool in it — wool tends to run itchy and isn’t recommended for these hats.
This worsted-weight hat suits cooler weather, but it’s breathable enough to wear across a wider temperature range than a bulky hat.
Styling & Wearability Ideas
Worn comfortably with the simple brim, this reads as an everyday, grab-it-on-your-way-out hat. With the ruffle brim, it becomes more of a statement piece, the kind of hat that gets noticed at school pickup or on a walk.
It layers easily under a hood or with a scarf once temperatures drop. Because it’s sized for the whole family, it makes an easy set: matching hats for siblings or a parent-and-child pair.
It’s also, obviously, a meaningful gift for a family who’s walked a similar road, or for anyone who wants to wear a small, visible piece of kidney cancer awareness.
Remember, the Aloha Ruffle Crochet Hat is free through the Crochet Cancer Challenge from October 6 to 31, 2026. Grab it while it’s free, make one for yourself, and consider making a second to donate.
Add this Pattern to your Favorites
Materials
- Brava Worsted, #4, (100% premium acrylic, 218 yds/ 199m; 3.5 oz.100g) in at least 2 colors
- US H/8 (5.00 mm) hook or hook to meet gauge
- Scissors
- Yarn needle
- Measuring tape
- Stitch markers x 2
Yarn
| Size | Crown & Side: Color A | Side: Color B | Ruffle Brim | Simple Brim | Hat with Ruffle Brim Total | Hat with Simple Brim Total |
| Toddler | 64 yds / 59 m | 24 yds / 22 m | 143 yds / 131 m | 57 yds / 53 m | 231 yds / 212 m | 145 yds /134 m |
| Child | 82 yds / 75 m | 28 yds / 26 m | 171 yds /157 m | 93 yds / 86 m | 281 yds /258 m | 203 yds /187 m |
| Teen/ Adult Small | 102 yds / 94 m | 32 yds / 30 m | 200 yds / 183 m | 126 yds / 116 m | 334 yds / 307 m | 260 yds /240 m |
| Adult Large | 123 yds / 113 m | 37 yds / 34 m | 228 yds / 209 m | 137 yds / 126 m | 388 yds / 356 m | 297 yds / 273 m |
Gauge
4 rounds of double crochet = 4″ [10 cm]
Finished Size
Crown Diameter
- Toddler 5″ [12.5 cm]
- Child 6″ [15 cm]
- Teen/Adult Small 7″ [18 cm]
- Adult Large 8″ [20 cm]
Pattern Key
BLOsc: back loop only single crochet
Btw: between
Ch: chain
CSDC: chainless starting double crochet
Dc: double crochet
FLOdc: front loop only double crochet
FLOsc: front loop only single crochet
FO: fasten off
M: stitch marker
PM: place stitch marker
Prev: previous
Rep: repeat
RS: right side
RSSCC: Reverse slip stitch color change
Sc: single crochet
Sl st: slip stitch
St(s): stitch(es)
WS: wrong side
YO: yarn over
Special Stitches and Techniques
BLOsc: sc in back loop of indicated stitch
CSDC: pull up a loop that is row height, holding loop in place and wrap yarn around hook (yarn over), insert hook in first st, YO, pull up a loop, [YO, pull through 2 loops] twice
FLOdc: YO, insert hook in available loop 2 rows below, YO and pull up a loop, [YO, pull through 2 loops] 2 times This will be in the same color.
FLOdc 1 st to the left/right: YO, insert hook in available loop 2 rows below and 1 stitch to the left/right YO and pull up a loop, [YO, pull through 2 loops] 2 times. This creates a leaning stitch
FLOsc: sc in front loop of indicated stitch
Magic circle: holding out pointer and middle finger, wrap yarn twice in counter-clockwise direction around fingers and yarn end landing towards the knuckle, carefully slide loops off finger and maintaining the size, insert hook through the center from back to front and grab the yarn, pull the yarn through the center, ch 1 and tighten, make indicated number of stitches in center, tighten loop
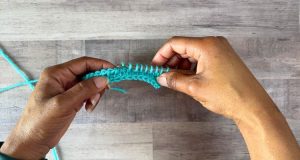
RSSCC: Remove the working loop in the current color from your hook and insert the hook from the back of the fabric through to the front through the first st of the round. Place the working loop of the current color back on the hook pulling it through the st to the back of the fabric. YO with the new color and pull through the loop on your hook. YO and ch 1 to secure.
Notes
- Pattern is written in US terms.
- Read entire pattern before beginning.
- This pattern uses the overlay mosaic technique, meaning you will work with one color per round.
- You will not turn after each round once working the Side.
- Change color with RSSCC, and carry the 2nd color up with the ch 1. Keep yarn tails tidy as you change colors.
- Alternating colors each round starting with Rnd 4 of the Side.
- There are two brim options for finishing the hat. Yarn amounts reflect the total required for a hat with the ruffle brim.
- A dash, – (2, 3, 4), means that the size is not included in the instructions for the Simple Brim.
- Check the stitch count at the end of each round before moving on.
Purchase the ad-free PDF with the schematic from your favorite pattern shop
More Crochet Hats to Make & Donate

Instructions
Crown
With Color A, make Magic Circle or ch 3, sl st to join
Rnd 1: CSDC in the center of the ring, 9 dc in the ring, sl st to join, tighten center, turn. 10 dc
Rnd 2: (CSDC, dc) in first st, 2 dc in each st around, sl st to join, turn. 20 dc
Rnd 3: CSDC in first st, 2 dc in next st, *dc in next st, 2 dc in next st, rep from * around, sl st to join, turn. 30 dc
Rnd 4: (CSDC, dc) in first st, dc in next 2 sts, *2 dc in next st, dc in next 2 sts, rep from * around, sl st to join, turn. 40 dc
Rnd 5: CSDC in first st, dc in next 2 sts, 2 dc in next st, *dc in next 3 sts, 2 dc in next st, rep from * around, sl st to join, turn. 50 dc
STOP HERE FOR TODDLER SIZE, move to Side
Rnd 6: (CSDC, dc) in first st, dc in next 4 sts, *2 dc in next st, dc in next 4 sts, rep from * around, sl st to join, turn. 60 dc
STOP HERE FOR CHILD SIZE, move to Side
Rnd 7: CSDC in first st, dc in next 4 sts, 2 dc in next st, *dc in next 5 sts, 2 dc in next st, rep from * around, sl st to join, turn. 70 dc
STOP HERE FOR TEEN / ADULT SMALL SIZE, move to Side
Rnd 8: (CSDC, dc) in first st, dc in next 6 sts, *2 dc in next st, dc in next 6 sts, rep from * around, sl st to join, turn. 80 dc
STOP HERE FOR ADULT LARGE SIZE, move to Side
Side
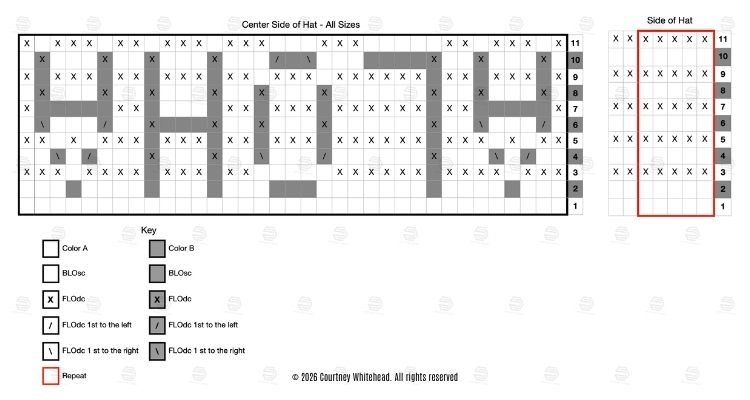
Rnd 1: Ch 1, BLOsc in each st around, sl st to join, change to B. 50 (60, 70, 80) sc
PM in 9th (14th, 19th, 24th) st (first st of mosaic chart). PM in 8th (13th, 18th, 23rd) st from end (last st of mosaic chart). This centers 35 sts to create “ALOHA”.
Rnd 2: Ch 1, BLOsc in each st around, sl st to join, change to A. 50 (60, 70, 80) sc
Rnd 3: With A, ch 1, FLOdc in next 8 (13, 18, 23) sts, FLOdc in next 3 sts, BLOsc in next st, FLOdc in next 4 sts, BLOsc in next st, FLOdc in next 7 sts, BLOsc in next 3 sts, FLOdc in next 3 sts, BLOsc in next st, FLOdc in next 3 sts, BLOsc in next st, FLOdc in next 4 sts, BLOsc in next st, FLOdc in next 3 sts, FLOdc in next 7 (12, 17, 22) sts, RSSCC. 8 sc, 42 (52, 62, 72) dc
Note: Move M up each round.
Rnd 4: With B, ch 1, BLOsc in next 8 (13, 18, 23) sts, BLOsc in next 2 sts, *FLOdc 1 st to the left, BLOsc in next st, FLOdc 1 st to the right (same as prev FLOdc)*, BLOsc in next 3 sts, FLOdc in next st, BLOsc in next 6 sts, FLOdc 1 st to the left, BLOsc in next 3 sts, FLOdc 1 st to the right, BLOsc in next 2 sts, [FLOdc in next st, BLOsc in next 3 sts] 2 times, rep btw *-*, BLOsc in next 2 sts, BLOsc in next 7 (12, 17, 22) sts, RSSCC. 41 (51, 61, 71) sc, 9 dc
Rnd 5: With A, ch 1, FLOdc in next 8 (13, 18, 23) sts, FLOdc in next 2 sts, BLOsc in next st, FLOdc in next st, BLOsc in next st, FLOdc in next 3 sts, BLOsc in next st, FLOdc in next 6 sts, BLOsc in next st, FLOdc in next 3 sts, BLOsc in next st, FLOdc in next 2 sts, [BLOsc in next st, FLOdc in next 3 sts] 2 times, BLOsc in next st, FLOdc in next st, BLOsc in next st, FLOdc in next 2 sts, FLOdc in next 7 (12, 17, 22) sts, RSSCC. 9 sc, 41 (51, 61, 71) dc
Rnd 6: With B, ch 1, BLOsc in next 8 (13, 18, 23) sts, BLOsc in next st, *FLOdc 1 st to the left, BLOsc in next 3 sts, FLOdc 1 st to the right*, BLOsc in next 2 sts, FLOdc in next st, BLOsc in next 6 sts, FLOdc in next st, BLOsc in next 3 sts, FLOdc in next st, BLOsc in next 2 sts, FLOdc in next st, BLOsc in next 3 sts, FLOdc in next st, BLOsc in next 2 sts, rep btw *-*, BLOsc in next st, BLOsc in next 7 (12, 17, 22) sts, RSSCC. 41 (51, 61, 71) sc, 9 dc
Rnd 7: With A, ch 1, FLOdc in next 8 (13, 18, 23) sts, FLOdc in next st, *BLOsc in next 5 sts*, FLOdc in next 2 sts, BLOsc in next st, FLOdc in next 6 sts, BLOsc in next st, FLOdc in next 3 sts, BLOsc in next st, FLOdc in next 2 sts, rep btw *-*, FLOdc in next 2 sts, rep btw *-*, FLOdc in next st, FLOdc in next 7 (12, 17, 22) sts, RSSCC. 18 sc, 32 (42, 52, 62) dc
Rnd 8: With B, ch 1, BLOsc in next 8 (13, 18, 23) sts, BLOsc in next st, *FLOdc in next st, BLOsc in next 3 sts, FLOdc in next st*, BLOsc in next 2 sts, FLOdc in next st, BLOsc in next 6 sts, [FLOdc in next st, BLOsc in next 3 sts, FLOdc in next st, BLOsc in next 2 sts] 2 times, rep btw *-*, BLOsc in next st, BLOsc in next 7 (12, 17, 22) sts, RSSCC. 41 (51, 61, 71) sc, 9 dc
Rnd 9: With A, ch 1, FLOdc in next 8 (13, 18, 23) sts, FLOdc in next st, *BLOsc in next st, FLOdc in next 3 sts, BLOsc in next st*, FLOdc in next 2 sts, BLOsc in next st, FLOdc in next 6 sts, rep from *-*, FLOdc in next 2 sts, rep btw *-*, FLOdc in next 2 sts, rep btw *-*, FLOdc in next st, FLOdc in next 7 (12, 17, 22) sts, RSSCC. 9 sc, 41 (51, 61, 71) dc
Rnd 10: With B, ch 1, BLOsc in next 8 (13, 18, 23) sts, BLOsc in next st, *FLOdc in next st, BLOsc in next 3 sts, FLOdc in next sts*, BLOsc in next 2 sts, FLOdc in next st, BLOsc in next 7 sts, FLOdc 1 st to the right, BLOsc in next st, FLOdc 1 st to the left, BLOsc in next 3 sts, rep btw *-*, BLOsc in next 2 sts, rep btw *-*, BLOsc in next st, BLOsc in next 7 (12, 17, 22) sts, RSSCC. 41 (51, 61, 71) sc, 9 dc
Rnd 11: With A, ch 1, FLOdc in next 9 (14, 19, 24) sts, BLOsc in next st, FLOdc in next 3 sts, BLOsc in next st, FLOdc in next 2 sts, BLOsc in next 5 sts, FLOdc in next 3 sts, BLOsc in next 3 sts, [FLOdc in next 3 sts, BLOsc in next st] 2 times, FLOdc in next 2 sts, BLOsc in next st, FLOdc in next 3 sts, BLOsc in next st, FLOdc in next 8 (13, 18, 23) sts, sl st to join. 14 sc, 36 (46, 56, 66) dc
Remove M. FO B, if using A for the Brim. If using B for the Brim, then FO A.
Choose a Brim: Ruffle or Simple with A or B.
Ruffle Brim
Rnd 1: Ch 1 loosely (pull to height of dc), 3 dc in each st around, sl st to join. 150 (180, 210, 240) dc
Rnd 2: Ch 1 loosely, 2 dc in each st around, sl st to join. 300 (360, 420, 480) dc
Rnd 3: Ch 1 loosely, 2 dc in first st, dc in next st, *2 dc in next st, dc in next st, rep from * around, sl st to join, FO. 450 (540, 630, 720) dc
Simple Brim
Rnd 1: With A, ch 1, *FLOsc in next 4 (5, 6, 7) sts, 2 sc in next st, rep from * around, sl st to join, turn. 60 (72, 80, 90) sc
Rnd 2: Ch 1, 2 sc in first st, sc in next 5 (6, 7, 8) sts, *2 sc in next st, sc in next 5 (6, 7, 8) sts, rep from * around, sl st to join, turn. 70 (80, 90, 100) sc
Rnd 3: Ch 1, *sc in next 6 (7, 8, 9) sts, 2 sc in next st, rep from * around, sl st to join, turn. 80 (90, 100, 110) sc
Rnd 4: Ch 1, sc in each st around, sl st to join, turn.
Rnd 5: Ch 1, 2 sc in first st, sc in next 7 (8, 9, 10) sts, *2 sc in next st, sc in next 7 (8, 9, 10) sts, rep from * around, sl st to join, turn. 90 (100, 110, 120) sc
Rnd 6: Rep Rnd 4.
Rnd 7: Ch 1, *sc in next 8 (9, 10, 11) sts, 2 sc in next st, rep from * around, sl st to join, turn. 100 (110, 120, 130) sc
Rnd 8: Rep Rnd 4.
STOP HERE FOR TODDLER SIZE
Rnd 9: Ch 1, 2 sc in first st, sc in next – (10, 11, 12) sts, *2 sc in next st, sc in next – (10, 11, 12) sts, rep from * around, sl st to join, turn. – (120, 130, 140) sc
Rnds 10-11: Rep Rnd 4
STOP HERE FOR CHILD SIZE
Rnd 12: Ch 1, *sc in next – (-, 12, 13) sts, 2 sc in next st, rep from * around, sl st to join, turn. – (-, 140, 150) sc
Rnd 13: Rep Rnd 4, FO.
Finishing
Weave in all ends.
Pin it for Later
Want to talk about yarn goodness, crochet tips, and exclusive weekly deals? Join my Facebook Group, Confidently Crochet with Creations By Courtney.
If we’re not hanging out on social media yet, come check me out on Facebook, Instagram and Pinterest.
Join my newsletter for sneak peeks, crochet tips, and more.
Use #CreationsByCourtney on social media when sharing your projects.
This pattern is not to be duplicated or resold, and not to be reproduced commercially. You may sell finished products on Etsy, at farmers markets, and craft fairs, but please credit Creations By Courtney as the pattern’s author.


2 Responses
Love this Aloha pattern but it is kind of confusing
Do you have a video of the actual mosaic pattern part of how to do it please and thanks 💜 🙏 💜
Hi Fiona,
There is not a video at this time. If you are familiar with overlay mosaic crochet, it is the same concept, except the letters are worked upside down, as it is a top down hat. You only use once color per round. If you downloaded the PDF, it includes the chart, which may be easier to follow than the written instructions.