
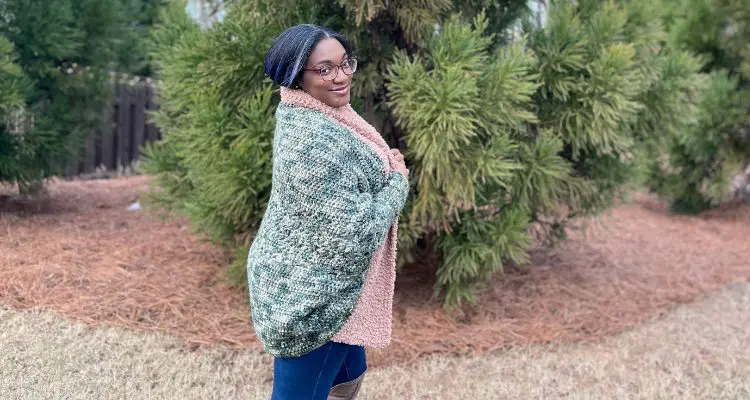
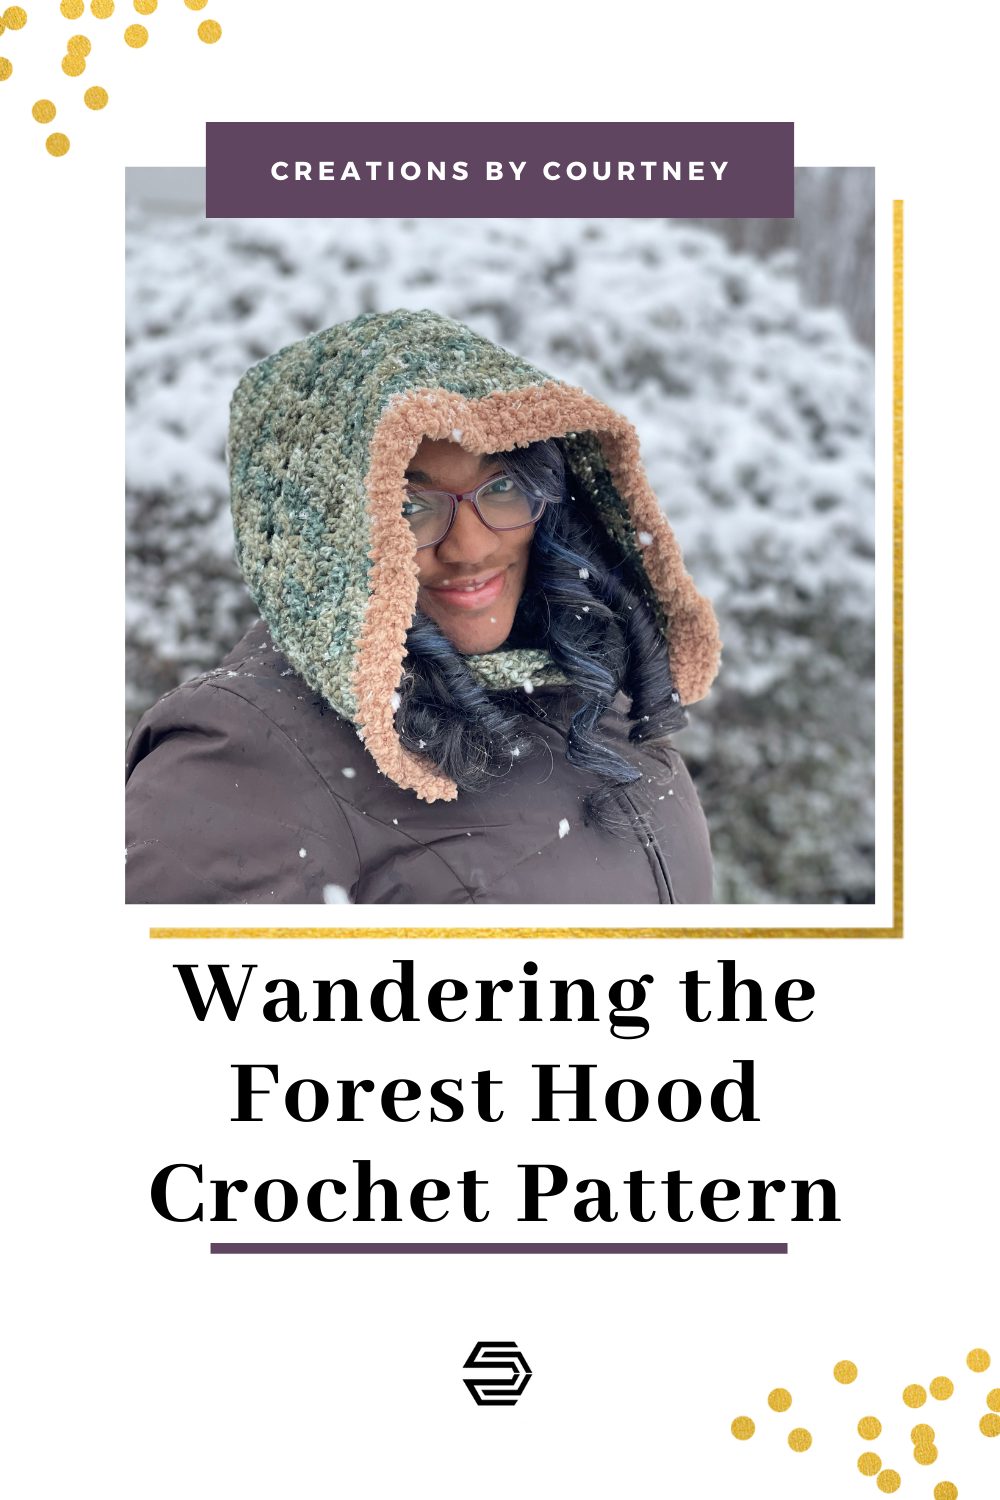
The Wandering the Forest Hood is the perfect winter accessory! This hood is slightly oversized for ease of wearing and styling with a coat, vest or sweater.
You may know that I love making an accessory pattern that coordinates with a garment pattern, so I asked community members to vote on my next WIP. Their votes have turned in the Wandering the Forest Hood. 🙂
Except for the mix of stitches, this hood is a straightforward crochet pattern that can easily be made within a few days in order to be worn for your weekend hike, or just having to be outside in the cold to dig out a vehicle. I wanted this to be a simpler design that could be worn with the Wandering through the Forest Cardigan, if desired, but also be worn on its own. Also, I think we need more crochet hoods because they’re much cuter than the regular hood of a hoodie or coat. Wouldn’t you agree?
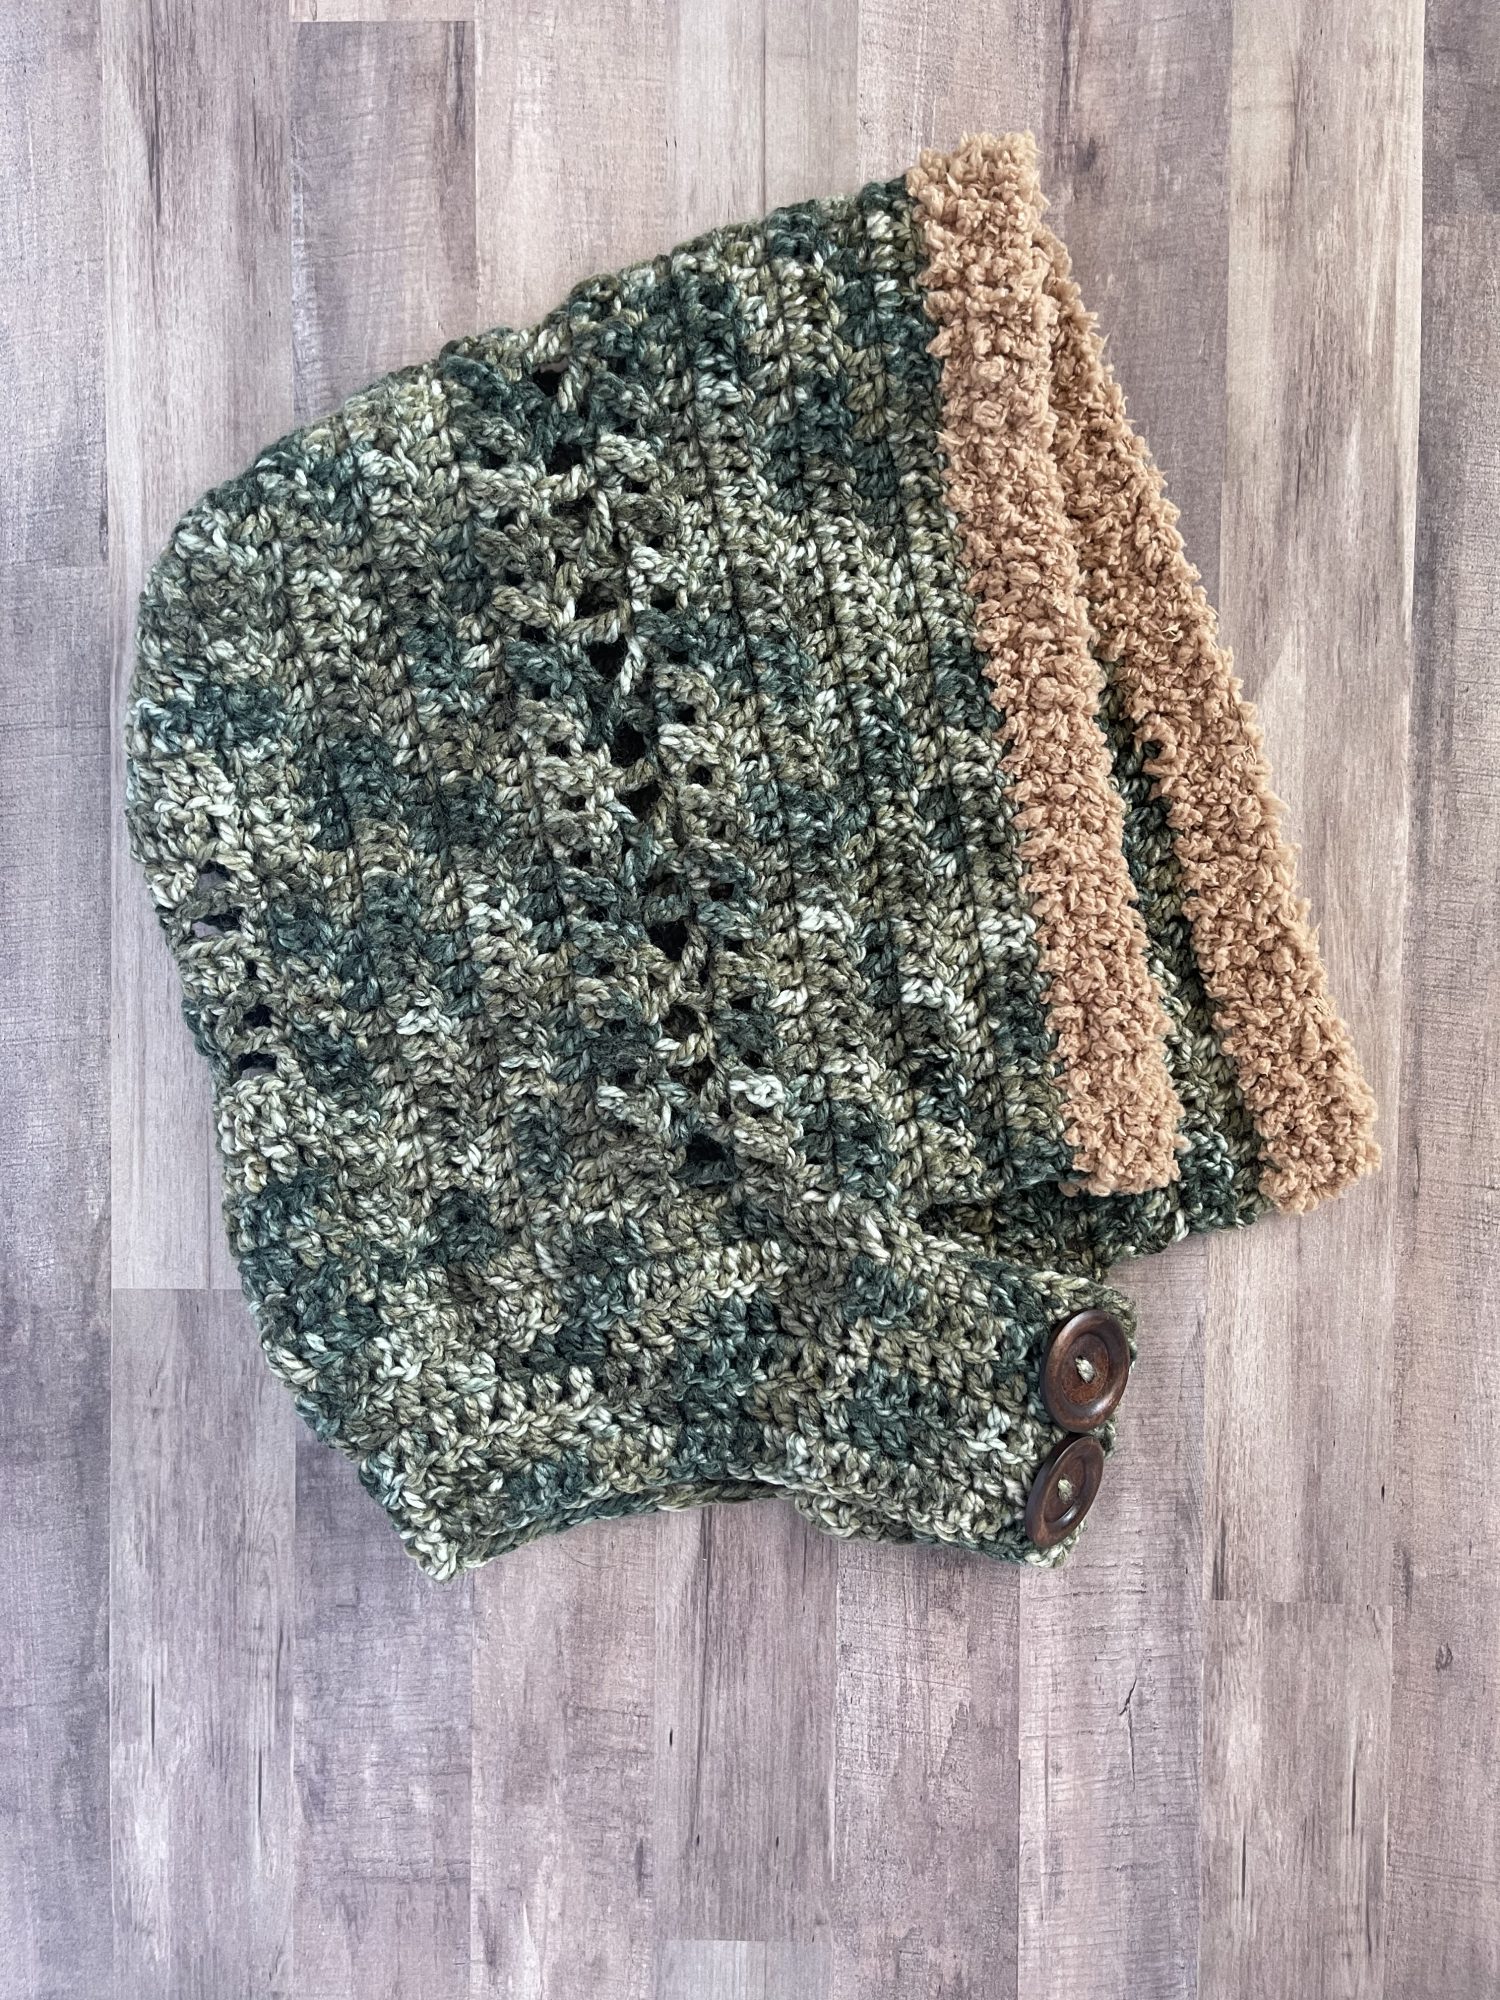
The Wandering the Forest Hood is designed to have a longer depth than a typical hood on a garment or coat to make it easier to pull up on the head and provide additional coverage from the winter elements. And the faux fur edging adds a touch of warmth and extra coverage for the face and neck. After spending four winters in Chicago🥶, I learned to have more coverage. No one enjoys a frozen nose or eyelashes.
Yarn
*Disclosure: This post may contain affiliate links to products that I use, and think you will enjoy using too. Should you decide to use any such link, I will earn a small commission at no cost to you. Thank you for supporting this small business.
For this crochet hood, I chose to my remaining amounts of King Cole Yarn Big Value Tonal Chunky and Cuddles Chunky, which was provided to me as a North American Brand Ambassador.
Both yarns are considered a #5 bulky, but are easier to work with than other bulky yarns. Big Value Tonal Chunky comes in 13 color ways. It is a premium acrylic of 167 yards (152 meters) per skein. At the time of this writing, it is sold out at Lovecrafts, but four colors are available through Annie’s Catalog for $8.99. For those in the UK and Europe, Wool Warehouse is carrying 11 of the colors for £3.49 ($4.85) per skein.
Cuddles Chunky is a super soft faux fur that I found easy to work with and frog. 😱 I know that is shocking to hear, but let me tell you why. This yarn has a strand of what felt like cotton thread in the middle with pieces of the fur attached. This made it easier to see and feel the stitches in each row made. Each of the 12 colors come in a 50g skein of 137 yards (125 meters) for $4.99 at Lovecrafts, but out of stock right now. If you don’t mind paying shipping, you can order some from this Etsy Shop for $4.69 per skein.
ADD TO RAVELRY FAVORITES
MATERIALS
- Yarn A: King Cole Big Value Tonal Chunky, bulky #5 (100% acrylic, 167 yds/ 152 m, 3.5 oz/ 100 g): Pale Greens x 2
- Yarn B: King Cole Cuddles Chunky, bulky #5 (100% polyester, 137 yds / 125 m, 1.75 oz / 50 g): Teddy x 1
- US K-10.5 (6.50 mm) hook or hook to meet gauge
- 40mm button x 2
- Stitch Markers
- Scissors
- Yarn Needle
- Measuring Tape
GAUGE
10 dc x 7 rows = 4” x 4” [10 cm x 10 cm]
FINISHED SIZE(S)
When flat: 16.5” [42 cm] tall
Collar: 26” [66 cm] wide
PATTERN KEY
Ch: chain
Cedc: crossed extended double crochet
CSDC: chainless starting double crochet
CSTR: chainless starting treble crochet
Dc: double crochet
Dc2tog: double crochet 2 together
Fdc: foundation double crochet
FO: fasten off
M: stitch marker(s)
Prev: previous
Rem: remain(s)
Rep: repeat
RS: right side
Sl st: slip stitch
Sc: single crochet
Sk: skip
St(s): stitch(es)
Tr: treble crochet
WS: wrong side
X-st: x-stitch
YO: yarn over
SPECIAL STITCHES & TECHNIQUES
Cedc: YO, sk 1 st, insert hook in next st, YO, pull up a loop (3 loops on hook), YO, pull through 1 loop (3 loops on hook), [YO, pull through 2 loops] 2 times; working in sk st, YO, insert hook in st, YO, pull up a loop (3 loops on hook), YO, pull through 1 loop (3 loops on hook), [YO, pull through 2 loops] 2 times
CSDC: pull up a loop that is row height, holding loop in place and wrap yarn around hook (yarn over), insert hook in first st, YO, pull up a loop, [YO, pull through 2 loops] twice
CSTR: pull up a loop to height of row, holding loop in place and wrap yarn around hook twice (yarn over), insert hook in first st, YO, pull up a loop, [YO, pull through 2 loops] three times
X Stitch:YO 2 times, insert hook in next st, pull up a loop (4 loops on hook), YO, pull through 2 loops (3 loops on hook), sk 2 sts, YO, insert hook in next st, pull up a loop (5 loops on hook), [YO, pull through 2 loops] 4 times, ch 2, YO, insert hook from right to left in center of X, pull up a loop, [YO, pull through 2 loops] 2 times
EXPERIENCE LEVEL
Intermediate

NOTES
- Pattern is written in US terms.
- Read entire pattern before beginning.
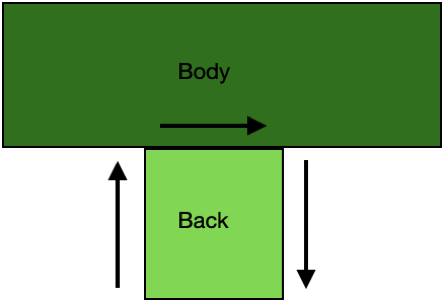
- The Wandering Hood is made in 4 parts: Body, Back, Seaming and Collar.
- The chains of the x-st count as sts when working the following row.
- The size of the hood can be adjusted by making a starting foundation row that has a total of stitches that is a multiple of 5 + 3.
- If the Body is adjusted for size, the Back and Collar will need to be adjusted too.
- Yarn amounts do not include any adjustments.
Purchase the ad-free PDF from your favorite pattern shop


Don’t forget to join the Creations By Courtney Community for CALs, crochet tips, and yarnie fun.
INSTRUCTIONS
Body
Row 1: With Yarn A, 73 fdc, turn
Rows 2-6: CSDC in first st, dc in each st, turn – 73 dc
Row 7: CSDC in first st, dc in next st, cedc 17 times, dc in next st, cedc 17 times, dc in last 2 sts, turn – 5 dc, 34 cedc
Row 8: CSTR in first st, tr in next st, *X-st, tr in next st; rep from * across until 1 st rem, tr in last st, turn
Row 9: Rep Row 7
Rows 10-15: Rep Row 2, FO after Row 15
Rows 16-17: Attach B, Ch 2 (does not count as st), dc in first st, dc in each st, turn. FO after Row 17
Back
Row 1: 17 fdc, turn
Rows 2-5: CSDC in first st, dc in each st, turn – 17 dc
Row 6: CSDC in first st, *ch 2, sk 3 sts, 3 dc in next st, ch 2, sk 3 sts, dc in next st; rep from *, turn – 17 sts; 9 dc, 8 ch
Row 7: CSDC in first st, *ch 1, sk 2 ch, 2 dc in next st, dc in next st, 2 dc in next st, ch 1, sk 2 ch, dc in next st; rep from *, turn – 17 sts; 13 dc, 4 ch
Row 8: CSDC in first st, *sk next ch, 2 dc in next st, dc in next 3 sts, 2 dc in next st, sk next ch, dc in next st; rep from *, turn – 17 dc
Rows 9- 11: Rep Rows 6-8
Rows 12-16: Rep Row 2
NOTE: Add or subtract additional row(s) of dc if the Back piece is not able to line up with the corners of the Body piece.
Seaming
Place M in 29th st from each end on Row 1 of the Body; use M to hold top corners of the Back in place along Row 1 of the Body; seam from one lower corner around to the next lower corner (the arrows indicate the direction of seaming).
Collar
Row 1: 10 fdc, attach to the 5th row of the Body, evenly dc across until 5th row on the other side, 10 fdc, turn – 84 dc
Row 2: CSDC in first st, dc in next 2 sts, ch 1, sk 1 st (button hole created), dc in next 6 sts, [dc2tog, dc in next 2 sts] 16 times, dc in next 10 sts, turn – 67 dc, 1 ch
Row 3: CSDC in first st, dc in next 9 sts, [dc2tog, dc in next 2 sts] 12 times, dc in next 10 sts, turn – 56 dc
Row 4: CSDC in first st, dc in each st, turn – 56 dc
Row 5: CSDC in first st, dc in each st until 4 sts rem, ch 1, sk 1 st (button hole created), dc in last 3 sts, turn – 55 dc, 1 ch
Row 6: Rep Row 4, FO
Finishing
- Weave in all ends.
- Attach 2 buttons to line up with button holes.
You may enjoy these patterns too
Wandering through the Forest Cardigan 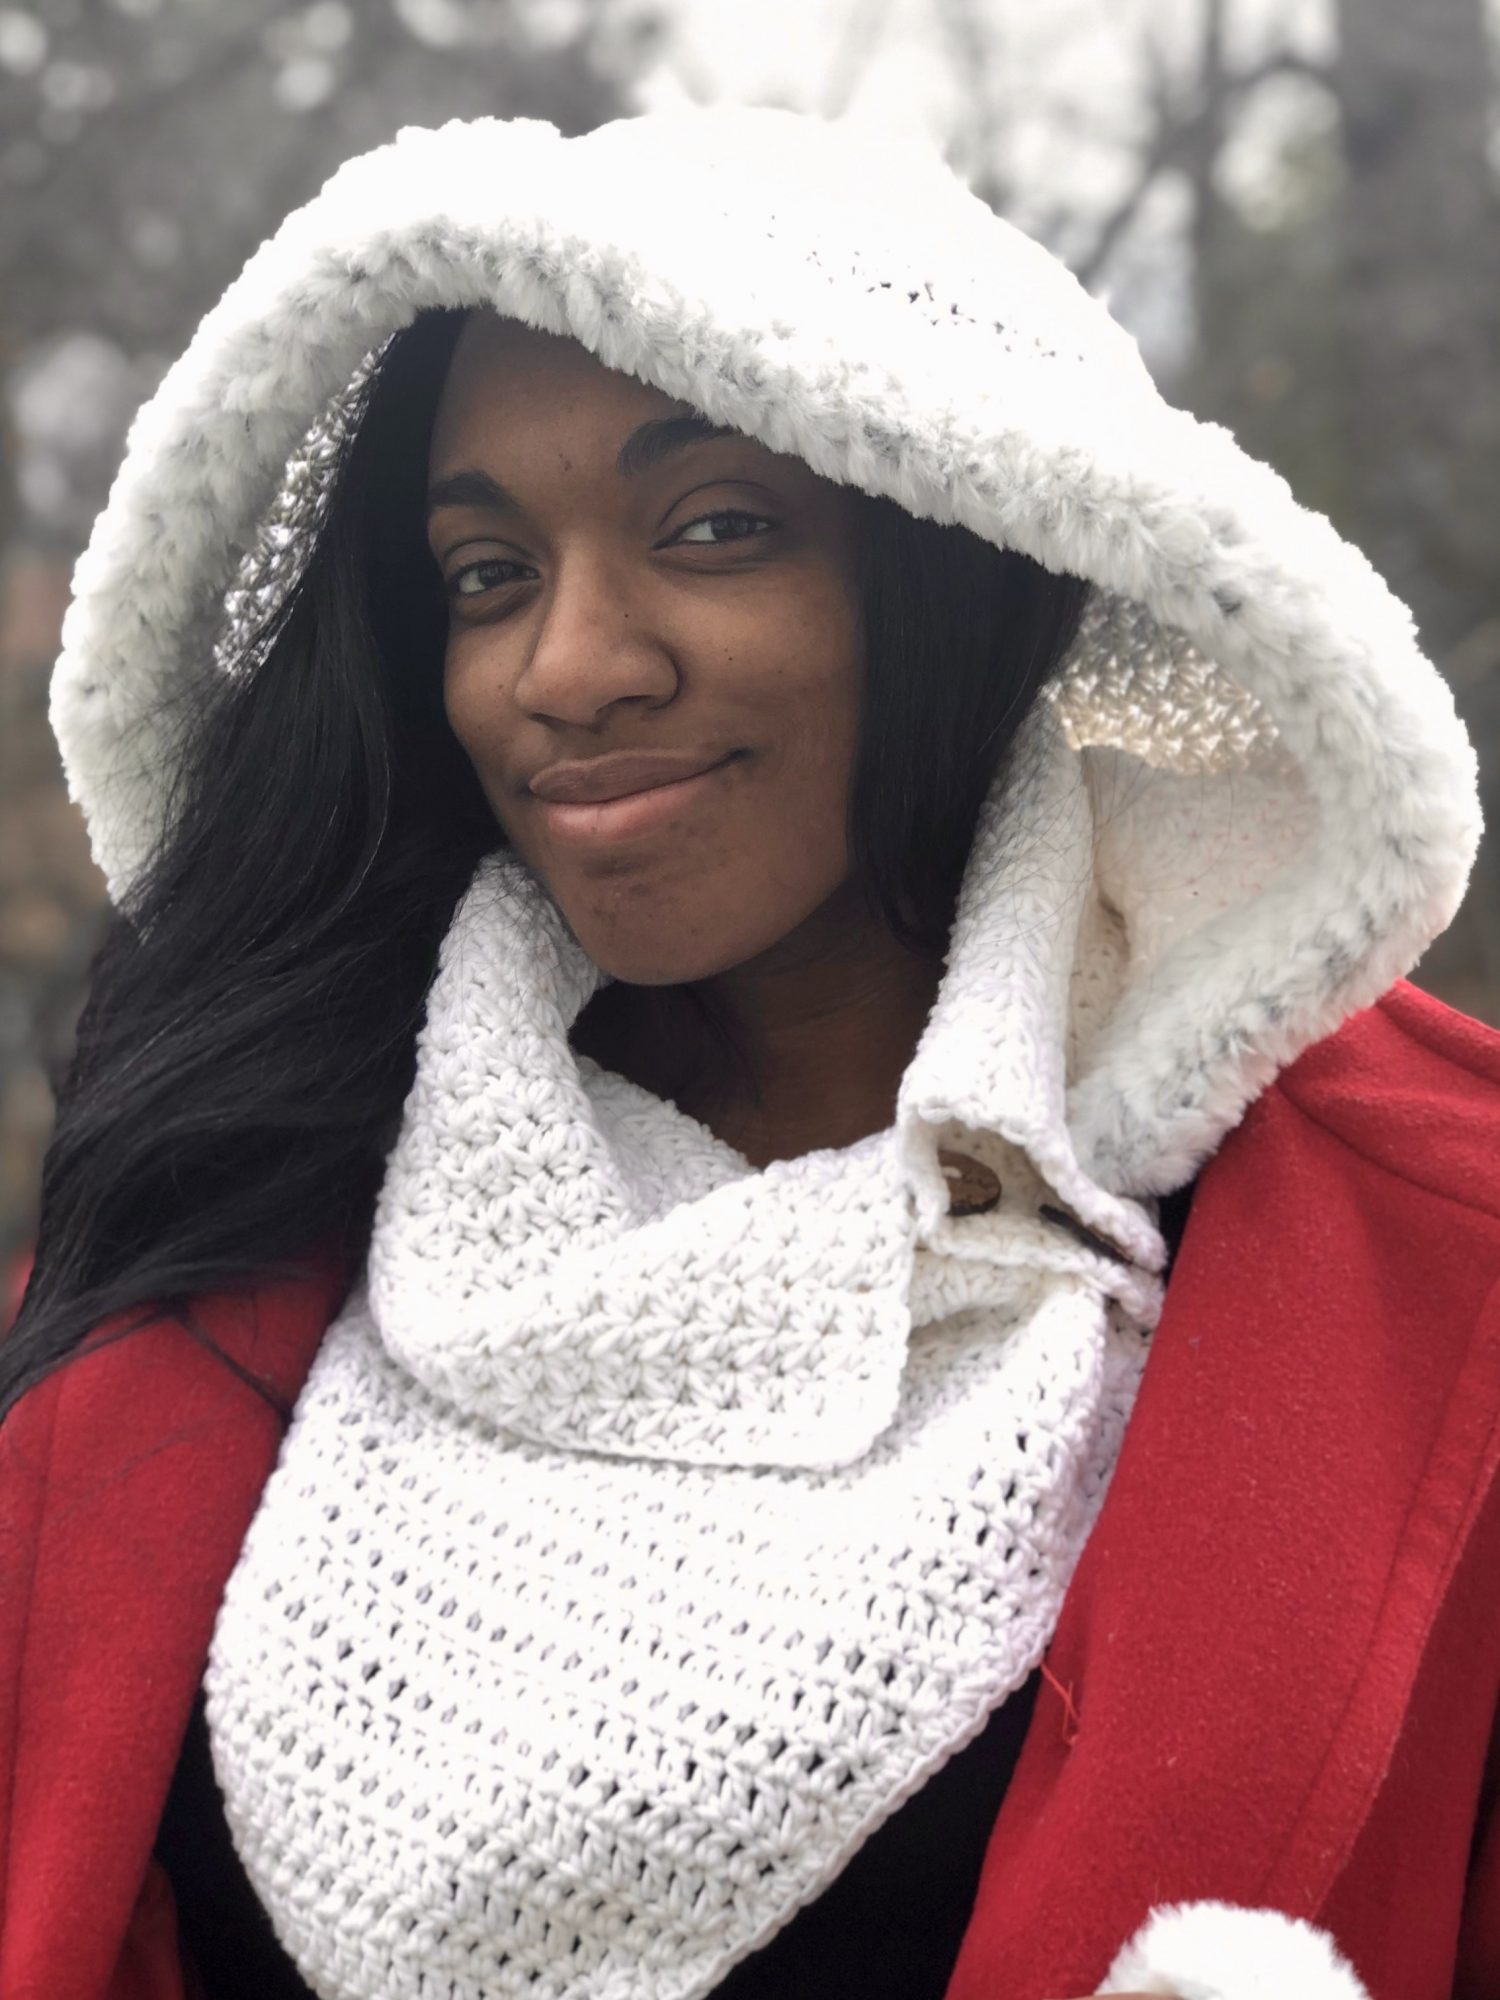
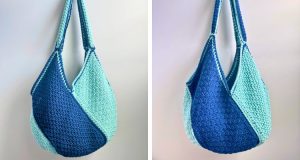
Ashley Hooded Cowl 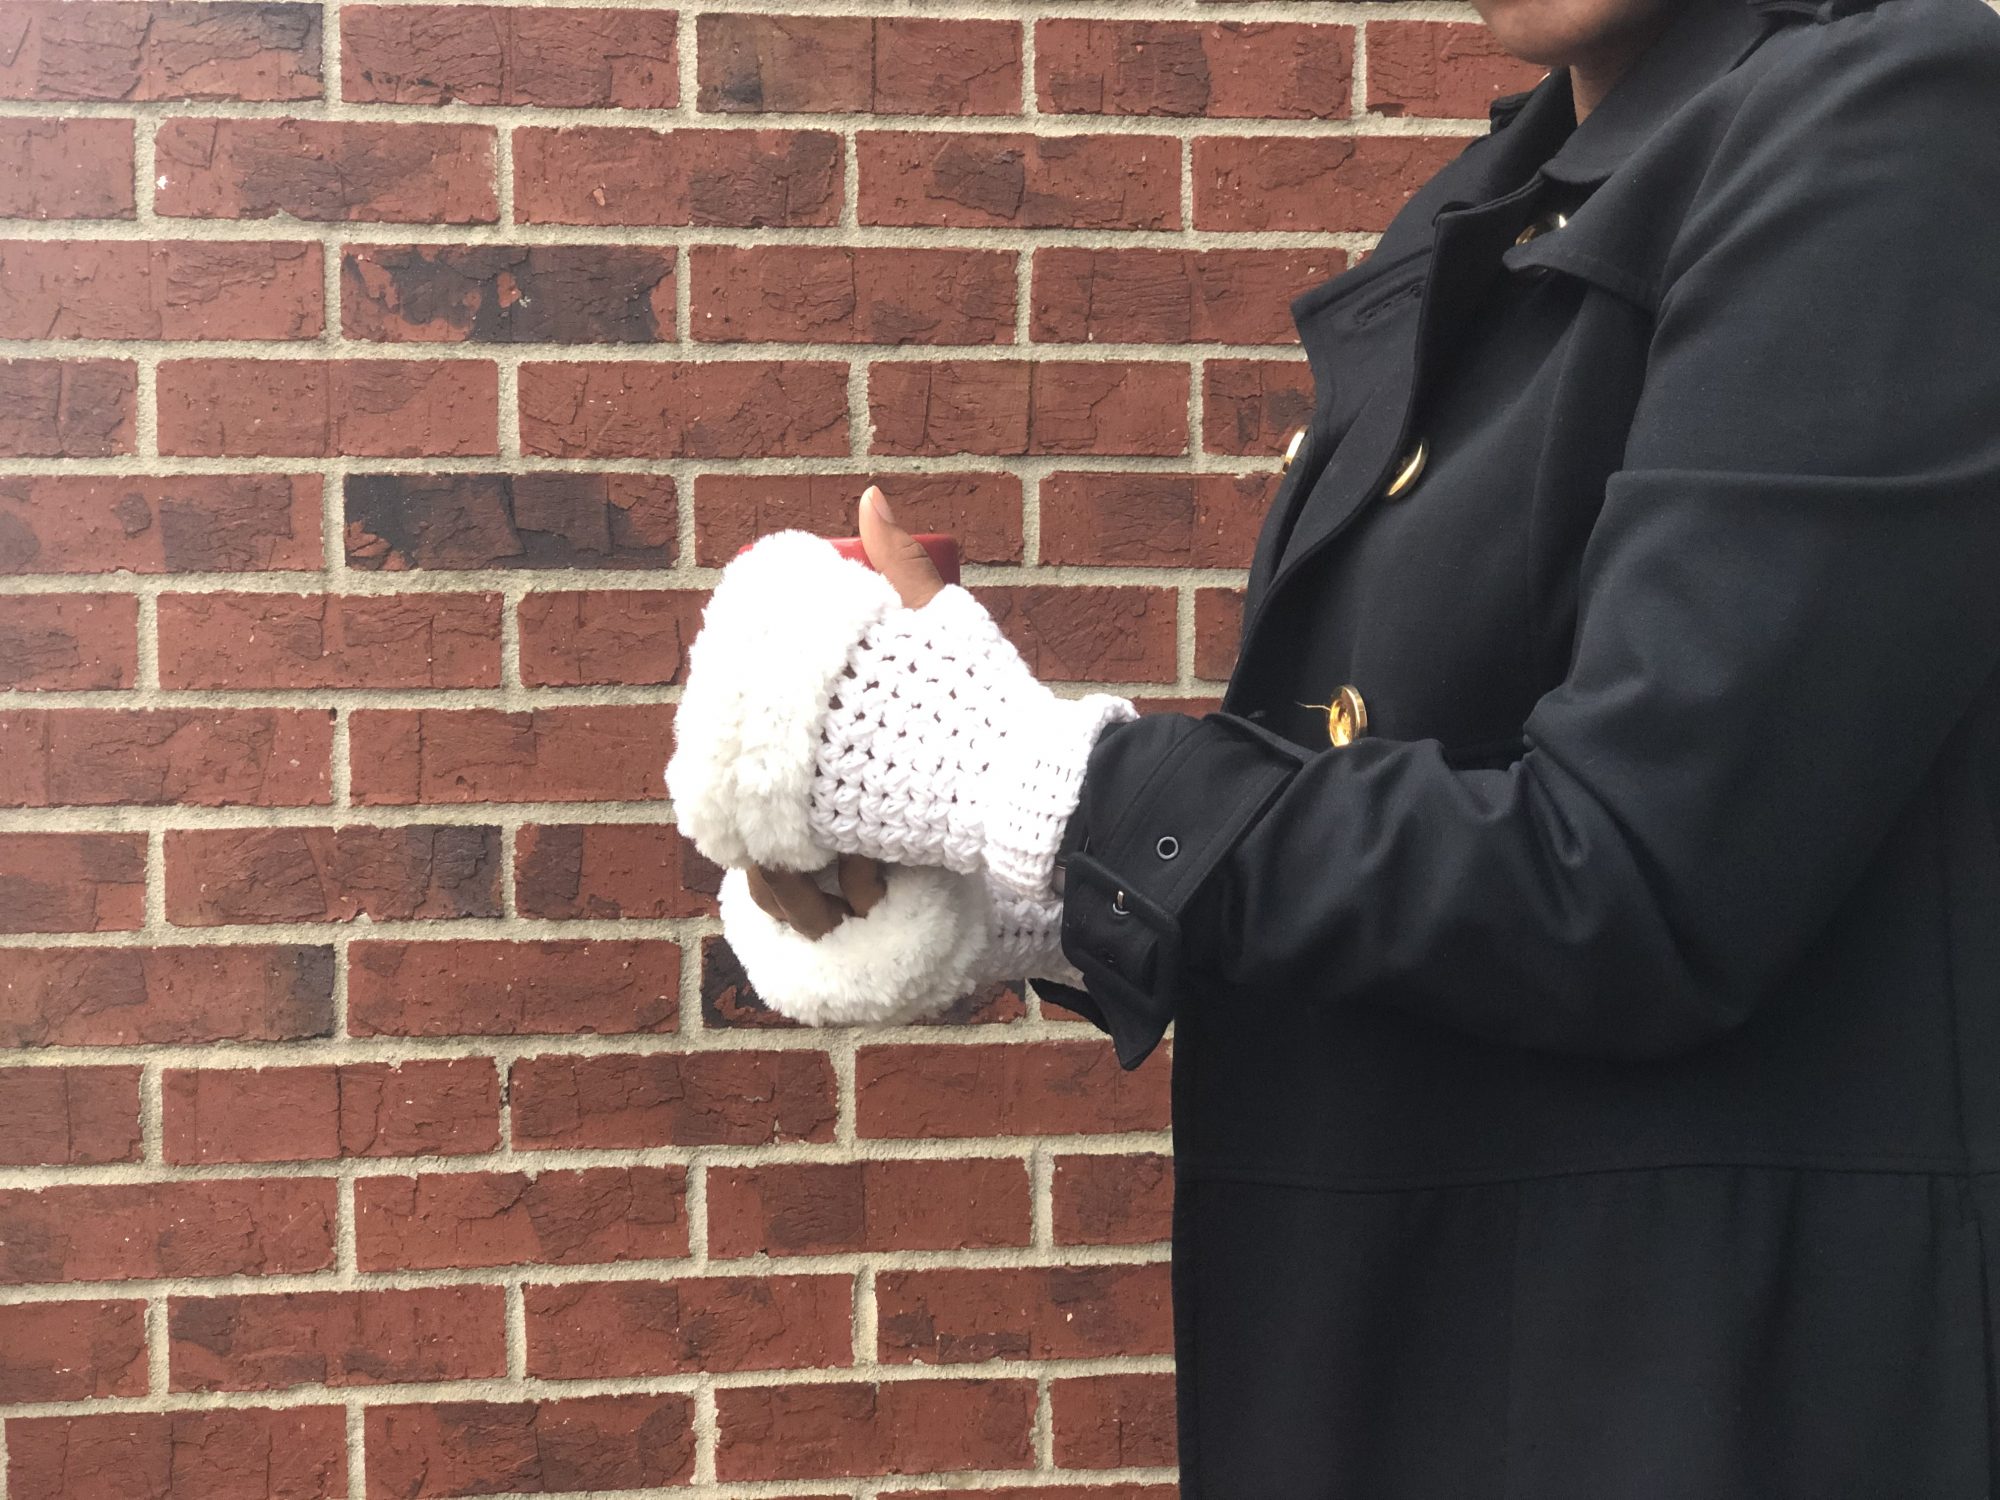
Ashely Faux Fur Mitts
Pin it for Later
Want to talk about yarn goodness, crochet tips, and exclusive weekly deals? Join my Facebook Group, Creations By Courtney Community.
If we’re not hanging out on social media yet, come check me out on Facebook, Instagram and Pinterest.
Join my newsletter for sneak peeks, crochet tips, and more. HERE
Use #CreationsByCourtney on social media when sharing your projects.
This pattern is not to be duplicated or resold, and not to be reproduced commercially. You may sell finished products on Etsy, at farmers markets, and craft fairs, but please credit Creations By Courtney as the pattern’s author.

One Response
The Wandering Forest Hood looks so warm and cozy….I love the detail of the X stitch and the faux fur
This would be a great piece for the cold winter weather