
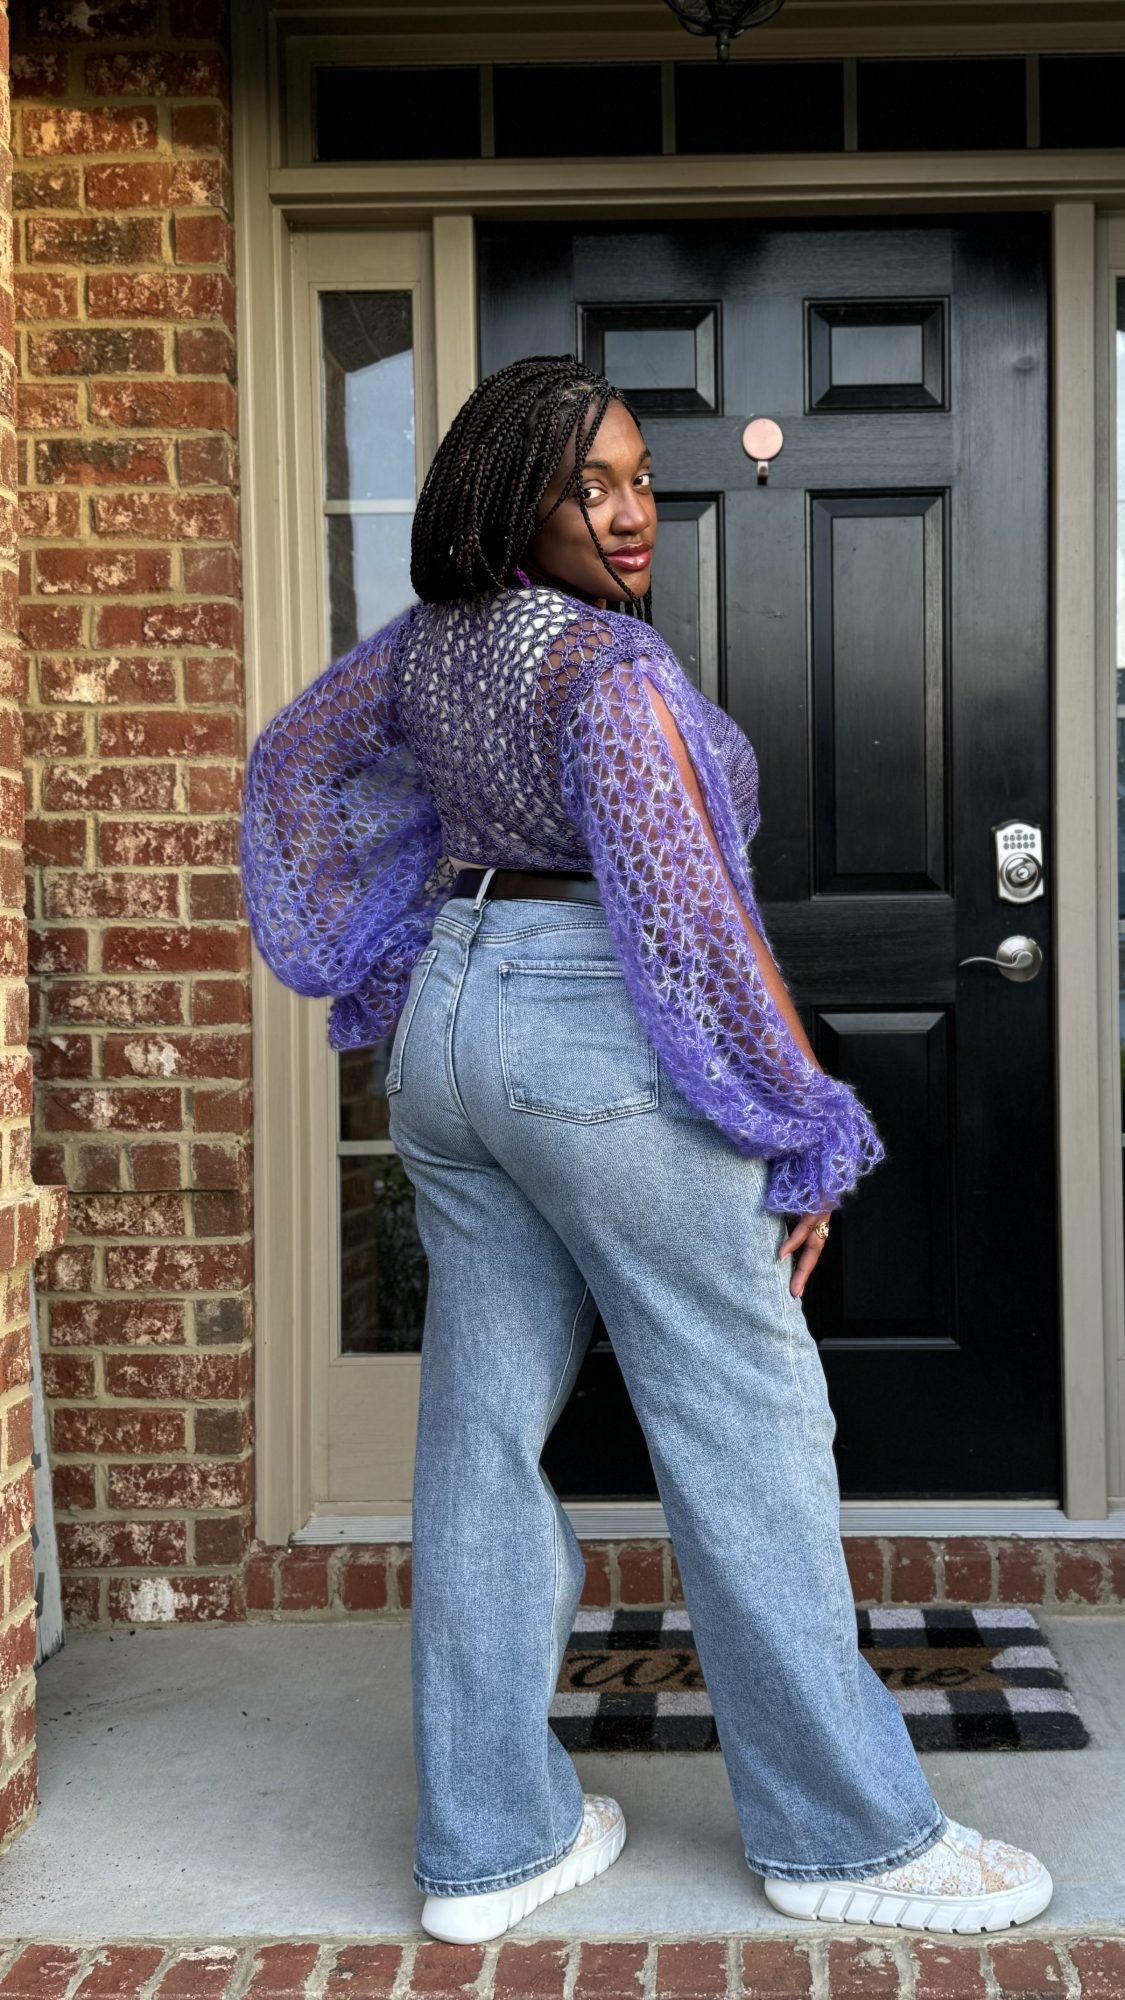
Pretty stitches can be a trap, right? You see that gorgeous, wavy texture and think, “Love it,” then your brain follows up with, “But will it fit… and will I hate making it?”
This Reversible Shells Tunic pattern is the friendly middle ground. The fabric looks fancy, but it’s mostly double crochet, skips, and a shell (five double crochets in one stitch). Even better, the tunic is built from rectangles, so it feels doable even if your crochet resume is mostly scarves, blankets, and hats.
As this is an oversized design inspired by a poncho but easier to wear: shop your stash for coordinating colors, make a swatch to match gauge, learn a join as you go method (Team No Seaming for Courtney), and you’ll finish with a simple but eye-catching edging so it looks polished, not “I got tired and called it done.” (We’ve all been there.)
Get the pattern today
 at the bottom.](https://creationsbycourtney.com/wp-content/uploads/2026/01/Reversible-Shells-Tunic-Pin-1.jpg)
Materials, yarn, and construction with the Snapdragon Shells Stitch
Before we get to the step-by-step, let’s make sure you’re set up for success. This is an easy stitch pattern to remember, so you can definitely Netflix and Stitch with this project.
One important step to remember to prevent yourself from having to frog later, is to make sure that the double crochets are worked between the stitches of the shell below, and the shell is worked between two double crochet below. This makes the Snapdragon Shells stitch distinct from other shell patterns.
Supplies and yarn choices that make shell stitches look their best
Shells can look crisp, soft, drapey, or puffy, depending on yarn choice. For a first garment in this stitch, DK weight is the easiest starting point because it’s stable, it works up at a satisfying speed, and it’s forgiving while you learn the rhythm.
Fiber makes a big difference:
- Cotton (or cotton-rich blends): Shells look clean and defined, with less fuzz hiding the texture. Cotton can feel a bit heavier, which can help the tunic hang nicely.
- Acrylic: Budget-friendly, easy care, and often softer than you expect. Great if you want something you can toss in the wash without worry.
- Blends (cotton-acrylic, cotton-bamboo, wool blends): Often the sweet spot for drape and comfort, especially if you want the tunic to swing instead of stand out.
Yardage range (keep reading for specific amounts): plan for about 1,300 to 2,900 yards for a tunic-length shell stitch top. It varies because length, bust, and ease.
Tools you’ll want nearby:
- Crochet hook in a 5.0 mm or the size needed to match gauge
- Yarn needle
- Stitch markers (helpful for join as you go and marking the arm openings)
- Measuring tape
- Scissors
If you enjoy shell textures in accessories too, you might like the Slanting Shells Wrap free crochet pattern. It’s a nice way to practice keeping shell repeats tidy.
A simple construction plan: two rectangle tunic and very little seaming
You’ve got two beginner-friendly ways to build this tunic. Both work well with the Snapdragon Shells look.
Option A: Two panels joined as you go.
You crochet one rectangle for the first side, and then as you create the second identical rectangle, you join at the beginning of each row until you reach the arm opening. This is the fastest path, and it’s great if you don’t want to seam later.
Option B: Two panels seamed.
You crochet the first panel and the second panel, then seam at shoulders and sides. This takes a little longer, and it will help to have more stitch markers or clips to line up the rows.
Either way, positive ease takes center stage in this design for a loose and comfy tunic.
For more garment confidence and fit pep talks (the kind that actually help), the beginner-friendly approach in Crochet Crop Top Made Simple is worth a read, even if you’re not making that exact design.
At-a-Glance Pattern Details for an Easy Shell Crochet Top Tunic
This is the quick snapshot you’ll want before you start, especially if you like to skim and then commit.
Skill level, stitches, and techniques you will use
Skill level: Easy or an Adventurous Beginner (you can do this if you can double crochet, and understand using the space between stitches).
You’ll use:
- Chain (ch)
- Double crochet (dc)
- Skipping stitches
- 5 dc shells (worked into one stitch)
- Simple join as you go
- Easy edging (single crochet and chain groups around openings)
The “hard” part isn’t hard, it’s just staying consistent. Count your edges, keep the same turning chain method, and your fabric will behave.
If you want extra help understanding a shell as a building block, this quick tutorial on how to do a 5 double crochet shell breaks it down clearly.
Sizing approach, fit notes, and how to customize length and sleeves
This tunic is OVERSIZED as it was inspired by poncho sizing, so you can reduce the ease by choosing a smaller size.
How to choose the right size:
- Measure your bust (or widest point, sometimes hips).
- Review the range of ease per size.
- Choose the size based on how loose of a desired fit.
Easy custom tweaks:
- Longer hem for leggings coverage
- Split hem or not (leave side seams open a bit higher, or no opening at all)
- Longer sleeves by adding more rounds of at the arm opening
- Smaller neckline by adding more rounds of chain groups and single crochet before finishing with two rounds of single crochet.
If you’d like general garment-building tips (not this stitch, just solid basics), Mary Maxim’s overview on how to crochet a top is a helpful companion read.
Why You Will Love This Snapdragon Shells Tunic Pattern (and how it fits real life)
This is the part that matters most: will you enjoy making it, and will you actually wear it?
The stitch pattern is simple, but it looks fancy
Snapdragon Shells has that “wait, you made that?” texture. The shells are offset, so you get a wave effect without doing complicated shaping.
After a few repeats, your hands start to remember the steps. It becomes that relaxing kind of crochet where you can watch a show, chat with family, or just enjoy the quiet.
And because the stitch has built-in movement, solid colors look rich, variegated yarns look playful, and an ombre can be show stopping.
Comfortable fit with easy adjustments, even if garments scare you
A tunic is forgiving by nature. It’s meant to skim, not squeeze.
Courtney has talked with lots of Crochet Besties over the years, and more often than not, many prefer a length that falls at the hips or covers the bottom, and a loose comfortable fit that doesn’t feel like they’re being strangled at the neck or can’t move their arms.
This crochet tunic was designed with that in mind.
If you prefer something shorter, then make fewer rows, and adjust the color change as needed by choosing a total number of rows that can be divided by 3 for even color changing.
Drape matters too. If your fabric feels stiff, blocking will relax the fibers, not matter the fiber content, but you can go up a hook size. If you do choose to go up in hooks size, it will impact how much yarn is needed, so keep that in mind.
For easy crocheting anywhere and anytime, purchase the ad-free PDF from your favorite shop
Check out these crochet patterns

Genevieve Crochet Bolero
The Genevieve Bolero is an easy, size-inclusive lace bolero with overlapping fronts, dramatic balloon sleeves that tie at the wrist, and airy fingering + lace yarn that uses just three stitches and less than three skeins.
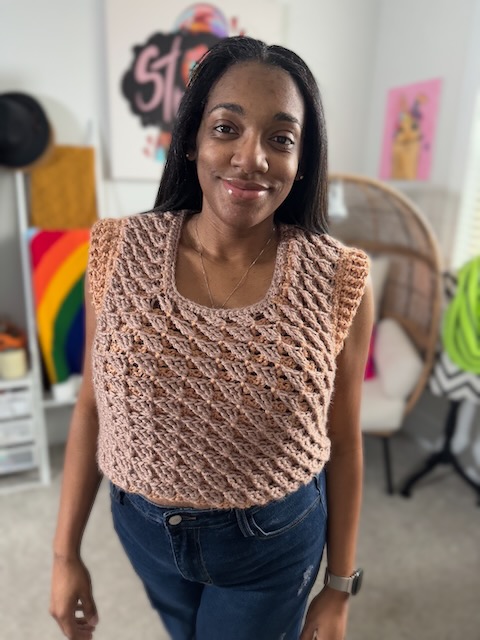
Berry Crop Top
The Berry Crop Top is a reversible, textured crop/vest worked in stretchy embossed wedges with worsted yarn, designed with comfortable negative ease, 11 inclusive sizes from 28–72″ bust, and tons of options to customize length, hem, and styling.
Coco Top
Celebrate color with the Coco Top, a worsted–weight yoke tee inspired by Día de los Muertos, worked in 2–4 bold shades and available in 8 sizes from Small–5X with easy 2″ positive ease for everyday wear.
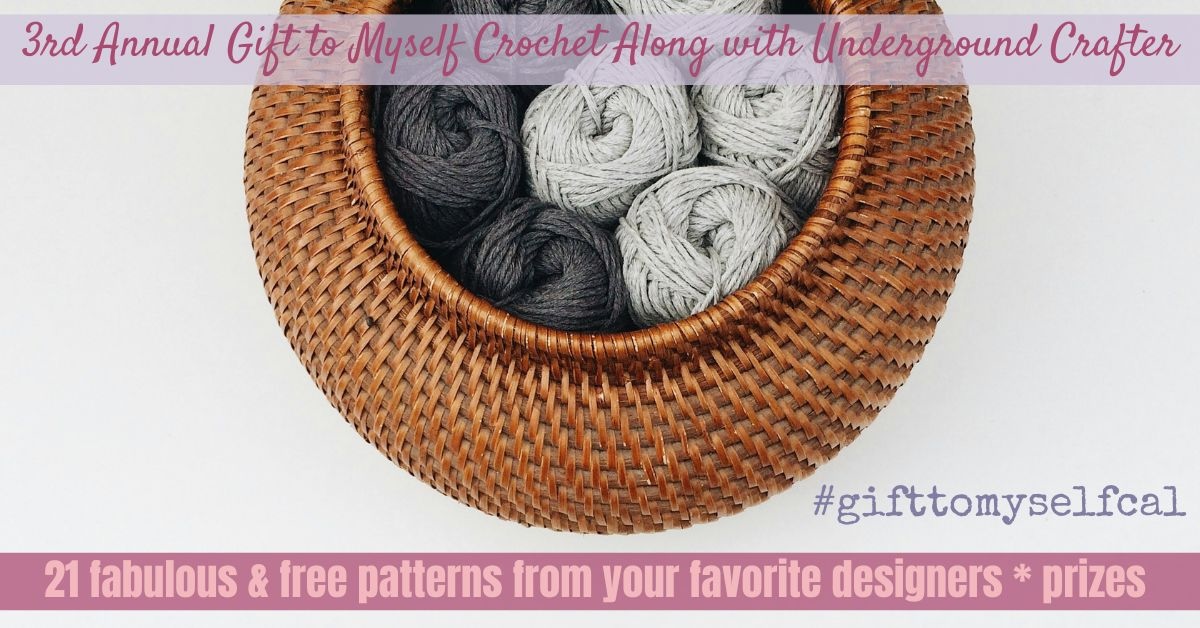
Gift to Myself Crochet Along
I’m thrilled to be a featured designer in the 3rd annual Gift to Myself Crochet Along hosted by Underground Crafter.
From January 2 to January 30, 2026, we’ll be sharing new free crochet patterns that you can make for yourself. It’s a way to treat yourself and slow down after the busyness of the recent holiday season.
You can make these fabulous and free projects to keep, for gifts, or to donate to charity while chatting with other crocheters in the Underground Crafters Facebook and Ravelry groups and sharing your projects to win giveaway prizes!
We’ve partnered with Forbidden Fiber Co., Furls, GlassEyesOnline, Knitter’s Relief Balm, LennyMudPottery, LumosLumos, MBT Creates, Unicorn Clean or WalnutFarmDesigns to bring you some great prizes in our end-of-CAL giveaway. Don’t forget to enter the giveaway in this blog post on Underground Crafter by Sunday, February 1, 2026 at 11:59 pm Eastern.
You can join in by crocheting the patterns as you have time. Share your progress and post pictures of your finished projects. Tag your projects and posts #gifttomyselfcal and #undergroundcrafter on all social media.
Crochet Pattern Instructions
Notes
- Pattern is written in US terms.
- Read entire pattern before beginning.
- Tunic is created in 10 sections: Side One, First Shoulder, Second Shoulder, Side Two, First Shoulder, Second Shoulder, Seaming, Sleeves, Neck Opening, and Hem.
- After Row 2, all shells and dc will be worked between indicated sts.
- A join as you go method is used when creating Side Two after several rows to create a split hem. You have the option to attach all rows, or lengthen the hem. The join as you go is used in place of seaming later.
- 3 colors are used for each side in the sample shown with a “color fade”. The order of color change is provided in a table, if you want to create the same color change pattern.
Materials
- DK #3 yarn in six colors, 1300-2892 yds /1189-2644 m; details in table
- Yarns in sample shown:
- Jammin’ Yarn and Fibers in Teal / Iris, Teal and Iris
- Queen City Yarn Biddleville DK in Witches Brew and Peacoat
- The Miller’s Girl DK in Shades of Purple
- Hook US H8 / 5.00 mm
- Stitch markers x 2
- Yarn Needle
- Scissors
- Measuring Tape
Gauge
Before blocking 2 repeats x 8 rows in pattern = 3.5”w x 3.5” l [9 cm x 9 cm]
After blocking: 2 repeats x 8 rows in pattern = 4”w x 3.75” l [10 cm x 9.5 cm]
How to make gauge swatch:
Note: For this pattern, after the foundation row, work all stitches in the spaces between stitches.
Row 1: 25 fsc
Row 2: CSDC in first st, dc in next 2 sts (2-dc group made), *sk next 2 sts, shell in next st, sk next 2 sts, dc in next 2 sts, rep from * to end, dc in last st, turn. 3 shells, 4 2-dc groups, 2 dc
Row 3: CSDC in first st, *shell btw next 2 sts, dc before and after center dc of next shell (2 dc made), rep from * until 3 sts rem, shell btw 1st and 2nd dc, dc in last st, turn. 4 shells, 3 2-dc groups, 2 dc
Rows 4-14: Rep Rows 2-3
Yarn Amounts
| Yarn | 1 | 2 | 3 | 4 | 5 |
| Yards | 1300 | 1532 | 2162 | 2495 | 2892 |
| Meter | 1189 | 1401 | 1977 | 2281 | 2644 |
| Skeins | 6 | 7 | 9 | 11 | 14 |
| Per Color | 217 yds 198 m | 255 yds 233 m | 360 yds 329 m | 416 yds 380m | 530 yds 485m |
Finished Sizes
All measurements are after blocking.
| Size | 1 | 2 | 3 | 4 | 5 |
| To fit chest circum. | 28-34 in. 71-86 cm | 36-44 in. 91-112 cm | 46-52 in. 117-132 cm | 54-60 in. 137-152 cm | 62-72 in. 157.5 -183 cm |
| Positive ease | 10-16 in. 25-40.6 cm | 8-16 in. 20-40.6 cm | 12-18 in. 30.5-46 cm | 14-20in. 35.5-51 cm | 14-24 in. 35.5-61cm |
| Width, flat | 22 in. 56 cm | 26 in. 66 cm | 32 in. 81 cm | 37 in. 94 cm | 43 in. 109 cm |
| Length, flat | 25 in. 63.5 cm | 25 in. 63.5 cm | 29 in. 74 cm | 29 in. 74 cm | 32 in. 81 cm |
| Arm Opening | 8 in. 20.3 cm | 9 in. 23 cm | 10 in. 25.4 cm | 11 in. 28 cm | 12 in. 30.5 cm |
| Sleeve | 2 in. 5 cm | 2 in. 5 cm | 2 in. 5 cm | 2 in. 5 cm | 2 in. 5 cm |
Pattern Key
Btw: between
Ch: chain
Ch-sp: chain space
Cnr: corner
Dc: double crochet
Dc3tog: double crochet 3 together
Fsc: foundation single crochet
FO: fasten off
Hdc: half double crochet
M: stitch marker
Prev: previous
Rem: remain(s)(ing)
Rep: repeat
RS: right side
Sc: single crochet
Shell: shell
Sk: skip
Sl st: slip stitch
St(s): stitch(es)
WS: wrong side
YO: yarn over
Special Stitches and Techniques
CSDC: pull up a loop that is row height, holding loop in place and wrap yarn around hook (yarn over), insert hook in first st, YO, pull up a loop, [YO, pull through 2 loops] twice
Join as you go – WS: start last dc and stop after first YO and pull through 2, bring yarn towards you, insert hook BACK TO FRONT at the top of corresponding row, YO and pull through the stitch and 2 loops on hook (dc complete); ✦ ch 1, insert hook BACK TO FRONT at top of next row, YO and pull through the row
Join as you go – RS: start last dc and stop after first YO and pull through 2, bring yarn towards you, insert hook FRONT TO BACK at the top of corresponding row, YO and pull through the stitch and 2 loops on hook (dc complete); ✱ ch 1, insert hook FRONT TO BACK at top of next row, YO and pull through the row
Shell: 5 dc between indicated sts
Add to Ravelry Favorites
Let’s get to stitching!
Side One
Note: refer to the table for the color changes
Row 1: With Color A, 81 (95, 116, 130, 144) fsc, turn. 81 (95, 116, 137, 144) sts
Row 2: CSDC in first st, dc in next 2 sts (2-dc group made), *sk next 2 sts, shell in next st, sk next 2 sts, dc in next 2 sts, rep from * to end, dc in last st, turn. 11 (13, 16, 18, 20) shells, 12 (14, 17, 19, 21) 2-dc groups, 2 dc
Row 3: CSDC in first st, *shell btw next 2 sts, dc before and after center dc of next shell (2-dc group made), rep from * until 3 sts rem, shell btw 1st and 2nd dc, dc in last st, turn. 12 (14, 17, 20, 23) shells, 11 (13, 16, 19, 22) 2-dc groups, 2 dc
Rows 4-48 (48, 56, 56, 60): Continue in pattern of rep Rows 2-3, and changing colors per the table below.
| Size | Color A | Color B | Color C |
| 1 | 1-16, 18-19, 22 | 17, 20-21, 23-35, 37-38, 41 | 36, 39-40, 42-57 |
| 2 | 1-16, 18-19, 22 | 17, 20-21, 23-35, 37-38, 41 | 36, 39-40, 42-57 |
| 3 | 1-19, 21-22, 25 | 20, 23-24, 26-41, 43-44, 47 | 42, 45-46, 48-66 |
| 4 | 1-19, 21-22, 25 | 20, 23-24, 26-41, 43-44, 47 | 42, 45-46, 48-66 |
| 5 | 1-21, 23-24, 27 | 22, 25-26, 28-45, 47-48, 51 | 46, 49-50, 52-72 |
First Shoulder
Mark 25 (32, 39, 46, 53) sts from each end with a M. The stitches between each Shoulder will be part of the neck opening.
*Note Row numbering will continue rather than starting at 1 due to the color change pattern
Row 49 (49, 57, 57, 61): CSDC in first st, *shell btw next 2 sts, dc before and after center dc of next shell (2-dc group made), rep from * until last 2-dc group before M, shell btw 1st and 2nd dc, dc in 1st st of shell row below, turn. 4 (5, 6, 7, 8) shells, 3 (4, 5, 6, 7) 2-dc groups, 2 dc
Row 50 (50, 58, 58, 62): CSDC in first st, dc in next 2 sts (2-dc group made), *sk next 2 sts, shell in next st, sk next 2 sts, dc in next 2 sts, rep from * to end, dc in last st, turn. 3 (4, 5, 6, 7) shells, 4 (5, 6, 7, 8) 2-dc groups, 2 dc
Rows 51-56 (51-56, 59-66, 59-66, 63-72): Rep [prev 2 rows] 3 (3, 4, 5, 5) more times, turn.
Last Row: Ch 1, hdc in first st, hdc in next 2 sts, *ch 2, sk next 2 sts, sc in next st, ch 2, sk next 2 sts, hdc in next 2 sts, rep from * across, hdc in last st. Do not FO.
Second Shoulder
Note: Numbering will start at 1 since the Second Shoulder is worked separately
Row 1: Working down the side of the First Shoulder, ch 1, turn corner, sc in side of last hdc from the Shoulder, 2 sc in side of next 6 (8, 10, 12, 12) dc, turn cnr, *sc in center dc of shell, ch 2, sk next 2 sts, hdc in next 2 dc, ch 2, sk next 2 sts, rep from * across until 2 sts before M, sc in center dc of shell, ch 1, sk next st, sl st in next st, CSDC in same st, *shell btw next 2 sts, dc before and after center dc of next shell (2-dc group made), rep from * until 3 sts rem, shell btw 1st and 2nd dc, dc in last st, turn. 4 (5, 6, 7, 8) shells, 3 (4, 5, 6, 7) 2-dc groups, 2 dc
Row 2: CSDC in first st, dc in next 2 sts (2-dc group made), *sk next 2 sts, shell in next st, sk next 2 sts, dc in next 2 sts, rep from * to end, dc in last st, turn. 3 (4, 5, 6, 7) shells, 4 (5, 6, 7, 8) 2-dc groups, 2 dc
Rows 3-8 (8, 10, 12, 12): Rep [Rows 1-2] 2 (3, 4, 5, 5) more times, turn.
Last Row: Ch 1, hdc in first st, hdc in next 2 sts, *ch 2, sk next 2 sts, sc in next st, ch 2, sk next 2 sts, hdc in next 2 sts, rep from * across, hdc in last st. Do not FO.
Arm Openings
Measure 8 (9, 10, 11, 12) in. / 20.3 (23, 25.4, 28, 30.5) cm down from the last row of each Shoulderand place M
Side Two
This is worked in the same manner as Side One, First Shoulder and Second Shoulder, including the color changes with D, E and F. You will start joining as you go at the start and end of Row 10 following Special Techniques.
Start with Color D, follow Side One instructions until Row 9 (RS), at end of row, remove hook from loop, insert hook BACK to FRONT at the bottom of Row 10 Side One and pull loop through
Row 10 (WS): Following Join as you go – WS and starting at ✦, dc in first st, dc in next 2 sts (2-dc group made), *sk next 2 sts, shell in next st, sk next 2 sts, dc in next 2 sts, rep from * to end, follow Join as you go -WS to dc in last st, turn. 11 (13, 16, 18, 20) shells, 12 (14, 17, 19, 21) 2-dc groups, 2 dc
Row 11 (RS): Following Join as you go -RS and starting at ✱, dc in first st, *shell btw next 2 sts, dc before and after center dc of next shell (2-dc group made), rep from * until 3 sts rem, shell btw 1st and 2nd dc, dc in last st, turn. 12 (14, 17, 20, 23) shells, 11 (13, 16, 19, 22) 2-dc groups, 2 dc
Continue in pattern joining each row following the Special Techniques instructions until you reach the M, then continue in pattern without joining and changing colors. Do not FO after completing the Second Shoulder.
| Size | Color D | Color E | Color C |
| 1 | 1-16, 18-19, 22 | 17, 20-21, 23-35, 37-38, 41 | 36, 39-40, 42-57 |
| 2 | 1-16, 18-19, 22 | 17, 20-21, 23-35, 37-38, 41 | 36, 39-40, 42-57 |
| 3 | 1-19, 21-22, 25 | 20, 23-24, 26-41, 43-44, 47 | 42, 45-46, 48-66 |
| 4 | 1-19, 21-22, 25 | 20, 23-24, 26-41, 43-44, 47 | 42, 45-46, 48-66 |
| 5 | 1-21, 23-24, 27 | 22, 25-26, 28-45, 47-48, 51 | 46, 49-50, 52-72 |
Seaming
Flip Tunic inside out, using yarn from Second Shoulder, line up the stitches, sc in each st, ch 1, turn corner, sc in side of last hdc from the Shoulder, 2 sc in side of next 8 (8, 10, 12, 12) dc, sl st to join, FO.
Repeat for second shoulder.
Sleeve
Make 2
Note: need to evenly space hdc around the Arm Opening that is a multiple of 7. Change between C and F in each round.
Rnd 1: Attach C at the bottom of the Arm Opening, ch 1, evenly space hdc until the Shoulder seam, change to F, continue to evenly space hdc around, sl st to join, turn.
Rnd 2: Change color as needed, ch 1, hdc in each st around, sl st to join.
Rnd 3: CSDC in first st, *sk next 2 sts, shell in next st, sk next 2 sts**, dc in next 2 sts, rep from * around, ending at **, dc in last st, sl st to join, turn.
Rnd 4: CSDC btw first and last dc of prev rnd, 2 dc in same sp, *dc before and after center dc of next shell (2-dc group made)**, sk next 2 sts, shell btw next 2 sts, sk next 2 sts, rep from * around, ending at **, 2 dc in sp btw first and last dc of prev rnd, change to B or E, sl st to join, turn.
Rnd 5: Rep Rnd 3, FO.
Neck Opening
Rnd 1: Attach yarn at shoulder seam, CSDC in same st where yarn is attached, *dc each st until 2 sts before the corner, dc3tog, rep from * 3 more times, dc in rem st, sl st to join. 120 dc
Rnd 2: Sl st, ch 1, sc in same st, ch 6, sk next 3 sts, *sc in next st, ch 6, sk next 3 sts, rep from * until 3 sts before cnr, sc in next st, ch 6, sk next 5 sts, **[sc in next st, ch 6, sk next 3 sts] 2 (2, 3, 3, 3) times**, ch 8, sk next 5 sts, rep from ** to **, rep from * around, sl st to join.
Rnd 3: Sl st in first 3 sts, ch 1, sc in center of ch-sp, *[ch 6, sc in center of next ch-sp**, rep from * until ch-sp before cnr, ch 3, sc in center of ch-sp, ch 3, sc in center of next ch-sp], rep from * 3 more times ending at **, sl st to join.
Rnd 4: Sl st in first 3 sts, ch 1, sc in center of ch-sp, *ch 4, sc in center of next ch-sp or sc, rep from * around, sl st to join.
Rnd 5: Ch 1, sc in first st, 3 sc in next ch-sp, [*3 sc in next ch-sp, rep from * until next cnr, **4 sc in next ch-sp, rep from ** until next cnr] 2 times, rep from * for rem ch-sp, sl st to join, TURN.
Rnd 6: Ch 1, *sc in each st to cnr, sk 2 sts in cnr, rep from * around, sl st to join, FO.
Hem
Attach yarn at split between Side One and Side Two, evenly sc down the split to cnr, *ch 1, turn cnr, sc in each st to next cnr, ch 1, turn cnr, evenly sc up** and then down the second split, rep from * around, ending at **, sl st to join, FO.
Finishing
Weave in all ends.
Wet block Tunic.
Lay flat to dry.
Conclusion
If you’ve been wanting a wearable shell crochet top, this Reversible Shells Tunic is a sweet win. The stitch looks detailed, but it’s built from mostly double crochets, and the shape stays simple (a few rectangles practically no seaming, done).
Swatch first to ensure it will be the desired size and fit. Pick colors based on the look you want, crisp shells and soft drape, and don’t be shy about customizing length.
And if you’re the kind of maker who loves checkboxes and fewer phone scrolls, a printable PDF version of the steps can be a calm little upgrade while you crochet.
Want to talk about yarn goodness, crochet tips, and exclusive weekly deals? Join my Facebook Group, Confidently Crochet with Creations By Courtney.
If we’re not hanging out on social media yet, come check me out on Facebook, Instagram and Pinterest.
Join my newsletter for sneak peeks, crochet tips, and more.
Use #CreationsByCourtney on social media when sharing your projects.
This pattern is not to be duplicated or resold, and not to be reproduced commercially. You may sell finished products on Etsy, at farmers markets, and craft fairs, but please credit Creations By Courtney as the pattern’s author.


2 Responses
I have read through several times but do not see a table that tells how much yarn is needed for each size. i only see this sentence: DK #3 yarn in six colors, 1300-2892 yds /1189-2644 m; details in table. Am I completely missing that table?
Hi Sandra,
Thank you for letting me know that it was missing. I have updated the post to add the yarn amounts. Sorry about that oversight. You may need to clear your browsing history for it to show up.