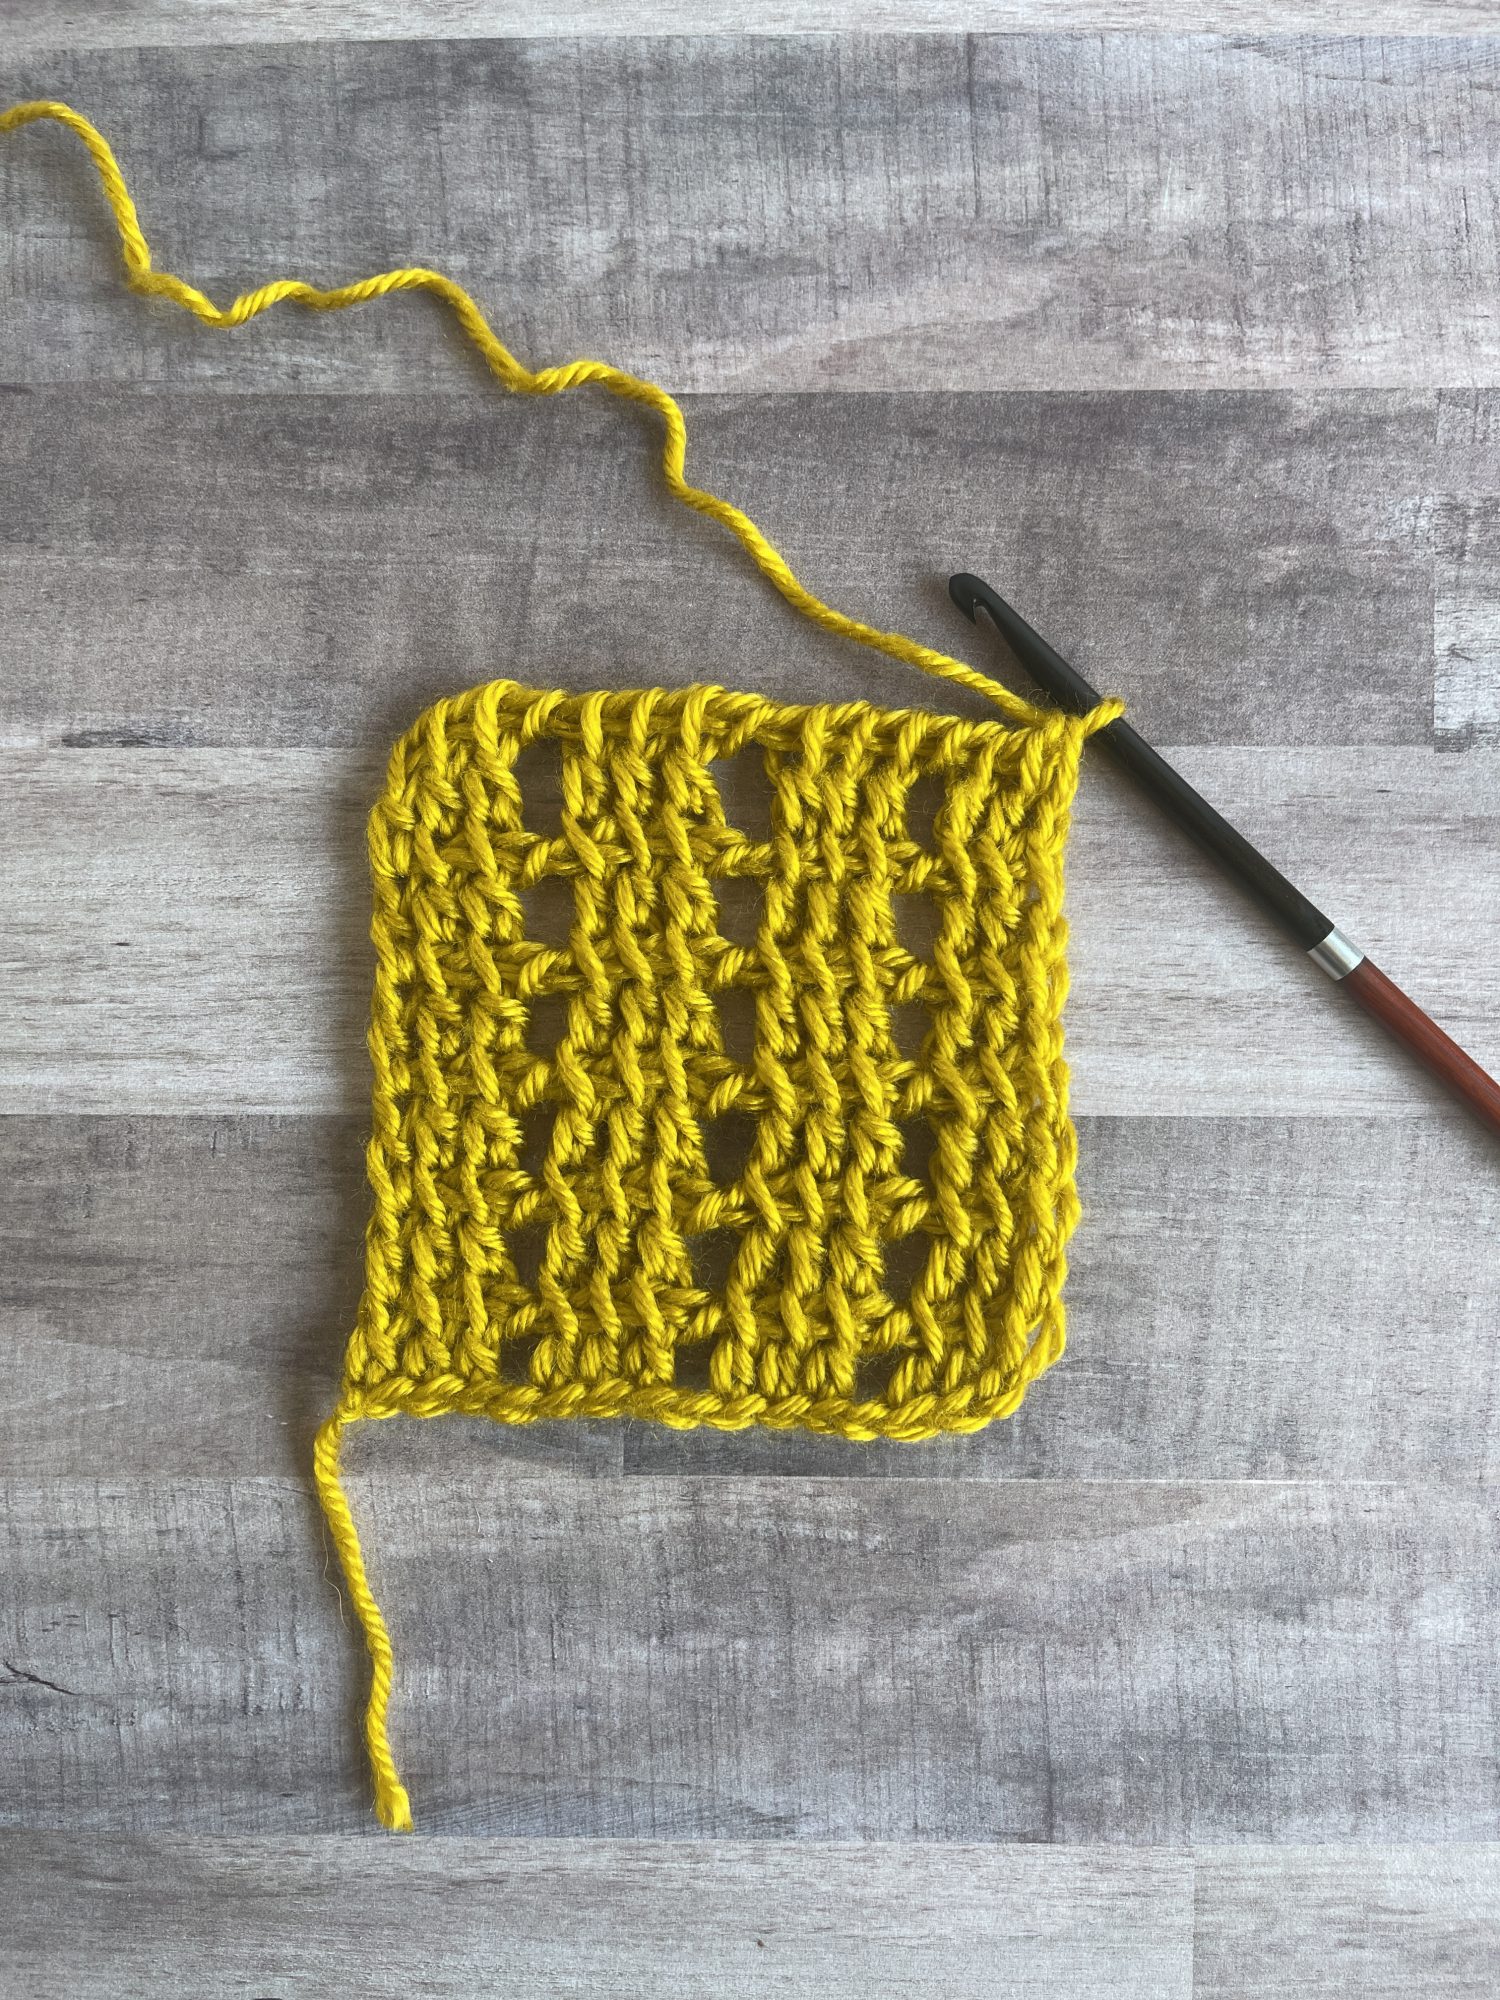
Learn how to modify the raise diagonal stitch with this crochet tutorial!
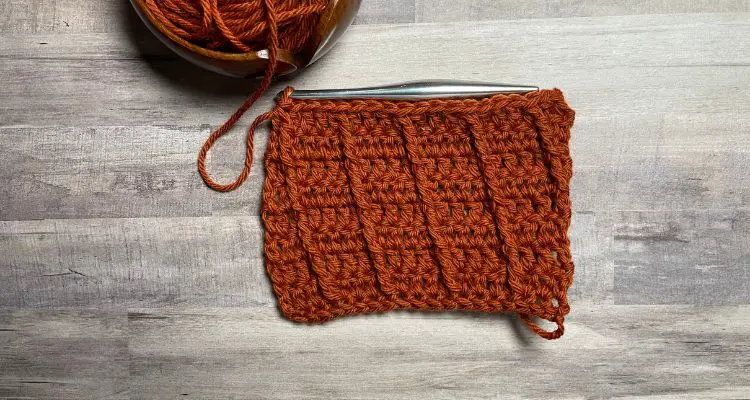
This is a fun crochet tutorial for a textured stitch pattern that uses only double crochet and post stitches.
The original stitch pattern used single crochet, double crochet and front post double crochet. As someone who has a never-ending to make list and limited time, I chose to modify the stitch pattern to work up quicker and without skipping a stitch behind the post stitches.
Personally, I’m not a fan of the skipped stitch, so I added a step to the front post extended treble stitch to create a smooth backside of the fabric. I used a similar technique in the Modified Split Front Post Stitch used in the Wrapped in Waves Cape.
Below you’ll find instructions for this crochet stitch tutorial in two forms, starting with foundation stitches and starting with chains. Plus a video tutorial.
Multiples needed for the stitch
Multiple needed: ch a multiple of 4
Start with foundation stitches: multiple of 4+3
Abbreviations Used:
Ch: chain
CSDC: chainless starting double crochet
Dc: double crochet
FPetr: front post extended treble crochet
FL: front loop
FO: fasten off
Fsc: foundation single crochet
Hdc: half double crochet
Rem: remain(s)
Rep: repeat
RS: right side
Sl st: slip stitch
Sc: single crochet
Sk: skip
Sp: space
St(s): stitch(es)
Tr: treble crochet
WS: wrong side
YO: yarn over
SPECIAL STITCHES & TECHNIQUES
CSDC: pull up a loop to height of row, holding loop in place and wrap yarn around hook (yarn over), insert hook in first st, YO, pull up a loop, [YO, pull through 2 loops] twice
FPetr: YO 2 times, insert hook from front to back to front around indicated st, YO, pull up a loop (4 loops on hook), YO, pull through 1 loop, [YO, pull through 2 loops] 2 times (2 loops on hook), working in st behind the post (that would be skipped), YO, insert hook in st, YO, pull up a loop (4 loops on hook), YO, pull through 3 loops (hdc made; 2 loops on hook), YO, pull through 2 loops

*Disclosure: This post may contain affiliate links to products that I use, and think you will enjoy using too. Should you decide to use any such link, I will earn a small commission at no cost to you. Thank you for supporting this small business.
Supplies Used:
WeCrochet Wool of the Andes in Marsala
Furls Crochet Streamline Metal 8.00mm
NOTES
- CSDC can be substituted with a ch 3.
- Carefully count the chains that are skipped to make the first row.
Written Instructions
Row 1: 19 fsc, turn
Row 2: CSDC in first st, dc in each st, turn. 19 dc
Row 3: CSDC in first st, dc in next 2 sts, FPetr around 3rd st 2 rows below, dc in next 3 sts, sk 3 sts 2 rows below, FPetr around next st 2 rows below, rep from * to end, turn. 15 dc, 4 FPetr
Row 4: Rep Row 2
Row 5: CSDC in first st, dc in next 3 sts, FPetr around post 2 rows below, *dc in next 3 sts, FPetr around post 2 rows below, rep from * until 2 sts rem, dc in last 2 sts, turn. 15 dc, 4 FPetr
Row 6: Rep Row 2
Row 7: CSDC in first st, FPetr around first st 2 rows below, * dc in next 3 sts, FPetr around post 2 rows, rep from * until 1 st rem, dc in last st, turn. 14 dc, 5 FPetr
Row 8: Rep Row 2
Row 9: CSDC in first st, dc in next st, FPetr around post 2 rows below, * dc in next 3 sts, FPetr around next post 2 rows below, rep from * to end of row, turn. 14 dc, 5 FPetr
Rep Rows 2-9
Prefer to use chains to start a project?
Ch 20
Row 1: Starting in 2nd ch from hook, sc in each ch, turn. 19 sc
Row 2: Ch 3 (counts as dc here and throughout), dc in each st, turn. 19 dc
Row 3: Ch 3, dc in next 2 sts, FPetr around 3rd st 2 rows below, dc in next 3 sts, sk 3 sts 2 rows below, FPetr around next st 2 rows below, rep from * to end, turn. 15 dc, 4 FPetr
Row 4: Rep Row 2
Row 5: Ch 3, dc in next 3 sts, FPetr around post 2 rows below, *dc in next 3 sts, FPetr around post 2 rows below, rep from * until 2 sts rem, dc in last 2 sts, turn. 15 dc, 4 FPetr
Row 6: Rep Row 2
Row 7: Ch 3, FPetr around first st 2 rows below, * dc in next 3 sts, FPetr around post 2 rows, rep from * until 1 st rem, dc in last st, turn. 14 dc, 5 FPetr
Row 8: Rep Row 2
Row 9: CSDC in first st, dc in next st, FPetr around post 2 rows below, * dc in next 3 sts, FPetr around next post 2 rows below, rep from * to end of row, turn. 14 dc, 5 FPetr
Rep Rows 2-9
Want to see that in video?
That’s all there is to Modified Raised Diagonal Stitch!
I hope you enjoyed this crochet tutorial. How will you use this crochet stitch/technique?
Use #creationsbycourtney when sharing your practice swatch. I want to give you a shout out!
Pin it for Later
You may like these tutorials/ crochet patterns
If we’re not hanging out on social media yet, come check me out on Facebook, Instagram and Pinterest.
Want to talk about yarn goodness, crochet tips, and exclusive weekly deals? Join my Facebook Group, Creations By Courtney Community.
Join my newsletter for sneak peeks, crochet tips, and more. HERE
Please use #CreationsByCourtney on social media when sharing your projects.

