
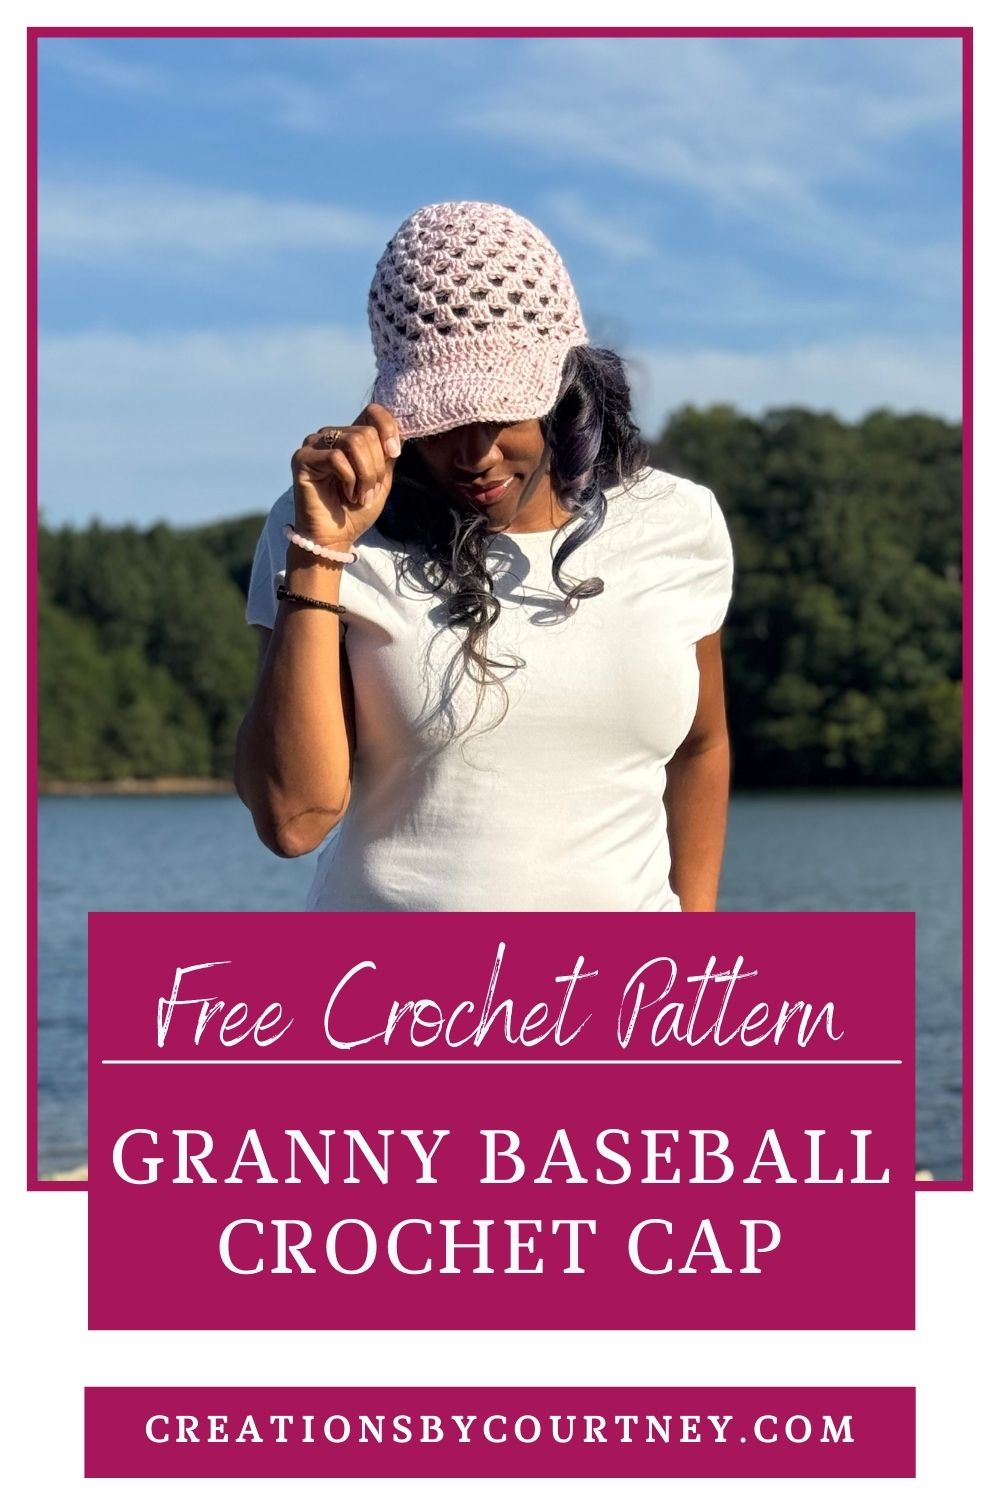
Two things that many people love are baseball and granny squares, so why not have a crochet baseball hat made with granny stitches? This crochet baseball cap blends casual style with handmade charm to become a new favorite to thrown on daily.
The granny stitch has been around for a while, and it beloved by many, especially when used for more than a square or blanket, such as ponchos and trendy dresses. The simple clusters create a fabric that lends itself to be flexible or sturdy based on the fiber you choose. As a classic stitch and style of hat this is a great project for beginners who learned with the granny stitch, but will also keep the interest of experienced crocheters as it’s not often that we find a granny stitch circle.
Why the Granny Stitch + Crochet Baseball Cap
Well one of my dearest friends, Channy, who has become part of my family, is currently fighting stage 3 breast cancer. It has been really hard for her, and designing a hat to continue to raise awareness for not just breast cancer but all forms of cancer is one the small things I have done to let her know that she is loved and has support.
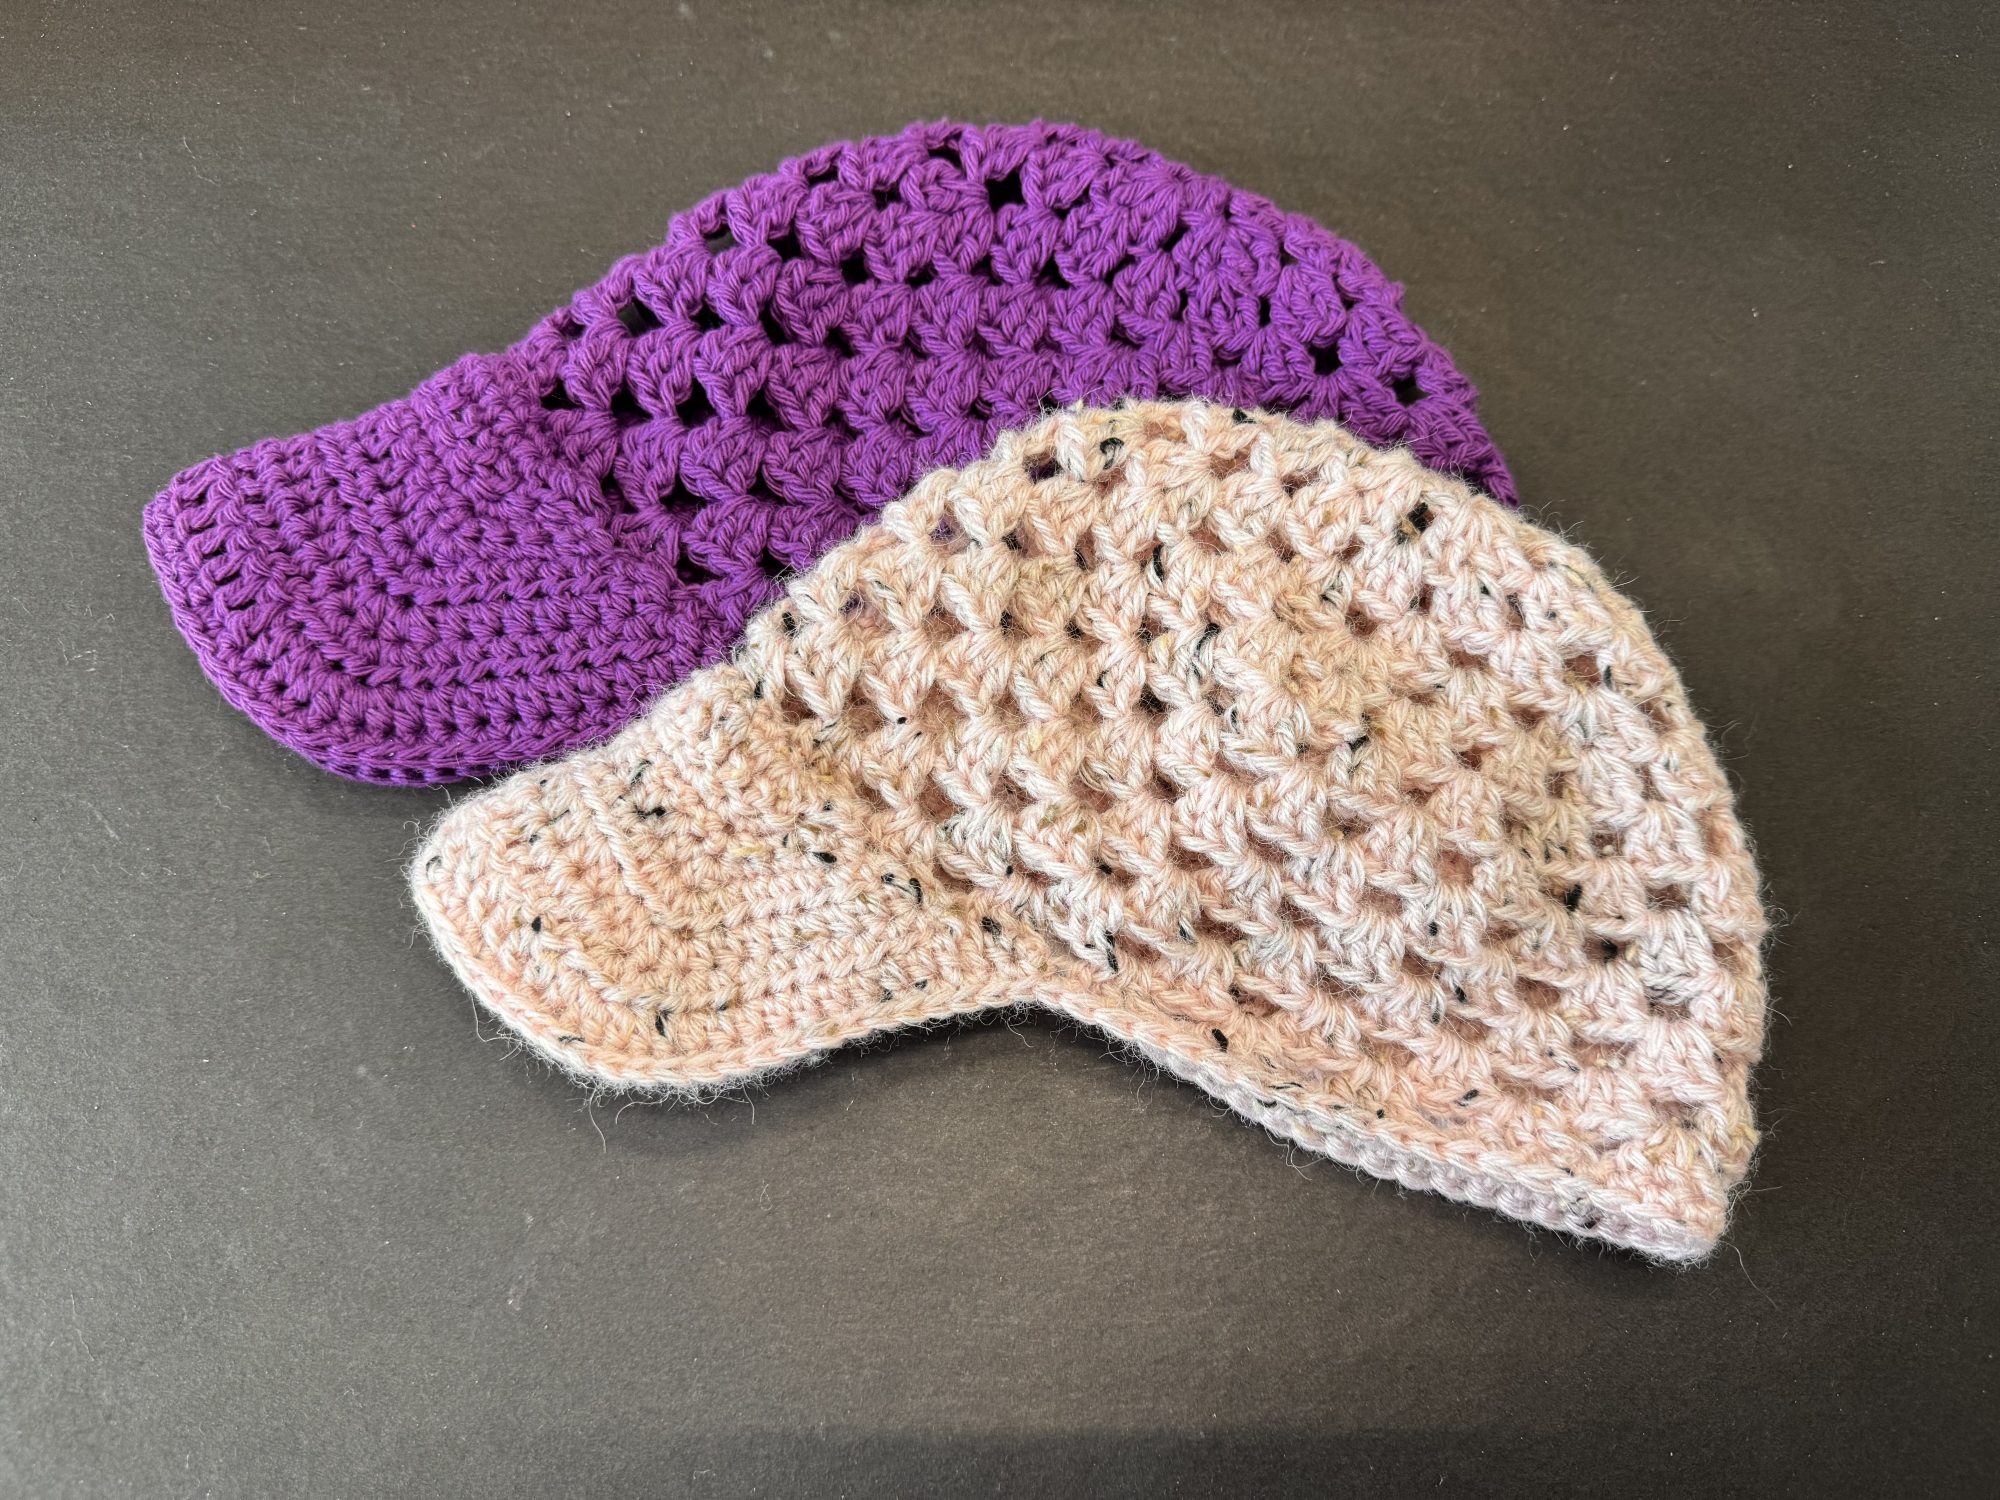
In making sure that it was a crochet hat that she would love, I asked Channy what style of hat she would like, and she sent several caps with brims. My first attempt was to create a slouchy beanie with “permanent” folds, and it did not go well. A happy accident from the first attempt was creating what appeared to be a breast on the crown, LOL.
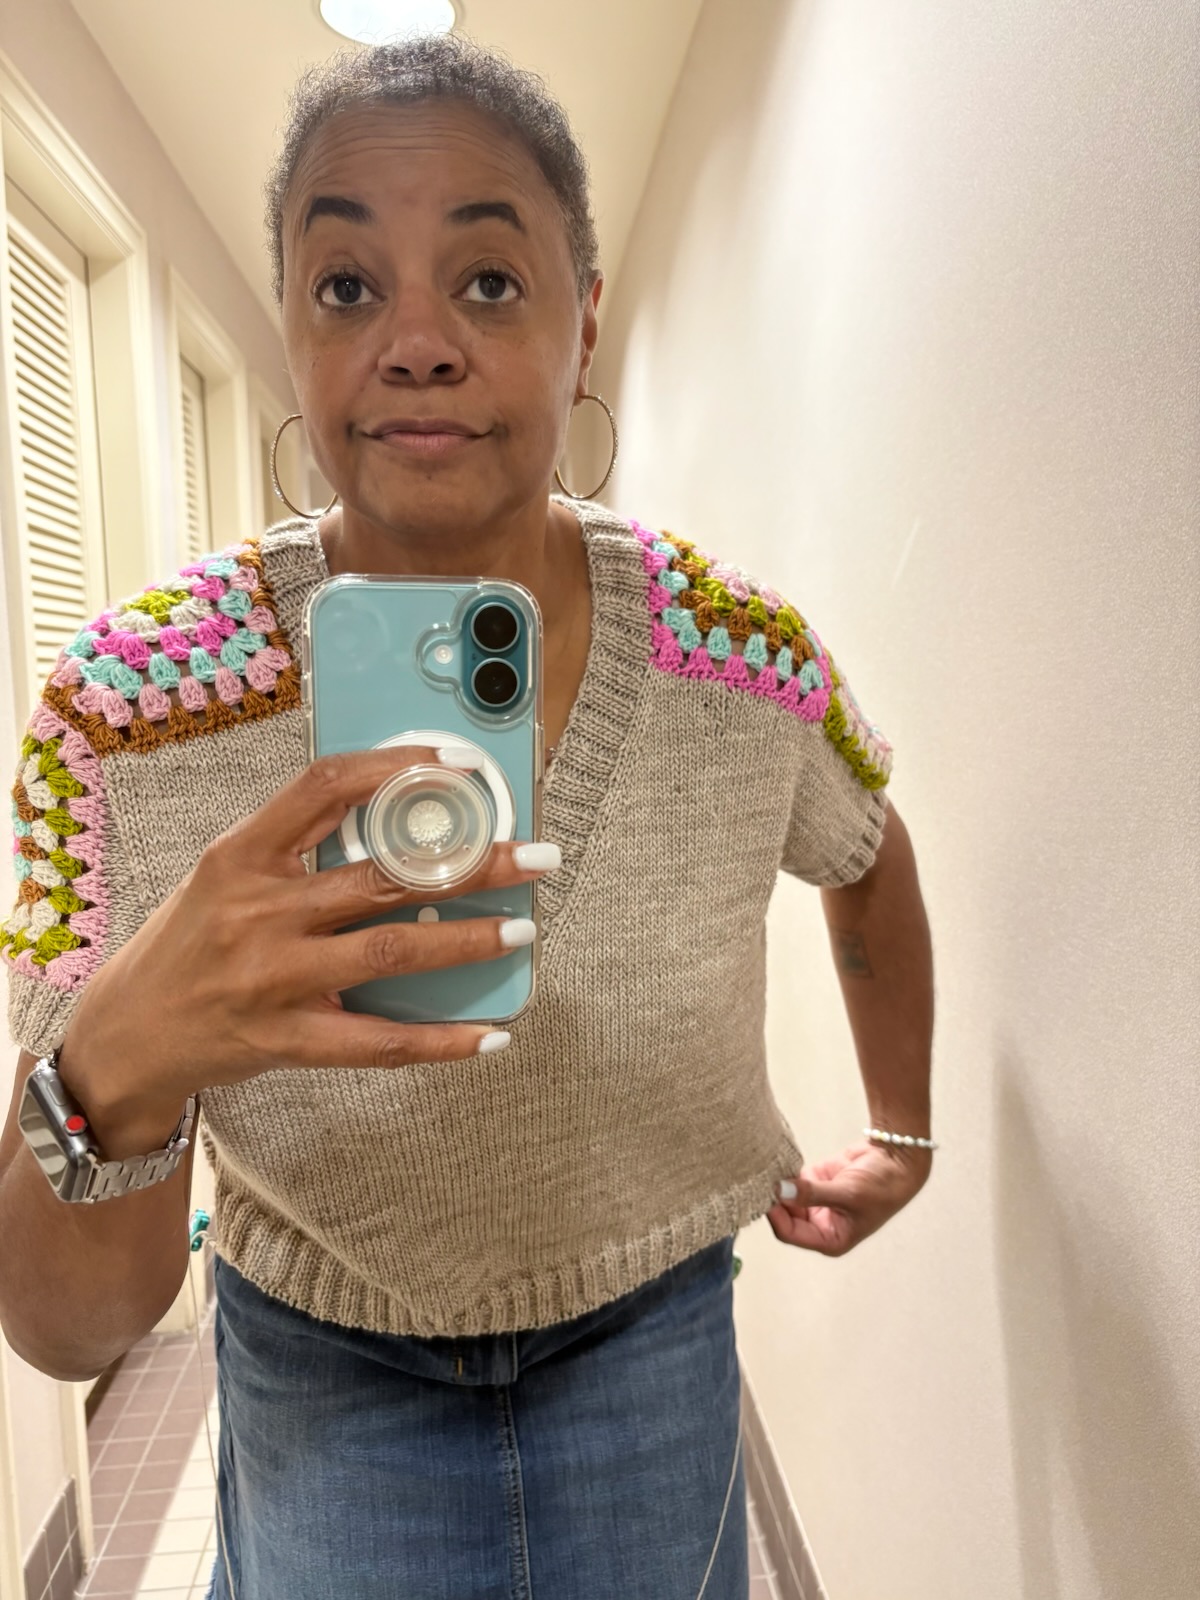
I set the first attempt aside and scrolled through the gorgeous knit and crochet projects Channy has finished and shared to her IG page, which landed me on the Geddy Tee. This fantastic pattern is a knit top with granny squares placed at the shoulder and sleeves. I knew that I needed to include the granny stitch with a baseball cap, as there are enough beanie or bucket hat patterns made from multiple granny squares.
I grabbed “Every Way with Granny Crochet: 50 shapes in Classic Granny Stitch” by Julia Madill from my bookshelf and started flipping through. Of course I found the granny in a circle pattern, which is perfect for a circle rug or blanket, but not a hat. I put my Courtney spin on it to create what I think is the perfect crochet baseball hat shape in the granny stitch.
Doesn’t Channy look great in her Geddy Tee?
Channy reminds me to enjoy all of the good and tough moments with my young kids, and that there is time to work on the dream goals later. She is a constant reminder of what is possible with a plan. She is the catalyst to me finding a local fiber crew, well local is subjective since we literally live is every part of metro Atlanta, LOL. I know that whether I want to travel, laugh or need an understanding ear, Channy is that person. I hope that you have a Channy kind of friend or relative in your life.
Keep reading to learn more about the annual Crochet Cancer Challenge hosted by Sweet Potato 3, and how you can support any cancer warriors that you have in your life and community.
Choosing the Right Yarn for Creating a Crochet Granny Stitch Baseball Hat
There’s two things to consider when choosing the right yarn: what will be good for the structure of the crochet baseball hat, and won’t irritate the wearer, particularly as a gift for a cancer patient or one that recently completed treatment.
Now, if you’re finding this free crochet pattern outside of the Crochet Cancer Challenge, and you plan to make the Granny Baseball Cap, I would still follow the yarn recommendations but consider wool for the chilly days.
Choosing the Right Yarn
Picking the right yarn is key to balancing comfort and structure in your crochet baseball cap. Since a cap needs to hold its shape but also feel good on your head, the choice of fiber matters a lot.
- Cotton Yarn: This is a top choice for crochet baseball caps. Cotton breathes well, feels soft against the skin, and offers enough firmness to keep the cap structured. It’s great for warm weather since it won’t trap heat.
- Cotton-Blend Yarns: Blends like cotton with acrylic or bamboo add a little stretch and durability without losing breathability. These blends can smooth out the stitch texture while providing extra comfort.
- Acrylic Yarn: Acrylic is affordable and comes in many colors. It’s lightweight but doesn’t breathe as well as cotton. If you pick acrylic, choose a soft, high-quality version to avoid itchiness.
- Wool and Wool Blends: Wool offers excellent structure and warmth, making it a good option for cooler climates, but can work for warm weather too since wool wicks away moisture. Blends with a higher content of acrylic or cotton is less likely to cause irritation to the scalp. If donating this crochet baseball cap to a hospital, avoid wool and only use acrylic or cotton.
Optional Supplies
If you’re new to Creations by Courtney crochet patterns, I tend to create seamless designs or require minimal sewing using supplies that most crafters have on hand.
When looking at other baseball hat patterns, it was important to create a brim that wasn’t too short, too long, or floppy. I borrowed one of my husband’s snap back baseball hats to create the brim, which is a made from two layers for stability.
Depending on the yarn that you choose, you may want to consider adding some plastic canvas between the brims to hold the shape. Based on the feedback from pattern testers, heavy worsted weight would benefit the most from the added support of the canvas between the layers of the brim.
Another option to strengthen the brim is to tighten the golden loop of each stitch or use a smaller crochet hook. This will shorten the brim a bit, so it is worth making the first layer and trying it on before fastening off.
A third option for a stiff brim is to use some fabric stiffener. If you decide to experiment with this method, I highly recommend using plastic bags or something to shape the brim while it dries. If you allow it dry flat, you will have a flat brim compared to drying in a curved shape. Also, do not seam the brims until after having applied and dried the fabric stiffener.
Styling Your Crochet Granny Stitch Baseball Hat
A crochet baseball cap made with the granny stitch isn’t just a hat; it’s a versatile accessory that can add charm and personality to your everyday outfits. Its handmade texture and relaxed vibe make it easy to style for various looks, from casual weekend wear to more polished street style. Along with styling tips, knowing how to care for your crochet hat will keep it looking fresh and maintain its shape season after season.
Outfit Ideas Featuring Crochet Baseball Caps
The granny stitch baseball cap works perfectly with casual and trendy ensembles, giving you a laid-back look that still stands out. Here are some outfit ideas to wear your crochet baseball cap with confidence:
- Casual Weekend Look: Pair your crochet baseball cap with a simple t-shirt or tank top and high-waisted denim shorts or jeans. Add white sneakers and a lightweight backpack for effortless style that’s perfect for running errands or meeting friends.
- Street Style Edge: Match the crochet cap with an oversized graphic sweatshirt or hoodie and joggers. Finish with chunky sneakers or boots to balance the softness of the hat with a modern urban vibe.
- Summer Easygoing: Wear the hat alongside a breezy sundress or a flowy romper. The granny stitch adds a cozy texture that contrasts beautifully with light, floating fabrics. Sandals or espadrilles complete the look.
- Layered Fall Outfit: Combine your crochet baseball cap with a denim jacket, longer-sleeve shirt, and slim jeans or wide leg jeans. Ankle boots add a bit of polish, making the cap the perfect complement to cool-weather layers. Don’t forget the crossbody purse.
- Sporty Chic: Team your crochet baseball cap with a fitted tank or sports bra, high-waisted leggings, and slip-on sneakers. It’s a great mix of sporty and handmade softness, ideal for casual outings or a walk at the park.
You’ll find this cap works with lots of textures—cotton tees, denim, knit sweaters, and even lightweight linen. Its colors can either blend with your outfit or serve as a focal point. Experiment with solid tones for a classic look or pick a multicolor granny stitch cap to brighten neutral outfits.
*Disclosure: This post may contain affiliate links to products that I use, and think you will enjoy using too. Should you decide to use any such link, I will earn a small commission at no cost to you. Thank you for supporting this small business.
ADD TO RAVELRY FAVORITES
MATERIALS
- Mary Maxim Natural Alpaca Tweed, #4 worsted weight yarn (77% acrylic, 20% alpaca, 3% viscose; 262 yds/ 240 m; 3.5 oz/ 100 g): Rose Quartz
- Alternative yarns
- US H (5.00 mm) crochet hook. These are my favorite crochet hooks.
- Scissors
- Yarn Needle
- Measure Tape
GAUGE
4 rounds in pattern = 4” [10 cm]
FINISHED SIZE(S)
Adult: 6.5” crown dia. x 5” height, 3.5” brim [16.5 cm dia. x 13cm x 9 cm]
PATTERN KEY
4-dc-CL: 4 double crochet cluster
Beg: beginning
BL: back loop
BLO: back loop only
Ch: chain
CL: cluster
CSDC: chainless starting double crochet
Dc: double crochet
Dcbl: double crochet in back loop
Dcfl: double crochet in front loop
Edc: extended double crochet
FL: front loop
FLO: front loop only
FO: fasten off
Hdc: half double crochet
Hdcbl: half double crochet in back loop
Hdcfl: half double crochet in front loop
M: stitch marker
PM : place stitch marker
Rem: remain(s)
Rep: repeat
RS: right side
Sc: single crochet
Scbl: single crochet in back loop
Scfl: single crochet in front loop
Sk: skip
Sl st: slip stitch
Sp: space
St(s): stitch(es)
WS: wrong side
YO: yarn over
SPECIAL STITCHES & TECHNIQUES
4-dc-CL: 4 dc in indicated space
CL: 3 dc in indicated space
Edc: YO, insert hook in indicated st, YO and pull up a loop (3 loops on hook), YO and pull through 1 loop (3 loops on hook), [YO and pull through 2 loops] 2 times
EXPERIENCE LEVEL
Intermediate
NOTES
- Pattern is written in US terms.
- Read entire pattern before beginning.
- The fabric will curl some as you create the Crown. Keeping the stitches facing you for the right side.
- You will not turn your work while making Crown and Sides of the Channy Granny Baseball Hat.
- You will turn each row when making the Brim.
- When making a CL in a 4-dc-CL, you will use the space between the 2nd and 3rd dc of the 4-dc-CL
Purchase the ad-free PDF from your favorite pattern shop


Don’t forget to join the Confidently Crochet with Creations By Courtney for CALs, crochet tips, and yarnie fun.
INSTRUCTIONS
Crown
Make a magic ring
Rnd 1: CSDC in ring, ch 1 or ch 4 (counts as dc and ch-1 sp here and throughout), [2 dc, ch 1] 5 times in ring, dc, sl st to join (sl st to 3rd ch if ch 4 was used). 12 dc, 6 ch-1 sp
Rnd 2: Sl st in first ch-1 sp, ch 4, [4-dc-CL, ch 1] in next ch-1 sp around, 3 dc in first ch-1 sp, sl st to 3rd ch to join. 24 dc, 6 ch-1 sp
Rnd 3: Sl st in first ch-1 sp, ch 4, *CL in next 4-dc-CL (refer to Notes), ch 1**, CL in next ch-1 sp, rep from * around stopping at **, 2 dc in first ch-1 sp, sl st to 3rd ch to join. 36 dc, 12 ch-1 sp
Rnd 4: Sl st in first ch-1 sp, ch 4, *CL in next ch-1 sp, ch1, rep from around until first ch-1 sp, 2 dc in first ch-1 sp, sl st to 3rd ch to join. 36 dc, 12 ch-1 sp
Note: Check gauge here
Rnd 5: Sl st in first ch-1 sp, ch 4, * 4-dc-CL in next ch-1 sp, ch 1**, CL in next ch-1 sp, ch 1, rep from * around stopping at **, 2 dc in first ch-1 sp, sl st to 3rd ch to join. 42 dc, 12 ch-1 sp
Rnd 6: Sl st in first ch-1 sp, ch 4, *Cl in next 4-dc-CL, ch 1, [CL in next ch-1 sp, ch 1] 2 times, rep from * around stopping after CL in last ch-1sp, 2 dc in first ch-1 sp, sl st to 3rd ch to join. 54 dc, 18 ch-1 sp
6.5” (16.5 cm) dia
Side
Rnd 7: Sl st in first ch-1 sp, ch 4, [CL, ch 1] in each ch-1 sp around, 2 dc in first ch-1 sp, sl st to 3rd ch to join. 54 dc, 18 ch-1 sp
Rnds 8-13: Rep Rnd 7. TURN after last rnd
NOTE: You can make one less round for a shorter cap, then proceed to the Brim

Brim, Layer 1
Row 1 (WS): Ch 1, scbl in next 14 sts, turn.
Note: PM in FL in first and last st along the Side. This will help with starting the second Brim.
Row 2 (RS): Ch 1, sk next st, hdc in next st, (dc, edc) in next st, edc in next 8 sts, (edc, dc) in next st, hdc in next st, sk last sc, sl st in FL of next st along Side, turn. 10 edc, 2 dc, 2 hdc, 1 sl st
Row 3: Sk sl st, sl st in hdc, sc in next st, 2 sc in next st, sc in next 8 sts, 2 sc in next st, sc in next st, sk next st, sl st through ch-1 of row below and FL next st of Side, sl st in FL of next st, turn. 3 sl st, 14 sc
Row 4: Sk first sl st, sc in next 3 sts, 3 sc in next st, sc in next 9 sts, 3 sc in next st, sc in next 2 sts, scfl in same st as sl st from prev row, sl st in FL of next st along Side, turn. 21 sc, 1 sl st
Row 5: Sk sl st, sc in next 4 sts, (sc, 2 hdc) in next st, hdc in next 11 sts, (2 hdc, sc) in next st, sc in next 4 sts, scfl in next st along Side, sl st in FL of next st, turn. 11 sc, 1 sl st, 15 hdc
Row 6: Sk sl st, sc in next st, hdc in next 5 sts, 2 hdc in next 2 sts, hdc in next 11 sts, 2 hdc in next 2 sts, hdc in next 5 sts, scbl in next st along Side, sl st in BL of next st along Side, turn. 2 sc, 1 sl st, 29 hdc
Row 7: Sk sl st, sc in next st, hdc in next 6 sts, 2 hdc in next 2 sts, hdc in next 13 sts, 2 hdc in next 2 sts, hdc in next 7 sts, scfl in next st along Side, sl st in FL of next st along Side, turn. 2 sc, 1 sl st, 34 hdc
Row 8: Sk sl st, sc in next st, hdc in next 7 sts, 2 hdc in next 3 sts, dc in next 14 sts, 2hdc in next 3 sts, hdc in next 8 sts, scbl in next st along Side, sl st in BL of next 2 sts, turn. 2 sc, 2 sl st, 27 hdc, 14 dc
Row 9: Sk sl st, sc in next st, hdc in next 11 sts, 2 hdc in next 2 sts, hdc in next 2 sts, dc in next 13 sts, hdc in next 2 sts, 2 hdc in next 2 sts, hdc in next 10 sts, dcfl in same st as prev rnd along Side, hdcfl in next st along Side, scfl in next st along Side, slst FL in next st along Side, FO. 2 sc, 34 hdc, 14 dc, 1 sl st
Brim, Layer 2
Starting in the marked st (14th sc of Brim, Layer 1, Row 1, attach the yarn to begin Brim, Layer 2. You will work Brim, Layer 2 in the same manner as Brim, Layer 1.
Row 1 (RS): Attach yarn in the same st as Brim, Layer 1, ch 1, scfl in next 14 sts, turn.
Row 2 (WS): Ch 1, sk next st, hdc in next st, (dc, edc) in next st, edc in next 8 sts, (edc, dc) in next st, hdc in next st, sk last sc, sl st in nxt st along Side, turn. 10 edc, 2 dc, 2 hdc, 1 sl st
Row 3: Sk sl st, sl st in hdc, sc in next st, 2 sc in next st, sc in next 8 sts, 2 sc in next st, sc in next st, sk next st, sl st through ch-1 of row below and FL next st of Side, sl st in FL of next st, turn. 3 sl st, 14 sc
Row 4: Sk first sl st, sc in next 3 sts, 3 sc in next st, sc in next 9 sts, 3 sc in next st, sc in next 2 sts, scfl in same st as sl st from prev row, sl st in FL of next st along Side, turn. 21 sc, 1 sl st
Row 5: Sk first sl st, sc in next 4 sts, (sc, 2 hdc) in next st, hdc in next 11 sts, (2 hdc, sc) in next st, sc in next 4 sts, scfl in next st along Side, sl st in FL of next st along Side, turn. 11 sc, 1 sl st, 15 hdc
Row 6: Sk first sl st, sc in next st, hdc in next 5 sts, 2 hdc in next 2 sts, hdc in next 11 sts, 2 hdc in next 2 sts, hdc in next 5 sts, sc in next st, scfl in next st along Side, sl st in FL of next st along Side, turn. 3 sc, 1 sl st, 29 hdc
Row 7: Sk first sl st, sc in next st, hdc in next 7 sts, 2 hdc in next 2 sts, hdc in next 13 sts, 2 hdc in next 2 sts, hdc in next 7 sts, scfl in next st along Side, sl st in FL of next st along Side, turn. 2 sc, 1 sl st, 35 hdc
Row 8: Sk sl st, sc in next st, hdc in next 7 sts, 2 hdc in next 3 sts, dc in next 14 sts, 2hdc in next 3 sts, hdc in next 9 sts, scbl in next st along Side, sl st in BL of next 2 sts, turn. 2 sc, 2 sl st, 28 hdc, 14 dc
Row 9: Sk first sl st, sc in next st, hdc in next 12 sts, 2 hdc in next 2 sts, hdc in next 2 sts, dc in next 13 sts, hdc in next 2 sts, 2 hdc in next 2 sts, hdc in next 11 sts, dcfl in same st as prev rnd along Side, hdcfl in next st along Side, slst in next st along Side, turn. 1 sc, 36 hdc, 14 dc, 1 sl st
Rnd 10: Working through both layers, sc in each st around the Brim, starting in the same st as the last st of the Brim, sc in each st around the Side, sl st to join, FO. 93 sc
Finishing
Weave in all ends.
You may enjoy these patterns too


Pin it for Later
2025 Crochet Cancer Challenge
It’s an honor to participate in the annual Crochet Cancer Challenge for the seventh year in a row. This is the most impactful design each year, as tens of thousands of crocheters show up to make a pledge to donate at least one finished hat for each pattern that they download.
It is truly amazing to see the total number of pledges at the beginning of November, and to start seeing the pictures of finished hats to be donated to a cancer warrior, survivor or a treatment center.
As always, the featured pattern of the day is available as a free download for a specified amount of time.
This year, the Granny Baseball Cap will be available to download for pledges from October 8-12, 2025.
- Head over to Sweet Potato 3 to get the coupon code by clicking “Return to BLOG HOP” button below.
- Come back here and click the “Download PATTERN HERE” button.
- Make a Granny Crochet Baseball Cap to donate. Use #crochetcancerchallenge and #creationsbycourtney when sharing a picture of your finished cap on social media.
Want to talk about yarn goodness, crochet tips, and exclusive weekly deals? Join my Facebook Group, Confidently Crochet with Creations By Courtney.
If we’re not hanging out on social media yet, come check me out on Facebook, Instagram and Pinterest.
Join my newsletter for sneak peeks, crochet tips, and more.
Use #CreationsByCourtney on social media when sharing your projects.
This pattern is not to be duplicated or resold, and not to be reproduced commercially. You may sell finished products on Etsy, at farmers markets, and craft fairs, but please credit Creations By Courtney as the pattern’s author.


4 Responses
Hi cancer challenge 2025 with or without spaces as I’ve tried both is not working. Am I doing something wrong. Thanks dee
Hi Dee,
Did you get my email this morning so that you can make your pledge?
Hi Courtney,
I started on your pattern for the cancer challenge and I’m confused about the 4-dc-cluster and cluster stitches in the first few rounds. Did you mean 4 dc and 3 dc or a true cluster which would be crochet 4 dc together and 3 dc together?
Hi Traci,
Clusters just refers to a group a double crochets in the same space and not the traditional crochet cluster together stitches. You can think of granny stitch (3 dc) in place of CL, and 4-dc-CL is just 4 dc in the same space. Both stitches are listed in the pattern and Special Stitches & Techniques for reference.