The Stacy Sunhat is a special crochet hat pattern. It’s not only my third design for Sweet Potato 3’s annual Cancer Challenge, but it’s also inspired by one of my crochet besties.
I was so lucky to be paired with Stacy and Kris in a crochet business group with the purpose of being each other’s accountability partners. Luckily, we have kept each other accountable, but also become great friends sharing our business and personal wins and challenges. And Stacy was ever so kind to share her story with me, which I get to share with you.
Stacy dealt with thyroid cancer, and thyroid cancer is represented by a ribbon that is pink, purple and teal. While inspired by my friend, I added my own touch when designing the Stacy Sunhat.
Her Story
Stacy was diagnosed with thyroid cancer while working full-time and raising her two young sons by herself. She found this to be a wake up call for making changes in her life to reduce stress and be present for her boys.
Prior to her diagnosis, she was gaining weight for no clear reason, and thyroid cancer is often linked to Hoshimoto, a thyroid autoimmune disease. Also, this brought about a long period of fatigue that was more than just being a working mom. Once she met with doctors, a biopsy was completed which determined the need for surgery on the neck. It was a successful surgery, and she carries with her a sense of humor should anyone ask about the scar on her neck, “You should see the other guy.” Her sense of humor is just one of many reasons why I adore her! Stacy was lucky that her thyroid cancer was caught early enough that chemotherapy nor radiation was needed. Since that time, she has more energy and a better ability to manage her weight. She loves knit and crochet, her dogs, her husband and two sons, and cruising at night to rescue lizards, snakes and more from the Arizona road sides with her husband. Stacy is pretty friction’ cool!
I realize that for too many people and families, cancer is a beast that can lead to loss, but I admire Christine of Sweet Potato 3 for coordinating this event each year to collect 50k pledges from crocheters all over the world to donate hats to a cancer survivor or patient. I hope we keep researching and working together to find a cure for all cancers.
The Design
I’m sure it’s pretty clear as to why this crochet pattern is called the Stacy Sunhat. I considered other names, and even asked my FB group members to help choose a name, but I came back to my original idea as it has a special story attached.
One thing I mentioned is that Stacy lives in Arizona where apparently one hibernates during the days of summer to come out after sunset to avoid the heat. For her, she enjoys spending time in her yard, has a garden, and even grew some grass! I will totally testify to the grass, as I’ve seen proof. 🙂
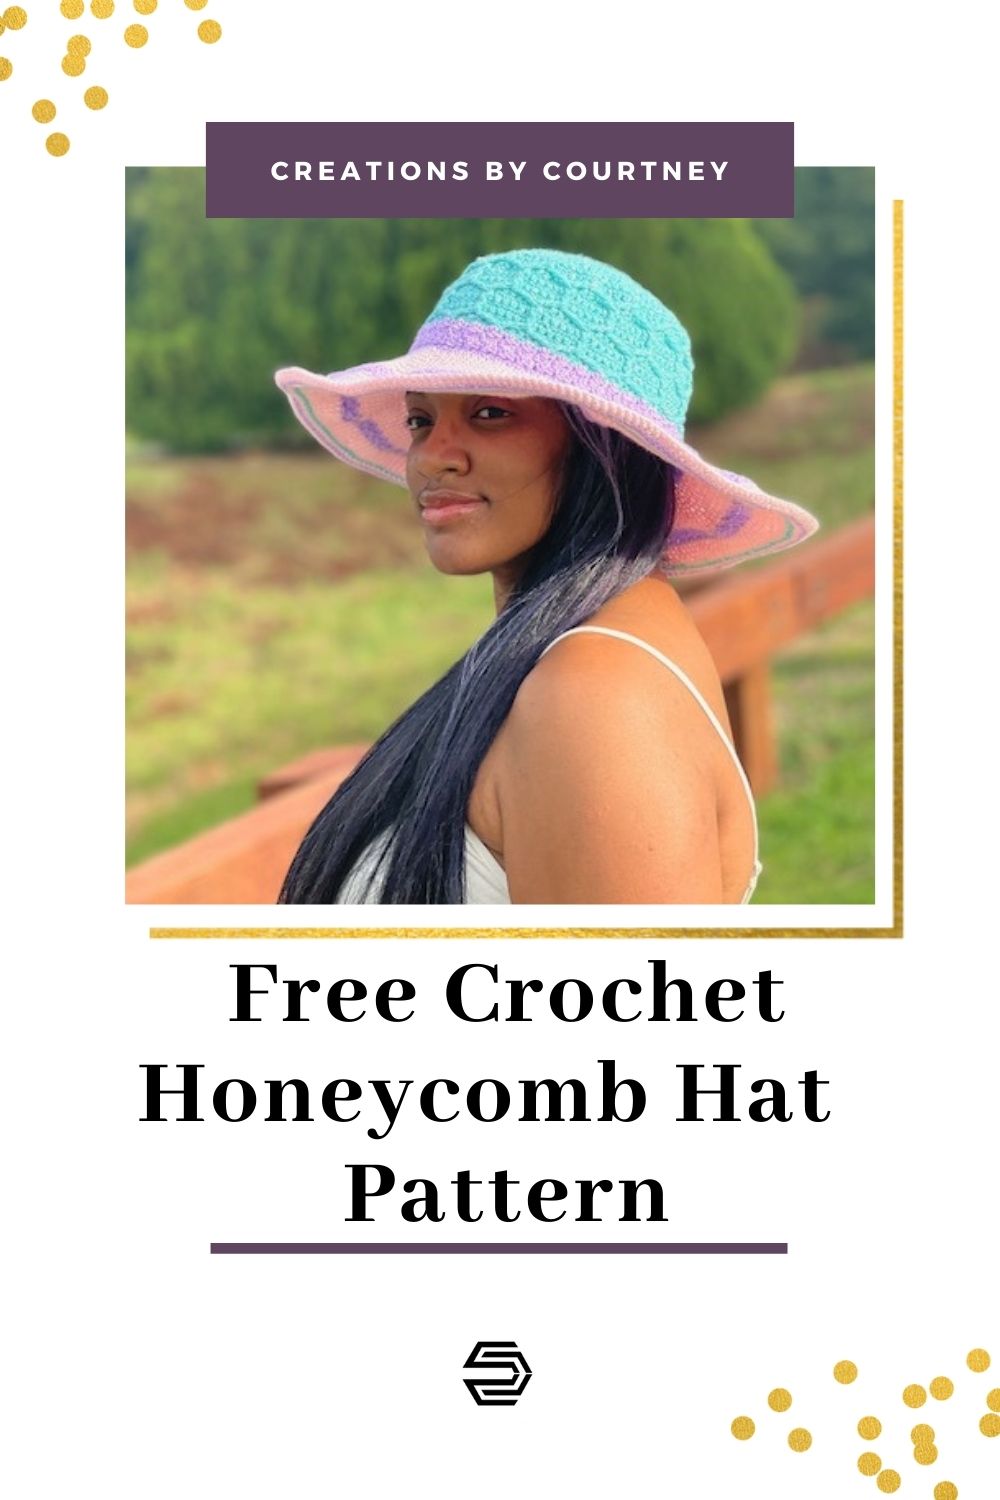
When it came time to think about the design, I thought about what style would make sense for being out in the Arizona heat… a sunhat, of course! There was a definite gap in ideas for what stitches to use, but the yarn was much easier to pick. It wasn’t until a Learn N’ Stitch request was made that I had a clear vision of the stitches I wanted to use. I chose to create an overlay honeycomb for the body of the hat paired with a band of lemon peel stitches to the classic single crochet for most of the brim. The brim had to be wide because it’s frickin’ hot and sunny in the desert. Why not be cute and protect your head and some of your shoulders? Luckily, my other crochet bestie suggested that I keep it simple, as my creativity suggested a frequent color change…
YARN
As a North American Brand Ambassador, it’s super exciting to try out so many new to me yarns! Cotton Top DK is one of the yarns! I love working with cotton yarn because it’s so versatile, and Cotton Top is a lovely blend of acrylic and cotton. With 11 color options, it’s perfect for accessory and garment patterns.
I enjoyed the airiness of this yarn, which has a strand of cotton intertwined. The Teal, Jasmin and Pink color ways are perfect for representing Thyroid cancer in the Stacy Sunhat, but there are other wonderful color combinations. Also, the yarn did not spilt while crocheting, except for when working around the wire for the brim, as it definitely was awkward to work with the wire (worth the effort though). I hope you decide to grab several skeins to add to your stash.
*Disclosure: This post may contain affiliate links to products that I use, and think you will enjoy using too. Should you decide to use any such link, I will earn a small commission at no cost to you. Thank you for supporting this small business.
Add to Ravelry Queue
MATERIALS
- King Cole Cotton Top DK (78% Premium Acrylic, 22% Cotton, 284 yds/ 260 m; 3.5 oz/ 100 g)
- Color A: Teal, shade 4224 x 1 skein or 157 yds total for largest size
- Color B: Jasmin, shade 4227 x 1 skein or 60 yds total for largest size
- Color C: Pink, shade 4216 x 1 skein or 165 yds total for largest size
- US G (4.00 mm) hook or hook to meet gauge I used my Furls Odyssey hook.
- Scissors
- Yarn Needle
- Measuring Tape
- 20 gauge wire or millinery wire
- White Duct tape
- Jewelry pliers
GAUGE
4 rounds of dc = 4” [10 cm]
SIZES
- Child: to fit head circumference 19” [48.2 cm]
- Teen: to fit head circumference 21” [53.3 cm]
- Adult: to fit head circumference 22” [55.9 cm]
PATTERN KEY
Ch: chain
Cnr: corner
CSDC: chainless starting double crochet
Dc: double crochet
FLO: front loop only
FPdc: front post double crochet
FPtr2tog: front post treble 2 together
FO: fasten off
Hdc: half double crochet
M: stitch marker(s)
PM: place stitch marker
Prev: previous
Rem: remain(s)
Rep: repeat
RS: right side
Sl st: slip stitch
Sc: single crochet
Sk: skip
Sp: space
St(s): stitch(es)
Tr: treble crochet
WS: wrong side
YO: yarn over
SPECIAL STITCHES & TECHNIQUES
CSDC: pull up a loop, holding loop in place and wrap yarn around hook (yarn over), insert hook in first st, YO, pull up a loop, [YO, pull through 2 loops] twice
FPtr2tog: YO 2 times, insert hook from front to back to front around post of FPdc to the right 2 rows below, YO, pull up a loop, *[YO, pull through 2 loops on hook] 2 times*, YO 2 times (5 loops on hook), insert hook from front to back to front around post of the next FPdc 2 rows below, YO, pull up a loop (6 loops on hook), [YO, pull through 2 loops] 2 times, YO, pull through 4 loops
EXPERIENCE LEVEL
Intermediate

NOTES
- Pattern is written in US terms.
- Read the entire pattern before beginning.
- The Stacy Sunhat is made in 4 parts: Crown, Side, Band, and Brim.
- If one number is listed, it applies to all sizes.
- Always sk the st behind a post st.
Grab the color-coded, multiple sizes PDF from your favorite pattern shop.
Crochet Cancer Challenge
I’m honored to be a featured designer in the annual Crochet Cancer Challenge hosted by Christine of Sweet Potato 3. This special event each October was created to bring awareness to not just breast cancer, but all forms of cancer. Each participating crochet designer shares how cancer has impacted their life or someone in their life.
During this event, it’s asked that each download equals a pledge to donate a hat. All of the specific details can be found over at Sweet Potato 3.
The Stacy Sunhat PDF is no longer available for free as part of the #crochetcancerchallenge but you can save 30% until October 31, 2021 in my Etsy and Ravelry Shops. Use the buttons above.
INSTRUCTIONS
Child Size Only
Crown
With A, Magic Circle
Rnd 1: Ch 2 (does not count as a st), 12 dc in loop, tighten, sl st to join, turn – 12 dc
Rnd 2: CSDC in first st, dc in same st, 2 dc in each st around, sl st to join, turn – 24 dc
Rnd 3: CSDC in first st, dc in same st, dc in next st, *2 dc in next st, dc in next st; rep from * around, sl st to join, turn – 36 dc
Rnd 4: CSDC in first st, dc in same st, dc in next 2 sts, *2 dc in next st, dc in next 2 sts; rep from * around, sl st to join, turn – 48 dc
Rnd 5: CSDC in first st, dc in same st, dc in next 3 sts, *2 dc in next st, dc in next 3 sts; rep from * around, sl st to join, turn – 60 dc
Rnd 6: CSDC in first st, dc in same st, dc in next 4 sts, *2 dc in next st, dc in next 4 sts; rep from * around, sl st to join, turn – 72 dc
Side
Starting with 4th st of prev Rnd, PM around this st, *sk next 5 sts, PM around next st; rep from * around – 12 M placed
Rnd 1: Ch 1, sc in first st, sc in each st around, sl st to join, turn – 72 sc
Rnd 2: Ch 1, sc in first st, starting around M to the right of the prev Rnd, FPtr2tog, *sc in next 5 sts, FPtr2tog starting around the same st as the prev FPtr2tog; rep from * around until 4 sts rem, sc in rem sts, sl st to join, turn. Remove M – 12 FPtr2tog, 60 sc
Rnd 3: Ch 1, sc in first st, sc in each st around, sl st to join, turn – 72 sc
Rnd 4: Ch 1, sc in same sp as sl st, sc in next st, FPdc around the FPtr2tog 2 Rnds below, *sc in next 5 sts, FPdc around the next FPtr2tog 2 Rnds below; rep from * around until 3 sts rem, sc in last 3 sts, sl st to join, turn – 12 FPdc, 60 sc
Rnd 5: Rep Rnd 3
Rnd 6: Ch 1, sc in first st, FPdc around the prev FPdc 2 Rnds below, *sc in next 5 sts, FPdc around prev FPdc 2 Rnds below; rep from * around until 4 sts rem, sc in last 4 sts, sl st to join, turn – 12 FPdc, 60 sc
Rnd 7: Ch 1, sc in first st, sc in each st around, sl st to join, turn – 72 sc
Rnd 8: Ch 1, starting around the right FPdc 2 Rnds below, FPtr2tog, sc in next 5 sts, *starting around same FPdc as prev FPtr2tog, FPtr2tog, sc in next 5 sts; rep from * around, sl st to join, turn – 12 FPtr2tog, 60 sc
Rnd 9: Ch 1, sc in first st, sc in each st around, sl st to join, turn – 72 sc
Rnd 10: Ch 1, sc in same sp as sl st, FPdc around the FPtr2tog 2 Rnds below, *sc in next 5 sts, FPdc around next FPtr2tog 2 Rnds below; rep from * around until 4 sts rem, sc in last 4 sts, sl st to join; FO Color A, turn – 12 FPdc, 60 sc
Band
Rnd 1: With Color B, ch 1, sc in first st, dc in next st, *sc in next st, dc in next st; rep from * around, sl st to join, turn – 72 sts
Rnds 2-3: Rep Rnd 1, turn – 72 sts
Brim
Note: these rounds will not be turned unless indicated.
Rnd 1: Working in FLO, ch 1, sc in first st, sc in same st, sc in next 5 sts, *2 sc in next st, sc in next 5 sts; rep from * around, change to Color C, sl st to join. FO Color B – 84 sts
Rnd 2: With Color C, ch 1, 2 sc in first st, sc in next 6 sts, *2 sc in next st, sc in next 6 sts; rep from * around, sl st to join – 96 sts
Rnd 3: Ch 1, 2 sc in first st, sc in next 7 sts, *2 sc in next st, sc in next 7 sts; rep from * around, sl st to join – 108 sts
Rnd 4: Ch 1, 2 sc in first st, sc in next 8 sts, *2 sc in next st, sc in next 8 sts; rep from * around, sl st to join – 120 sts
Rnd 5: Ch 1, 2 sc in first st, sc in next 9 sts, *2 sc in next st, sc in next 9 sts; rep from * around, sl st to join – 132 sts
Rnd 6: Ch 1, sc in first st, sc in each st around, sl st to join
Rnd 7: Ch 1, 2 sc in first st, sc in next 10 sts, *2 sc in next st, sc in next 10 sts; rep from * around, sl st to join – 144 sts
Rnd 8: Ch 1, 2 sc in first st, sc in next 11 sts, *2 sc in next st, sc in next 11 sts; rep from * around, sl st to join – 156 sts
Rnd 9: Ch 1, 2 sc in first st, sc in next 12 sts, *2 sc in next st, sc in next 12 sts; rep from * around, sl st to join – 168 sts
Rnd 10: Ch 1, 2 sc in first st, sc in next 13 sts, *2 sc in next st, sc in next 13 sts; rep from * around; change to B and do not FO C, sl st to join – 180 sts
Rnds 11-12: With Color B, ch 1, sc in first st, dc in next st, *sc in next st, dc in next st; rep from * around, sl st to join, TURN. FO Color B- 180 sts
Rnds 13-14: With Color C, ch 1, sc in first st, sc in each st around, sl st to join
Measure the brim; cut a length of wire with 3” of overlap that will fit around the brim; overlap the ends and tape each end
Rnd 15: Ch 1, sc in first st, sc in each st around, sl st to join
Finishing
- Weave in all ends.
- Block to final size, if needed.
Enjoyed this hat? Check out these hat patterns

1. Terresa Turban 
2. Wrapped in Love Hat 
3. Whirlwind Hat
Pin it for Later

If we’re not hanging out on social media yet, come check me out on Facebook, Instagram and Pinterest.
Want to talk about yarn goodness, crochet tips, and exclusive weekly deals? Join my Facebook Group, Creations By Courtney Community.
Join my newsletter for sneak peeks, crochet tips, and more. HERE
Please use #CreationsByCourtney on social media when sharing your projects.
This pattern is not to be duplicated or resold, and not to be reproduced commercially. You may sell finished products on Etsy, at farmers markets, and craft fairs, but please credit Creations By Courtney as the pattern’s author. Read the Disclosure Policy for additional information.


11 Responses
What a beautiful hat! Just stunning! Thank you so much for your generosity and supporting this great cause!
Thank you, Kristina! It’s a pleasure to create something that can spread joy to so many through our love for crochet.
a VERY CUTE DESIGN
Thank you, Vickie! It’s an honor to create something that can bring joy to so many.
As a crocheter and long-term thyroid cancer survivor, I’m delighted to see this pattern. Since I hate scalp sunburns, its being a sun hat is the icing on the cake. Thank you!
Hi Sue,
It’s awesome that you’re around to share your story of recovery. It’s a privilege to have designed this hat in honor of my friend and all people that have dealt with or may deal with thyroid cancer. A lack of scalp sunburns is always a good thing!
This sun hat is beautiful…I love the honey comb detail and the wide brim for sun protection
Thank you for sharing