
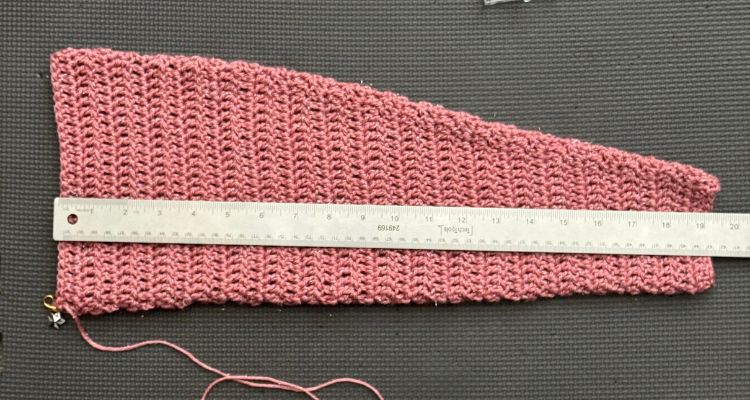
A sleeve can make or break a sweater. The body can fit like a dream, but if the sleeve pulls at your bicep or puddles around your wrist, the whole thing feels off the second you move.
Here’s the good news: getting your crochet sleeve width right isn’t a mystery, and it definitely isn’t luck. It comes down to a few honest measurements, your actual gauge (not the gauge you were hoping for), and a shaping plan that gets along with your stitch pattern.
Let’s build sleeves that feel good when you reach, bend, wave at a friend, and just live your life in them.
This post may contain affiliate links. If you make a purchase through these links, I may earn a small commission at no extra cost to you.
Before You Pick Up Your Hook
Measure the upper arm, wrist, sleeve length, and armhole before you touch your stitch count. Use your own blocked gauge, not the one you wish you’d gotten. Decide on positive ease, negative ease, or a close, body-skimming fit, and turn those finished measurements into stitches before you start shaping anything.
Keep your shaping friendly with your stitch repeat, especially if you’re working something textured or lace. And try on one sleeve before making its twin — future you will thank present you, I promise.
Start With Finished Sleeve Measurements
That number on your tape measure is just a starting point. What actually matters is the finished measurement you want the sleeve to land at once it’s crocheted, blocked, and worn — ease included.
Need a refresher on measuring first? These must-know crochet sweater measurements will help with the rest of the garment too. Just don’t borrow your bust circumference for sleeve planning. A matching bust size tells you nothing about how much room your arms actually need. Different problem, different measurement.
Measure the Upper Arm and Wrist
Measure around the widest part of the upper arm to find your upper arm circumference, then take the wrist measurement around the wrist bone. Keep the tape measure comfortably snug, not pulled tight enough to make your arm feel like a sausage in its casing.
Also record the underarm-to-wrist distance as your sleeve length, bending the elbow a little while measuring. Arms aren’t flat boards, and measuring over that bend helps avoid sleeves that sneak up your arm every time you move.
No live person to measure? The Craft Yarn Council’s standard body measurements are a good starting point, but real measurements win every time you have them. It may help to measure the sleeve on a favorite top or sweater in a pinch.
Choose Your Ease on Purpose
Positive ease means the finished sleeve is wider than the arm for a relaxed fit, such as wearing a cardigan over a long sleeve top. Negative ease means the sleeve is smaller than the arm and relies on stretch for a close fit.
A dense stitch pattern in cotton has less give than an open stitch in merino or a springy acrylic blend. So don’t use the same amount of ease for every yarn and stitch. Making a swatch allows you test how it will stretch in all directions to help you determine the amount of ease.
Choose negative ease for a close-fitting sleeve, while a roomier sleeve needs more width and comfort. Negative ease also requires enough yarn stretch to stay comfortable. Scrunch your swatch, stretch it gently, and see how it behaves.
A sleeve that feels fine with your arm hanging down can still feel tight the second you reach for your coffee mug.
Check Your Stitch and Row Gauge
Gauge isn’t the boring speed bump before the fun part. It is the map for every sleeve adjustment you want to make. Think of it like a crochet assistant that keeps your numbers honest from swatch to sleeve
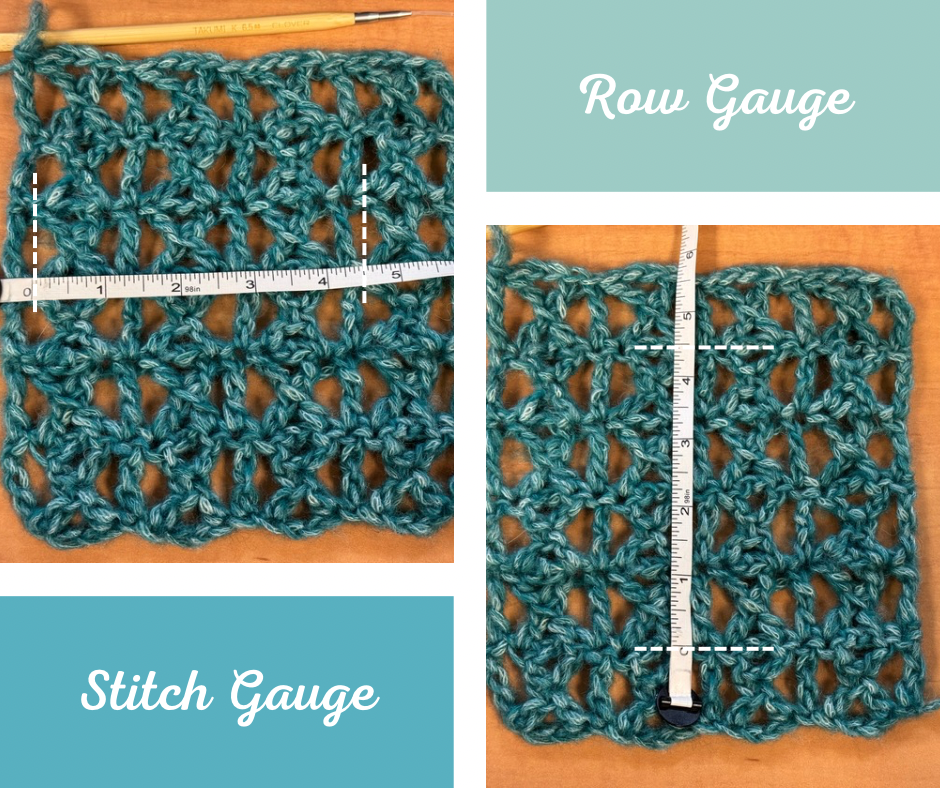
Stitch gauge tells you how many stitches fit across an inch or centimeter. Row gauge tells you how many rows fit in an inch or centimeter of height. Mama in a Stitch’s gauge guide breaks down that horizontal-versus-vertical difference really well if you want to go deeper.
Make a Swatch Big Enough to Trust
If your pattern gauge is measured over 4 inches, make a gauge swatch at least 6 inches wide and tall. Measure in the center, in a few different places, away from the edges.
Block the swatch the same way you plan to block the sweater. Wet-blocking or steam-blocking can relax stitches, change the width, and affect ease. Yep, even when the unblocked swatch looked “close enough.” Ask me how I know…
Turn Gauge Into Useful Numbers
Divide the stitches in your gauge area by its width to find stitches per inch. Do the same with rows to find rows per inch.
For example, if your swatch has 16 stitches across 4 inches, that’s 4 stitches per inch. Keep both numbers handy: stitches per inch sets sleeve width, while row gauge guides sleeve length and shaping placement. At 4 rows per inch, a 12-inch sleeve length needs 48 rows, and those row counts help position decrease rows.
Don’t forget to check the stitches and rows per inch for any other stitches used in the sleeve pattern, such as a ribbing at the wrist. You may discover that you’ll want to change the hook size to make the ribbing more comfortable.
Calculate Sleeve Width in Stitches
Now for the bit that sounds math-y but honestly isn’t too bad. You’re turning finished measurements into stitch counts, then using sleeve shaping to place those stitches.
For a sleeve worked in the round, multiply the desired finished circumference by your stitch gauge. That gives you the total stitches around the sleeve.
For a sleeve worked flat and seamed, multiply that same circumference by your stitch gauge for the total stitch count across the piece — you’re working one flat rectangle (or taper), then seaming up that single edge to close it into a tube. If you’re using a stitch pattern, decide whether to round up or down for the stitch count to fit within the stitch multiple. This prevents the stitch pattern from”breaking.”
Add your ease to your target circumference before doing any of this math. Width comes from stitch count. Length comes from rows. Keep them separate in your head and this gets a lot less confusing.
Plan the Upper Arm First
The upper arm is usually the widest point of a tapered sleeve. Take your desired upper arm circumference, including the ease you want, and convert it to stitches.
Working cuff to underarm? Compare your cuff and upper-arm stitch counts, then divide the difference across your shaping rows and spread it evenly. Say your cuff has 40 stitches and the upper arm needs 56 — that’s 16 stitches spread across 8 shaping rows. Working armhole to cuff instead? Same idea, just reversed, with decreases doing the work instead of increases.
And here’s the one thing I really want you to remember: don’t estimate your upper arm width as a percentage of your bust circumference, even though some patterns do it as a shortcut. Two people with the exact same bust size can need totally different upper-arm room. Bodies just don’t work that neatly. Measure your actual arm and use that number instead.
This is exactly the math my Increase and Decrease Planner was built for. Plug in your stitch counts and it spits out your shaping rows and placement for you, no scratch paper required.
Include Cuffs and Seams
A ribbed cuff typically pulls in more than the sleeve fabric above it. A folded cuff adds bulk. Whatever measurement you record for the wrist, include space to fit over the hand. And if you prefer a snug cuff, choose a stitch that offers A LOT of stretch.
A little bit of planning prevents frogging.
Plan Tapered Sleeve Shaping
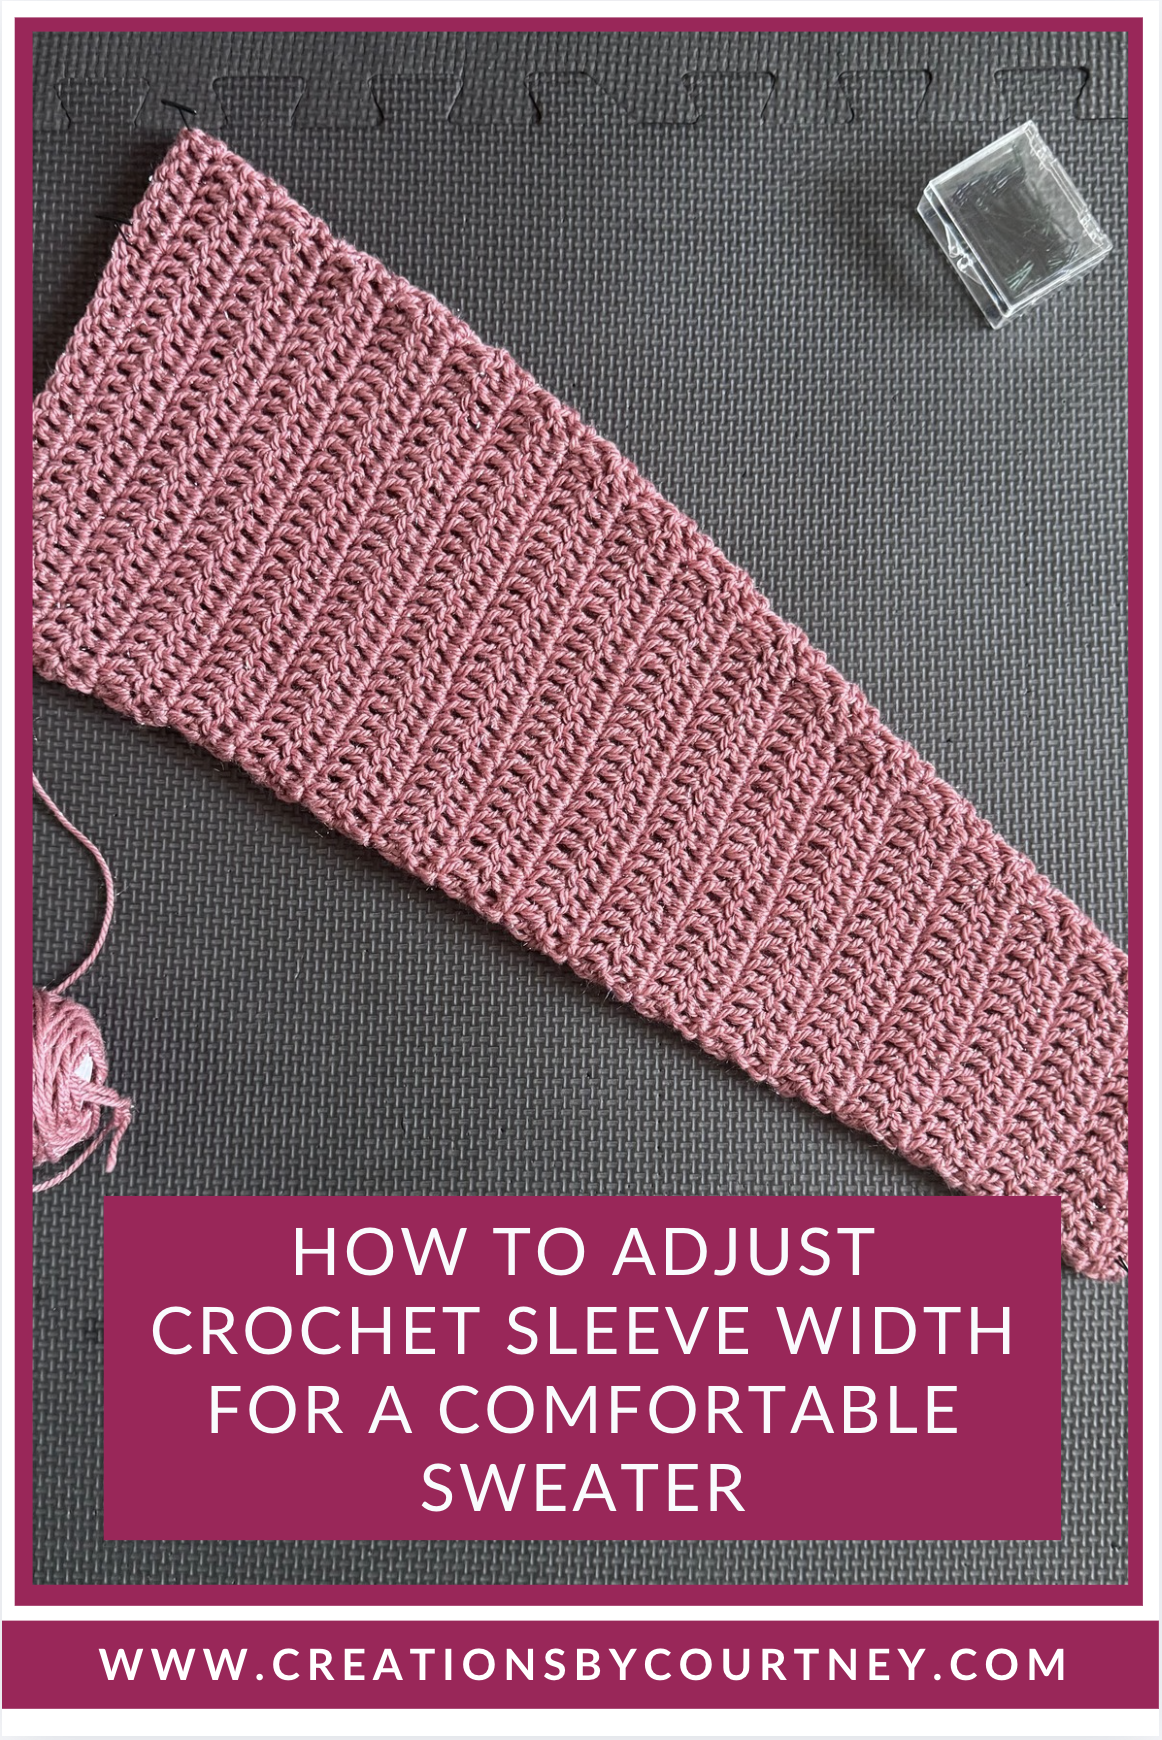
For a tapered sleeve, subtract the smaller stitch count from the larger one. That difference, built around your desired fit and ease, is what gets distributed across your shaping rows.
Count how many rows you actually have between the cuff and the underarm, minus a sleeve cap. Next, figure out how many stitches each shaping round actually changes for you. Most sleeve shaping is worked in pairs, one increase or decrease on each side of the sleeve so the shaping stays balanced, which means a typical shaping round changes your count by 2 stitches total. If you’re using a different method, like shaping only on one side, or working multiple pairs in a single round for a faster taper, use that real number instead.
Once you know your stitches-per-round number, divide your total stitch difference by it to find how many shaping rounds you need. For the common paired method: total stitch difference ÷ 2 = number of shaping rounds.
Math doesn’t divide evenly? Totally normal. Slip in one extra plain row here and there between shaping rows and nobody will ever know the difference.
Space Increases or Decreases Evenly
Divide the available sleeve rows by the number of decrease rows to find the approximate interval. For example, 24 available rows ÷ 6 decrease rows gives an interval of 4 rows.
Your plan might place decrease rows every fourth row, with an occasional fifth row. Write the row numbers down before you begin, especially if the decrease rows aren’t perfectly even. Counting while binge-watching a show is brave, not the best move, but we all do it… so just write it down where you can find it when you pick up your WIP.
Match the Sleeve to the Armhole
A lovely sleeve still needs to fit the opening waiting for it. Check the armhole depth before making both sleeves, especially if you changed the body width or your row gauge differed than the pattern.
For a drop shoulder sweater, sleeve construction usually joins a straighter, roomier armhole. That opening depends on shoulder width as well as bust circumference. A drop shoulder often needs little or no sleeve shaping. Whereas a set-in sleeve follows a curved armhole and needs more shaping.
Use clips, stitch markers or straight pins (from sewing) to set the sleeve in place before seaming to check for any unintended bunching or gaps. It’s much easier to figure out adjustments now rather than ripping out the seam… #teamseamless
Try On One Sleeve First
Finish one sleeve through the upper arm and try the whole thing on. Check the width with your arm relaxed, then bent. Compare the length to what you’re aiming for. Sometimes, sleeves can end up longer than intended on a drop shoulder sweater because the boxy shape of the body extends beyond the shoulders. This means that a shorter sleeve may be needed.
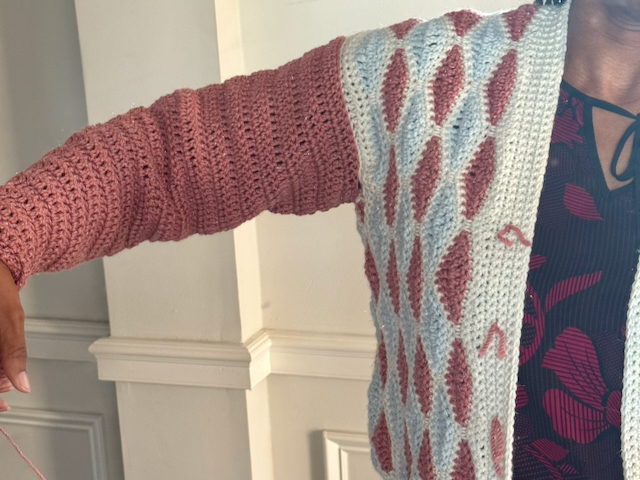
Needs adjusting? Update your notes of what changes are needed, so it’s easier to make the second sleeve. You do not need to get stuck on Sleeve Island. Or casting your almost finished sweater into time out to be forgotten.
Keep Continuous-Round Sleeves Straight
Working sleeves in continuous rounds creates a smooth look, but tends to create a fabric that appears to be twisting, which can. be more pronounced with shaping.
Mark the Underarm Line
If working in the round, it can help to place a stitch marker at the center and first stitch. This will help track the placement of increases or decreases, if it’s just 1 or 2 stitches to keep the seam straight.
It also helps to stagger the placement of the increase or decrease so they are less obvious within the fabric. This may look like increasing or decreasing in the stitch before the marked stitch, and then making the increase or decrease in the marked stitch on the next shaping round.
Match Shaping to Your Stitch Pattern
A basic double crochet sleeve forgives almost anything. Cables, shells, and mesh? Not so much.
If your stitch pattern repeats over six stitches, your final count usually needs to land on a multiple of six. If there is a section of plain stitches, that the easiest place to adjust stitch count, but if there isn’t, make adjustments at the beginning or end of the row so it falls at the underarm.
If you’re uncertain of how to make increases or decreases in a textured or lace stitch, let a Google search be your friend, but also add Crochet Every Way Stitch Dictionary: 125 Essential Stitches to Crochet in Three Ways by Dora Ohrenstein to your personal library.
Block Before You Judge the Fit
Crochet fabric can relax, widen, lengthen, or all three after blocking. Compare your sleeve to your finished measurements after it’s dry, before you attach the second sleeve or add a cuff.
Want the fuller picture on planning garments? Check out learn the basics of crochet garment construction, keep the Craft Yarn Council reference handy, and grab your free garment guide to record what actually works for your body.
How do I make a crochet sleeve wider?
Add stitches at the underarm when its a textured stitch with evenly spaced increases. Add stitches at the center when it’s simple, like double crochet.
Can I adjust sleeve width without changing sleeve length?
Yes. Change your stitch count and keep your row count the same. Measure your bicep and round to your stitch multiple if your pattern has one.
What if my sleeve is the right width but too long?
Your row gauge may differ from the pattern’s, or your fabric relaxed after blocking. Remove rows near the cuff or underarm, wherever the shaping sits best.
Should I work sleeves cuff up or armhole down?
Both work and depends on whether you’re following a pattern. Cuff-up lets you try on as you go to check length and width. Armhole-down lets you ensure a comfortable fit at the shoulder first. Pick whichever makes your stitch pattern easier to manage.
A Better-Fitting Sleeve Is Worth the Math
A good sleeve moves with you, sits where it should, and feels like part of the sweater instead of an afterthought. Start with your measurements, trust your blocked gauge, and let the stitch counts do the rest.
Once you have adjusted crochet sleeve width for one garment, you will start spotting what future sleeves need. That is handmade confidence, and it looks good on every body.
Want to talk about yarn goodness, crochet tips, and exclusive weekly deals? Join my Facebook Group, Confidently Crochet with Creations By Courtney.
If we’re not hanging out on social media yet, come check me out on Facebook, Instagram and Pinterest.
Join my newsletter for sneak peeks, crochet tips, and more.
Use #CreationsByCourtney on social media when sharing your projects.
Got a sleeve fit win (or a fit fail turned learning moment) after using this post? I’d love to see it. Tag me or drop it in the Facebook group.