When one learns to crochet, it can be frustrating to recall how many yarn overs, pull throughs and where to insert the hook. Once you get the hang of the basics, next comes the excitement to make the first complete project. For some that may include making their first crochet garment, which can be a crochet sweater, crochet top, crochet vest, crochet cardigan, or a crochet poncho.
In the excitement of wanting to create the first crochet garment, there are common mistakes that can be made, which can include challenges with the yarn being used, not making a gauge swatch, inaccurate measurements, not blocking the finished piece, and finishing details.
Keeping reading to learn what mistakes to avoid so you can enjoy making your first crochet garment, or making the first crochet garment that comes out the right size.
1. Skipping Pattern Reading
“Read entire pattern before beginning,” should be one the golden rules.
You know what to expect when following the crochet pattern, such as a how many pieces or sections in the garment, gauge, special stitches or techniques, or special materials. It will also help discover any confusing sections within the pattern.
If you find instructions that are confusing or errors that were missed during the pattern testing phase, reach out to the designer for help.
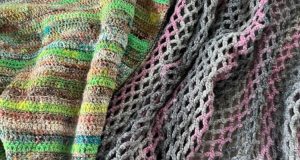
2. Choosing the Wrong Yarn for a Crochet Garment
Picking the right yarn is super important because the yarn weight and fiber content will impact the finished look and drape.
Choose a yarn of the same weight, which doesn’t have to be the same brand, as listed in the pattern. If you want to choose a different brand of yarn that is the same weight, yarnsub.com is a great resource.
You can choose to use a different weight of yarn, but it requires more work to determine how many stitches and rows. Also, if you choose a thicker yarn than what is listed in a crochet pattern, your crochet sweater is likely to come out larger and stiffer, especially if you don’t know how to make the adjustments.
Yarn fiber impacts the finished garment too. Acrylic yarns are widely available and work well for garments, despite what some may say. Two tips are using a soft acrylic yarn with the right hook size, and acrylic yarns can be blocked. If a crochet pattern features an animal or plant fiber, the drape will differ if you choose a synthetic fiber. Even if you have an allergy to wool, consider finding a yarn blend of acrylic and a plant fiber (cotton, viscose, bamboo, etc) to create the same amazing finished look as the pattern you’re following.
If you’re not familiar with drape, drape refers to how a fabric moves or hangs. With crochet garments, you want good drape rather than stiff fabric. The air between stitches impacts drape. Crochet hook size can also impact drape.
Don’t forget to consider the texture of the yarn you choose. Thick and thin (think Lion Brann Yarn Homespun) creates amazing texture, but will impact gauge / the overall size. Again, start with the listed yarn or something very similar for your first few crochet garments.
3. Choosing the Wrong Size for your Crochet Garment
You’re about to spend 40+ hours making an intermediate crochet garment. Prevent frustration by choosing the right size the first time.
Let’s be honest more than less folks are uncomfortable talking about the size of their clothes or their body size. Luckily, in making your own crochet garment, you’re the only person that needs to know your body measurements. Now if you are a maker selling custom crochet garments, then you’ll need the exact body measurements of the customer.
The common mistake is choosing the size that matches your letter size in store bought clothes, rather than measurements provided in the pattern. Unfortunately store bought clothing sizing varies from store to store. A crochet pattern likely uses the Craft Yarn Council offers standard sizing charts to determine each size’s measurements. Choose the size that is closet to your body measurements, and includes the ease listed in the pattern.
Depending on your preferred fit and the ease per size, you may choose to size up or size down. Check out this post for crochet sweater and top measurements, and this post about what measurements to know for crochet bottoms.
4. Ignoring Gauge Swatches
I know that making a gauge swatch feels like torture and a waste of time for many. It’s such an important step to take before you start following a pattern. From a gauge swatch, you’ll learn if you have chosen the right hook size and the finished crochet garment will be the same size listed in the pattern. There is more one can learn from a gauge swatch, but I’ll save that for another blog post. In the meantime, check out this post about crochet gauge.
When following a crochet pattern, you want to find the gauge information, which is typically listed as stitches and rows per 4″ / 10 cm. Some patterns may list the gauge in a different measurement, such as 1″ / 2.5 cm or 5″ / 13 cm, so read it carefully to know what area to measure on your gauge swatch.
When you make a gauge swatch, DO NOT MAKE IT TOO SMALL. This means that if the pattern lists gauge as 4″ x 4″ / 10 cm x 10 cm, make a swatch that is at least 6″ x 6″ / 15.3 cm x 15.3 cm to get the most accurate measurement.
If a crochet pattern lists the gauge as blocked, you NEED to block your gauge swatch too. This will let you know how the fabric will change and eliminate some surprises to lead to frustration.
5. Incorrect Stitch Counts
You need to count!
There, I said it! As fiber artists, we are not known for stellar counting skills. LOL We know how to count and do basic math for all other areas of life, but something weird happens when we begin to crochet.
Besides making gauge swatches, counting is another least favorite but important part of crochet. For many, there are interruptions that suddenly happen when counting. This is where stitch markers can be really helpful by placing them every 10, 20 or 50 stitches, depending on how many stitches are in a round or row.
I’m not saying that you need to count every round or row, but maybe you will when making your first crochet garment. It does help to count every few inches of progress to ensure that stitches were not unintentionally added or subtracted. By counting periodically, you can catch and fix any mistakes with less effort. Download and print this Project Planner Page, or use it digitally on a tablet, track your current WIP’s progress.
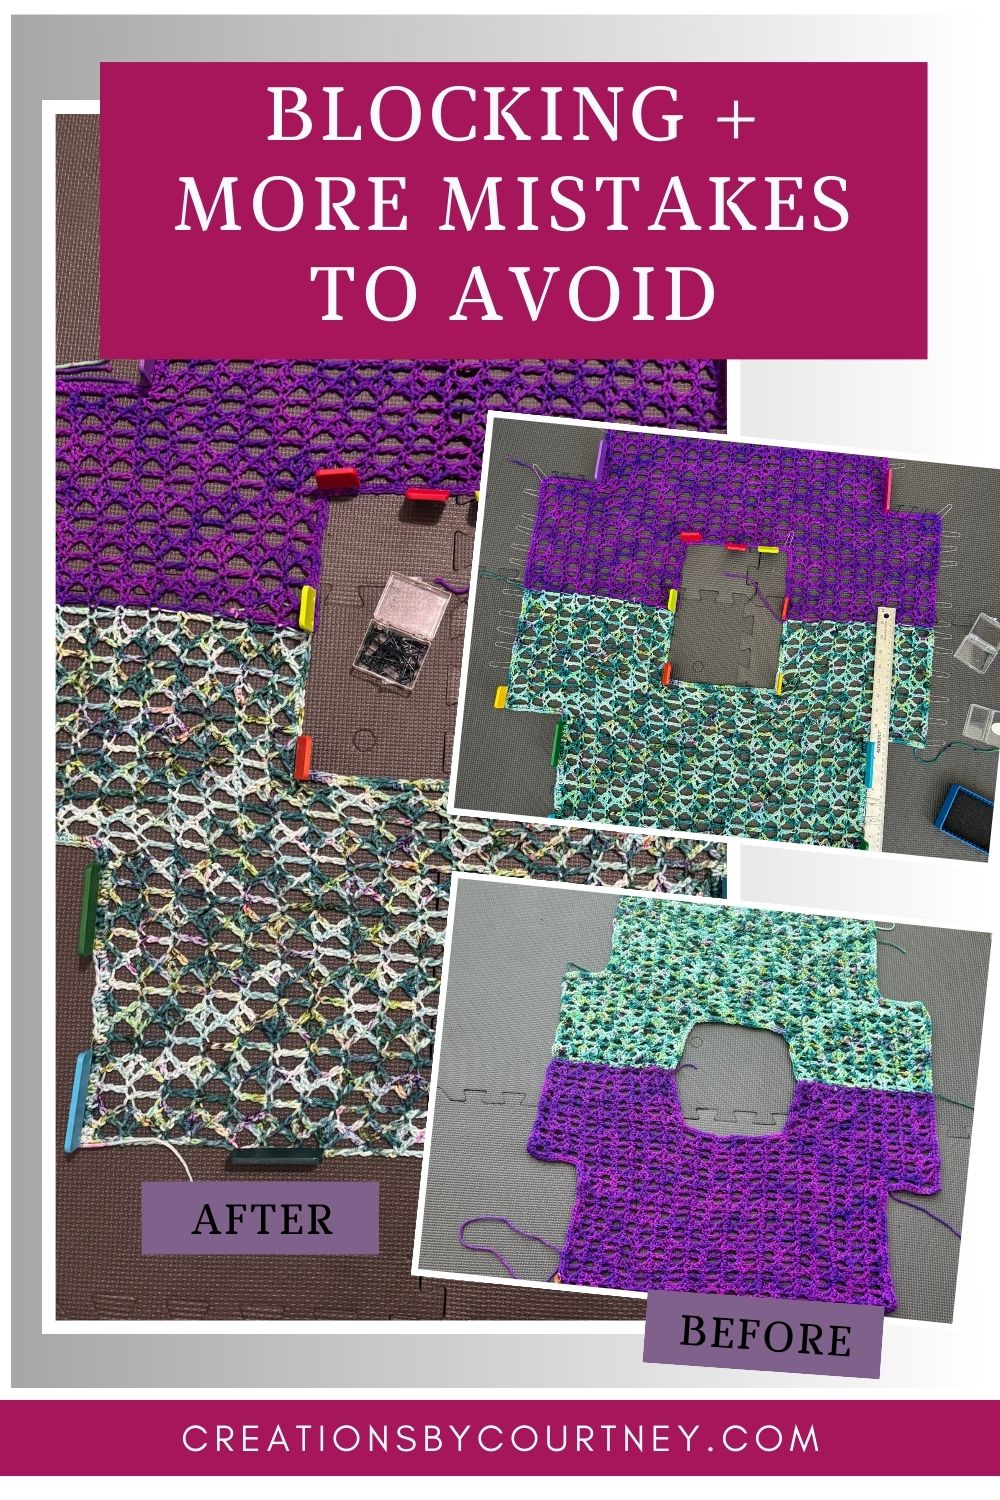
6. Neglecting Proper Blocking of your Crochet Garment
When you’re new to crochet garment making, blocking can be confusing or intimidating. It means that you use a form of water (soaking in warm water, steam, or spray) to shape and / or stretch a crochet fabric to specific measurements.
You’ll need the following materials for all methods of blocking:
- rust-proof pins
- a gentle detergent
- tape measure or long straight ruler (18+”)
- blocking boards or anti-microbial mats
- A tub or some other basin is helpful for wet blocking.
Whatever mat you choose, place your crochet piece in a well-ventilated area and not in direct sunlight. Allow enough time for your crochet garment to dry before wearing.
Spray blocking is the easiest option. I recommend this method for a light blocking and laying down corners that have curled.
Steam blocking is the next step up as the heat from the steam relaxes the fiber more. A clothing iron with steam can be used for steam blocking, but it requires more care. The iron touching the fiber can lead to it melting acrylic yarns, or burning natural fibers. I recommend getting a nice steamer that heats up quickly and doesn’t drip too much when held horizontally.
Wet blocking typically produces the best finishing results. This allows all of the fabric to relax more than the other forms of blocking. This means an easier time shaping and pinning the crochet garment to the final measurements to dry. Always refer to the pattern instructions.
7. Poor Finishing Techniques
Finishing techniques refer to how you deal with the yarn ends, the method of seaming / joining piece, and adding any required closures (zippers, buttons, clasps).
Weaving in the ends is one of my least favorite tasks in crochet, so I tend to create designs with minimal to no seaming, and will take the time to modify a crochet pattern I’m following to reduce the seams. LOL You may feel similarly to me, and have considered leaving those ends tucked in rather than woven. After the hours spent to create your crochet garment, you may as well spend the time to weave in the ends properly.
Typically, you want an end that is at least 6″ / 15 cm in length to weave through the rows / rounds. If you weave along the stitches in one direction and then back across the same stitches, make sure to work under then over and through the first strand. This helps lock the end to itself and throughout the stitches. If you weave through the row along a single stitch, it helps to split the fibers in several places when heading in one direction, and then work through the stitches going back in the opposite direction. The most secure method is to split the yarn end into two sections, and weave each section in different directions.
When it comes to seaming or joining crochet garment pieces, the whip stitch is the easiest but can be bulky and visible. If it’s not a part of the design, consider learning the mattress or reverse mattress stitch, as well as slip stitching or using single crochets to join pieces. Don’t forget to think about how the seam will look and feel in the finished garment.
If a type of closure is required, follow the crochet pattern instructions for the length/ size of closure, and take your time for the placement of buttons, snaps or a zipper. If you choose a different size than what is listed in the pattern, you will need to account for that when crocheting.
8. Rushing Through the Crochet Garment
I have heard many times that some like crochet more than knitting because it is a quicker craft, which fulfills the instant gratification seekers, but there are benefits to learning to take your time with any fiber project, especially a garment. Rushing through a crochet project can increase the likelihood of making the mistakes above, which can lead to a project being placed in time out when it’s not looking or fitting as pictured in the pattern.
I get it when feeling excited about starting a new crochet sweater and wanting to finish sooner than later. But think about the mistakes listed above that can be avoided with a little bit of planning to increase your level of enjoyment while crocheting.
Additionally, not rushing a crochet garment provides the opportunity to practice meditation. Yes, meditation can be participating in a repetitive activity with focus (exercise in the morning is part of my meditation practices). If you haven’t experienced it yourself, you may know someone or read a post in a Facebook group about how fiber arts and other crafting has been helpful in reducing one’s experience of anxiety and depression.
Learning to not rush through a crochet garment means giving yourself a reasonable amount of time to make it. The time it takes will be influenced by the complexity of the design, yarn weight being used, and your personal crochet speed and experience. Based on the recommendations of Autumn of the Size Inclusive Collective, she recommends at least 8 weeks for a pattern tester to make the largest sizes within a size inclusive crochet pattern. With this information, consider 2-4 weeks for a simple crochet garment, 4-6 weeks for an intermediate crochet garment, and 6+ weeks for an advanced crochet garment when following a pattern, if you have a few hours to crochet every single day and taking breaks.
Yes, you need to take breaks periodically to stretch your entire body and get up to move around. Oh, and this includes not pulling all nighters when crocheting on the regular. I’m not saying never stay up past your typical bedtime, but ensure you get adequate rest. Being rested will clarify a confusing section and improve consistent tension throughout the project.
Regardless of the time it takes to complete you garment, make a plan of how many stitches or rows to complete each day based on your availability and taking breaks. This will enhance your crochet experience and contribute to experiencing more calm and joy.
Conclusion
When making your first crochet garment or your fourth garment, avoid the following mistakes:
- Choosing the wrong size to make
- Not reading the entire pattern before beginning
- Choosing the wrong yarn
- Not checking the gauge
- Not counting stitches while making your crochet garment several times.
- Not blocking the gauge swatch and finished project
- Poor finishing techniques
- Rushing through a crochet project.
I hope you enjoyed learning about these eight common mistakes when making a crochet garment, and maybe noticed a few things that you can work on to continue to further improving your crochet.
If we’re not yet connected, join the Creations by Courtney newsletter today and receive a cheat sheet for recording your body measurement to remove the guess work on what size to make for your next crochet top.
Like to connect on social media?
Follow me on Instagram, Facebook, YouTube and Pinterest.
Come hang with me and other crochet friends in the Creations by Courtney Community FB group.