
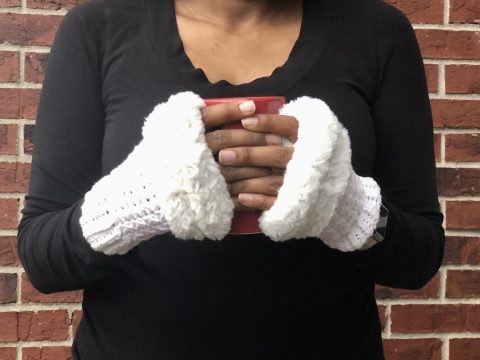
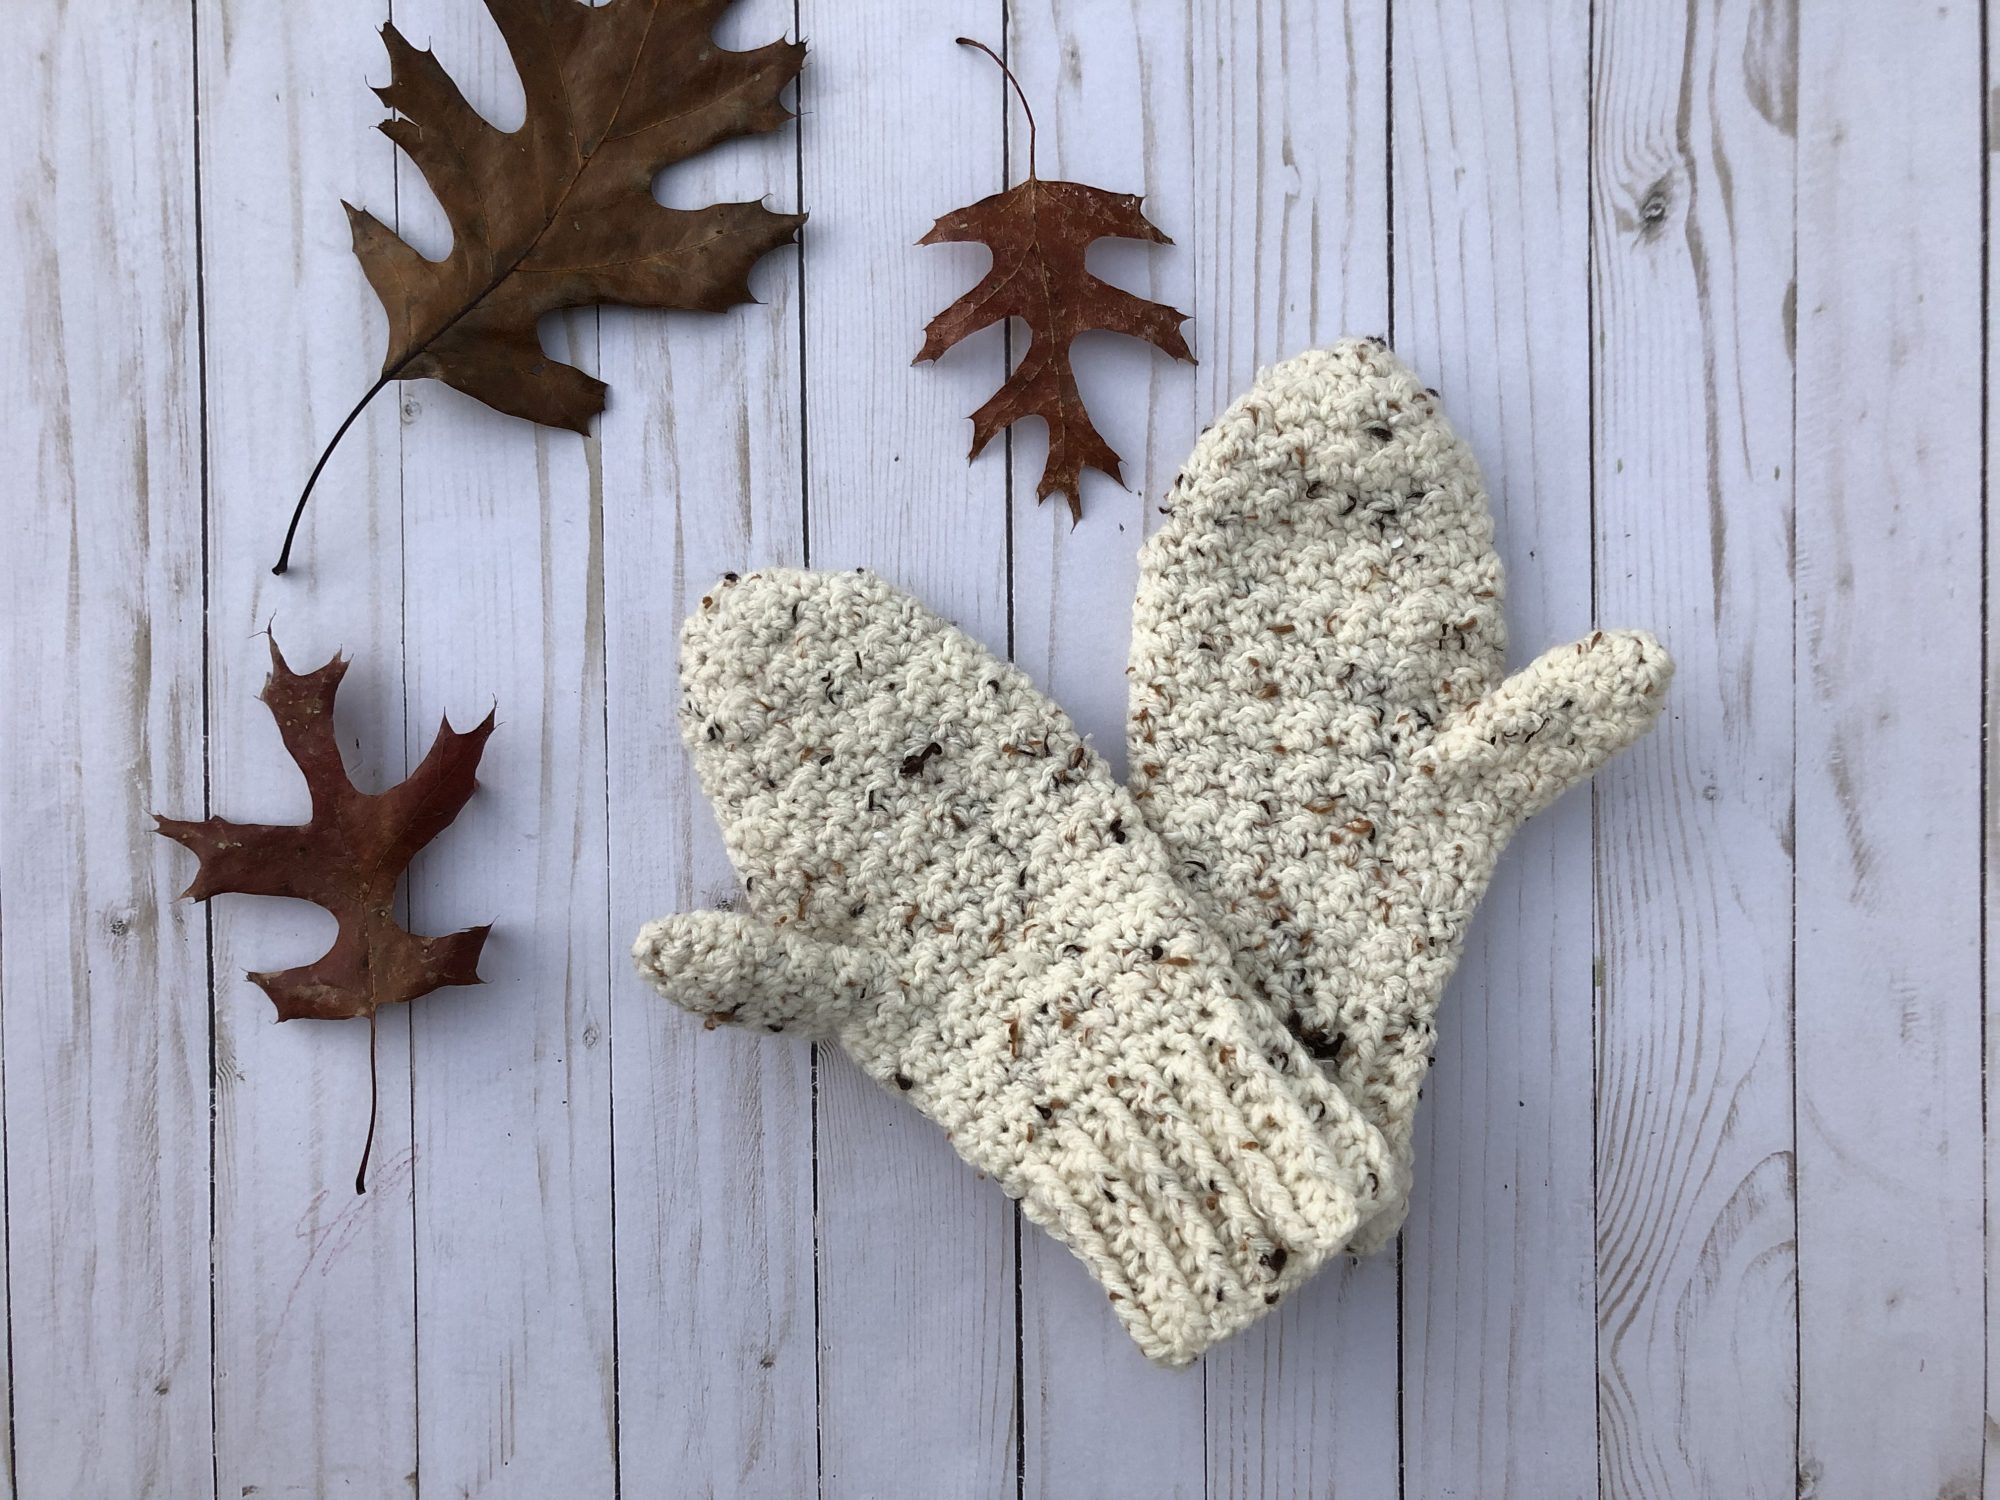
If you’re on the hunt for a quick crochet gift that looks store-bought (but is handmade with love), these faux fur fingerless gloves are calling your name. 💕
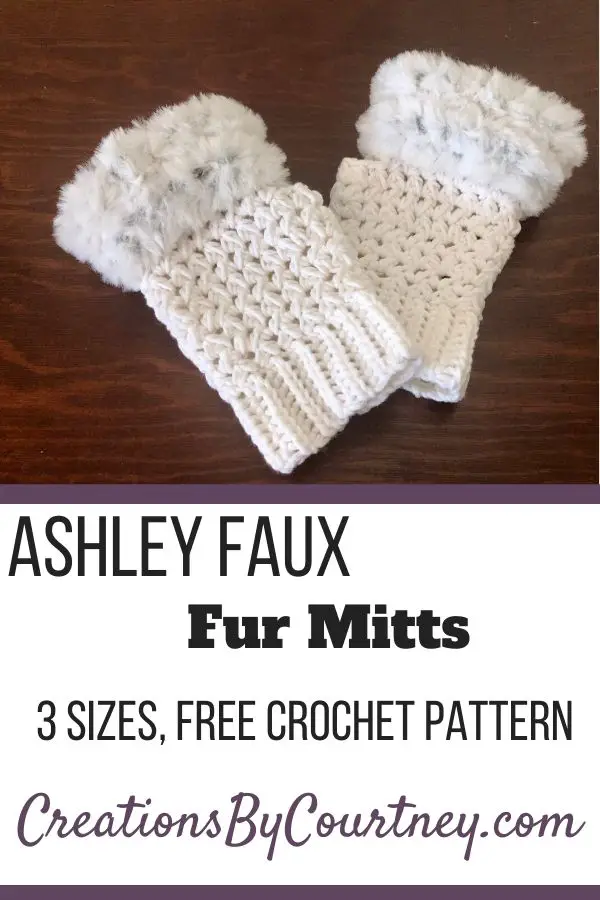
The Ashley Faux Fur Mitts are everything you want in a free crochet pattern for the holidays — stylish, cozy, fast to make, and beginner-friendly when it comes to working with fuzzy yarns. Whether you’re prepping for a winter market, knocking out your gift list, or just need a touch of glam for yourself, these mitts check all the boxes.
✨ They’re soft. They’re warm. They’re fabulously fluffy. And they only take a weekend to stitch!
You’ll love how the faux fur yarn creates a luxurious texture while forgiving any little stitch wonkiness — perfect if you’re new to working by feel. And let’s be honest… that skein of faux fur yarn in your stash? It’s been waiting for this moment. 😉
📌 Pin this for later!
Save this free crochet pattern to your holiday gift board before things get hectic. Quick makes like this are a lifesaver in December! 🎄
🎁 Want more cozy-glam crochet?
Get the full Ashley Crochet Pattern Collection — it includes coordinating patterns that make for a stunning handmade gift set (or your next best-seller)!
Choosing the right yarn for fingerless gloves
Let’s talk yarn real quick…
For the Ashley Faux Fur Mitts, you’ll want something that feels soft and cozy — the kind of yarn you can’t stop squishing. Faux fur yarn steals the show here, but what you pair it with matters too.
🧵 For the hand and wrist sections, feel free to use what you have in your stash — worsted weight acrylic, wool, or even a nice blend will work beautifully. Wool is warm and stretchy, acrylic is budget-friendly and easy to care for, and blends often offer the best of both worlds.
☁️ Cotton can work, especially if you want less stretch or live in a warmer climate, but just know it won’t be quite as soft or warm.
Now for the star of the show…
Faux fur yarn gives this pattern that luxe winter look — and don’t worry, I’ll give you a few tips below to make it easy to work with!
Can I make these crochet mitts?
Let’s call this one “adventurous beginner” to intermediate.
If you’ve never worked with faux fur yarn before, don’t stress! It might feel a little different at first (okay, maybe a lot different 😅), but once you get into a rhythm, it’s surprisingly forgiving — like, hides-all-the-wonky-stitches kind of forgiving.
The pattern uses half double crochet stitches, but in a different way, so the real “challenge” is understanding where to put your hook for the cluster stitches and the faux fur. You’ll definitely have to rely more on feel rather than sight with the faux fur. But don’t worry — I’ve included some tips below to help you through it.
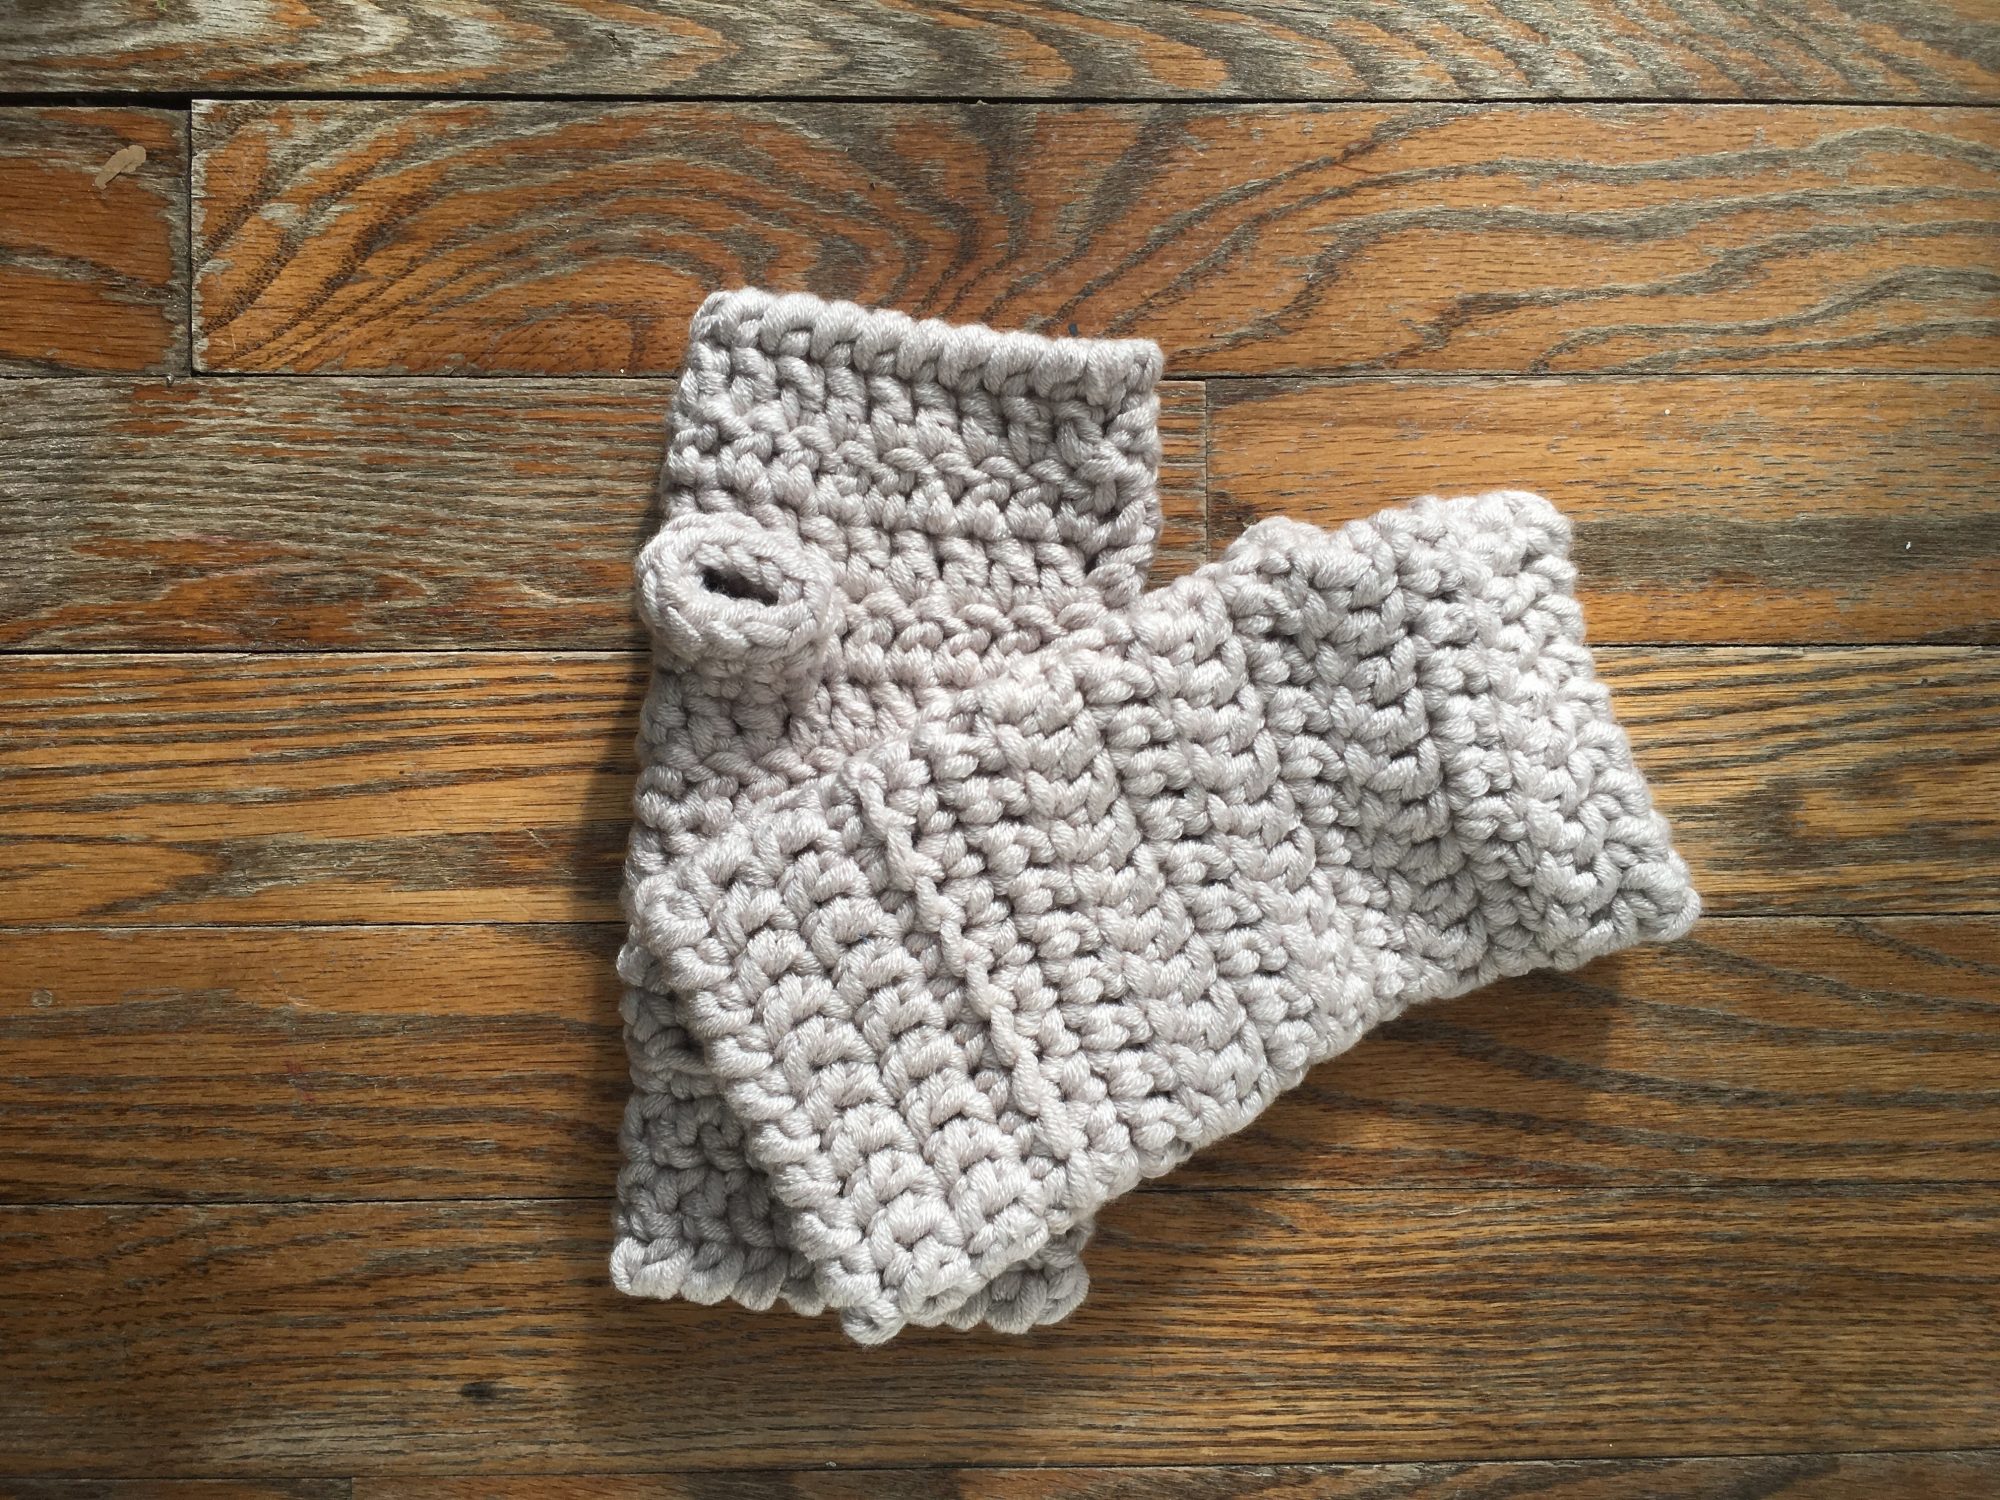
This pattern is available in three sizes, and you can customize the length of the cuff. Have fun mixing fiber and color, if you’re working from your stash. Want to add a little bling? Go for it. These mitts are yours to make fabulous.
And because the construction is simple, this is a great pattern for gift-making — you can whip up a few pair in a weekend so no one feels excluded from the specialness of a handmade gift.
Tips for Working with Faux Fur Yarn
Okay, real talk: faux fur yarn can look a little scary at first — like, where did the stitches go?! 😱
But I promise it’s not as wild as it seems. Once you let go of trying to see every stitch and instead start to feel your way through it, you’ll get the hang of it fast.
Here are a few tips to make your faux fur adventure smooth and stress-free:
1. Use your fingers like eyes
You won’t be able to count stitches the traditional way. Instead, feel for the spaces and trust your tension. After a few rounds, you’ll be surprised at how much easier it gets.
2. Stitch markers are your best friend
Especially when working in rounds, place a marker in the first stitch of each round. This little trick keeps everything on track (and saves your sanity later).
3. Keep the lighting good — but don’t overthink it
Bright lighting helps a little, but don’t strain your eyes trying to “see” each stitch. Faux fur isn’t about precision; it’s about texture. Relax and enjoy the fluff!
4. Practice on a small swatch
If this is your first time using faux fur yarn, try a few practice rows before jumping into the mitts. It’ll help build confidence without pressure.
5. Don’t frog unless you have to
Unraveling faux fur is… not fun. 😅 Try to work slowly and check your stitch count every few rounds if that helps.
💡 Bonus tip: Faux fur hides a multitude of oopsies. Seriously. No one will ever notice if you’re one stitch off — all they’ll see is a gorgeous, fluffy finish.
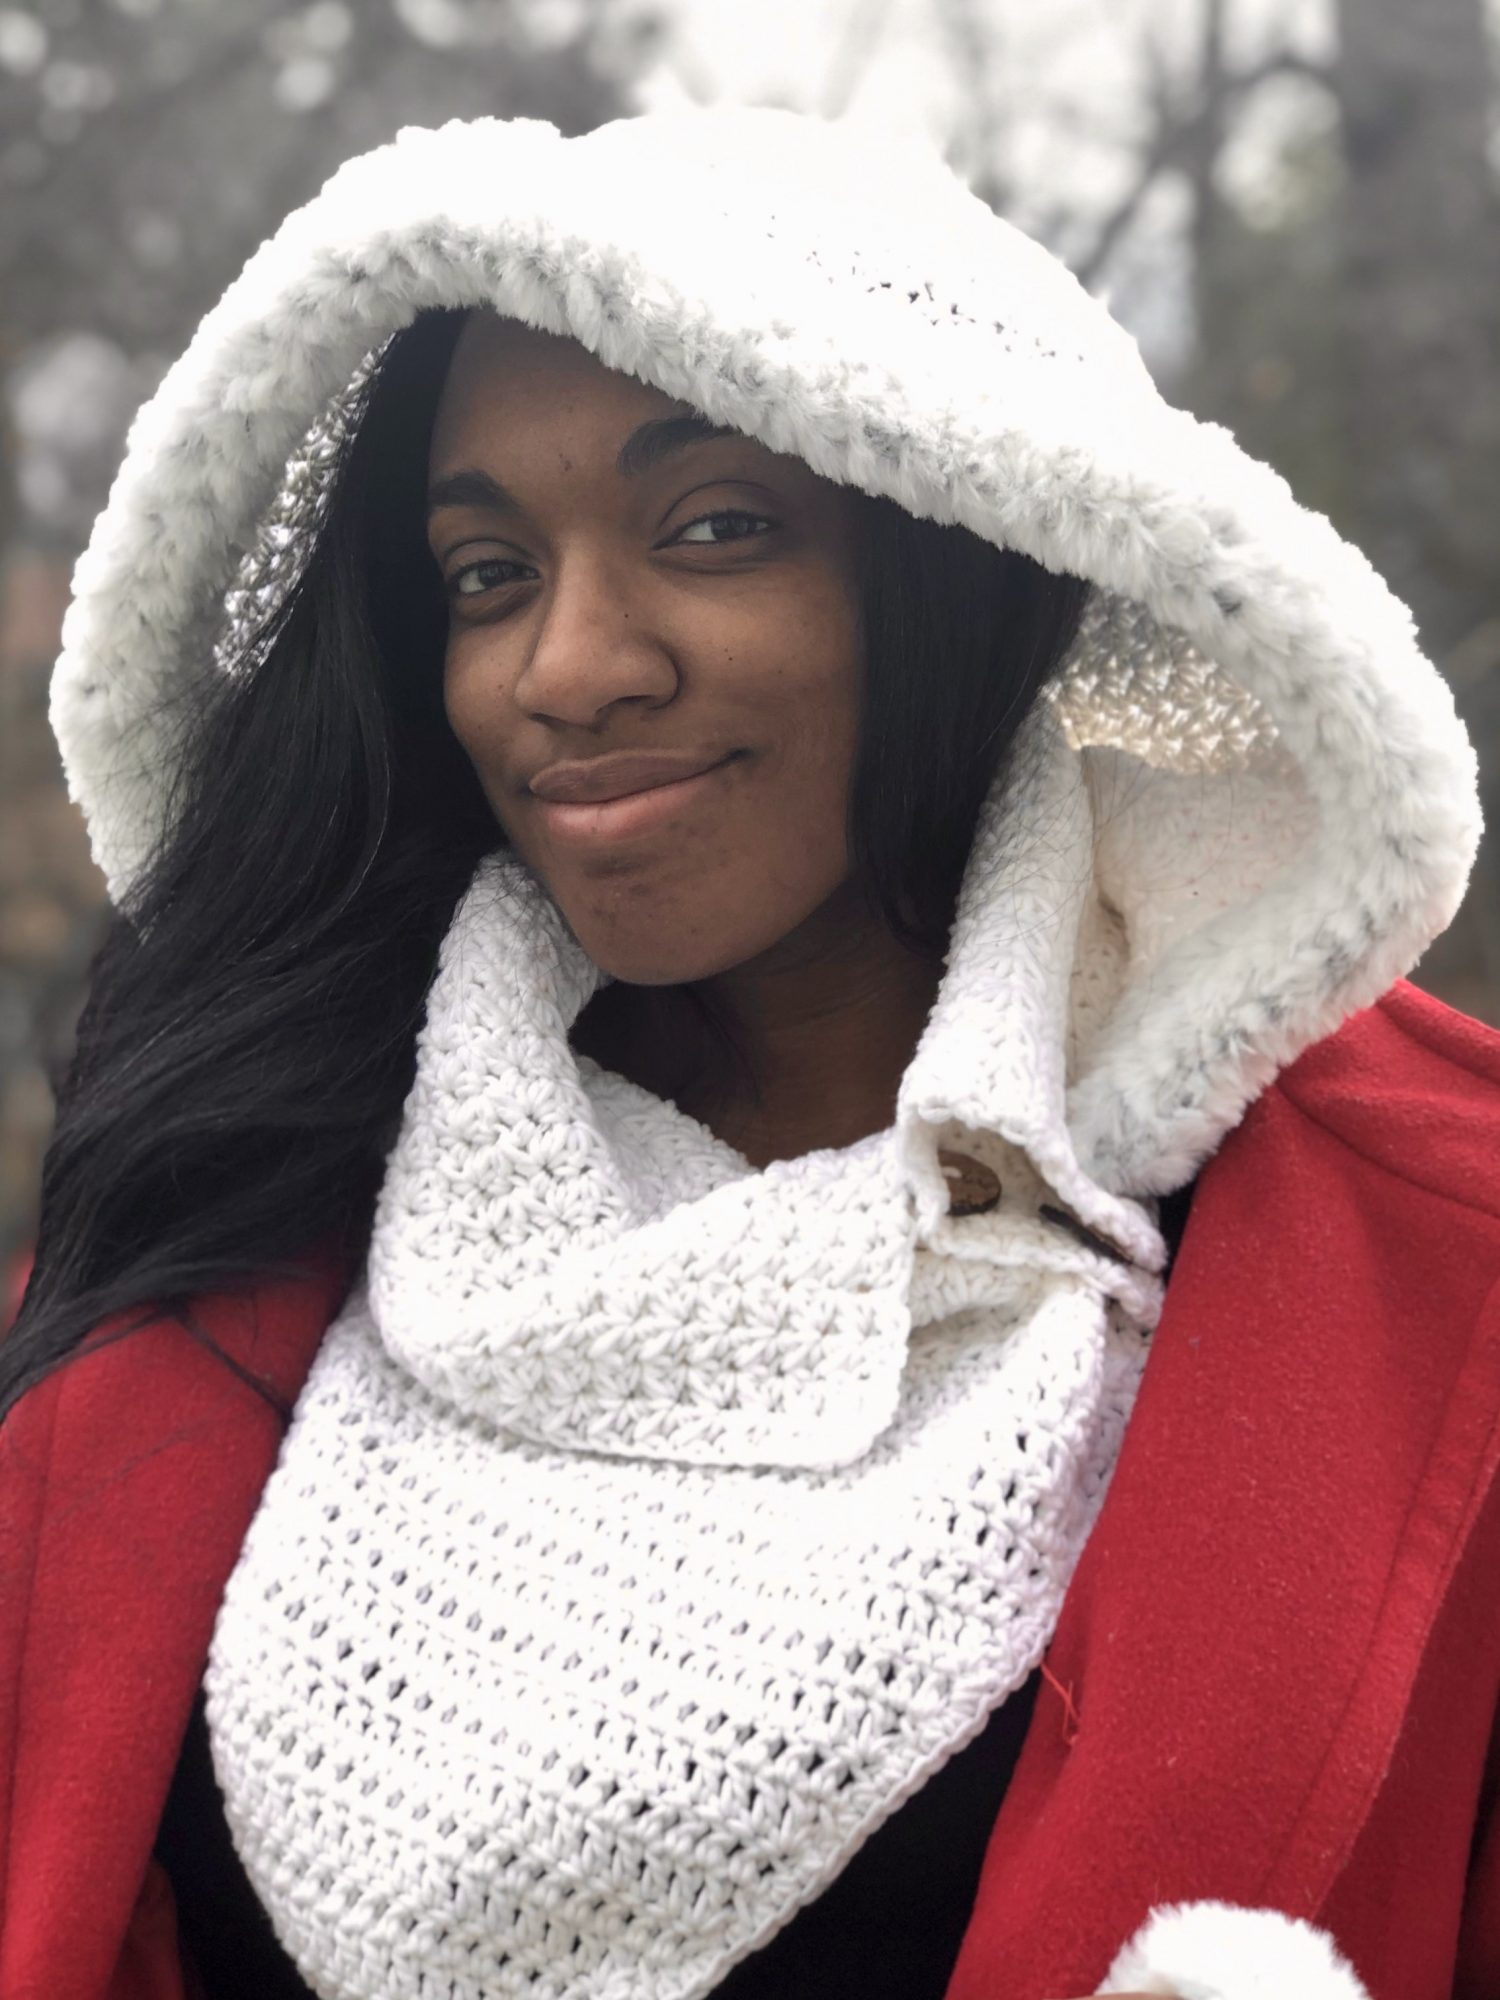
Make It a Set – Get the Ashley Collection!
Love the look of the Ashley Faux Fur Mitts? Why stop there?
The Ashley Collection includes coordinating patterns that pair perfectly with these cozy mitts — so you can create a matching handmade gift set that looks like it came from a boutique (but shhh… we’ll keep your secret 🤫).
Whether you’re prepping for a market or just love a coordinated look, this bundle saves you time scrolling and helps you get gifting done in style.
🧶 What’s in the Ashley Collection?
- The Ashley Faux Fur Mitts (you’ve already got this one!)
- Ashley Hooded Cowl
- Ashley Cozy Hat > more faux fur *wink wink*
- Coordinating accessory patterns to mix, match, and gift
- Easy-to-follow instructions with that same cozy-glam vibe
💌 Grab the full Ashley Collection here and crochet your way to a beautiful, handmade holiday lineup!
Let’s Make the Ashley Faux Fur Mitts!
Now that you’ve got your yarn, tips, and confidence lined up, it’s time to crochet your very own pair of faux fur fingerless gloves!
These mitts come together quickly, and once you’ve made one, you might just find yourself making a few more — because they really are that fun (and giftable!).
Grab your hook, find a cozy spot, and let’s get stitching. The full free crochet pattern is below! 👇
💬 Don’t forget to share your mitts!
I love seeing what you create with my patterns! Be sure to:
- 📸 Tag me on Instagram @creationsbycourtneyllc
- 💬 Leave a comment below to tell me who you’re making these for
- 📌 Pin this post to your crochet gift board so you can come back to it anytime
And if you’re ready to level up your gift-making game, don’t forget to check out the full Ashley Crochet Pattern Collection — the perfect way to crochet a coordinated, cozy gift set this holiday season. 🎁
*Disclosure: This post may contain affiliate links to products that I use, and think you will enjoy using too. Should you decide to purchase with any such link, I will earn a small commission at no cost to you. Thank you for supporting this small business.
Add to your Ravelry Queue
Materials
- Red Heart Super Saver Solids (100% Acrylic, 364 yards / 333 meters, 6.98 oz / 198 g): White, 1 skein
- Lion Brand Go For Faux Thick & Quick, super bulky #7, (100% Polyester, 24 yds/ 22m; 4.2 oz/ 120g): Chinchilla, 1 skein
- Alternatives:
- Hook US Furls Crochet Streamline Resin Hook I/9 (5.50 mm) or size needed to match
- Hook US Furls Crochet Streamline Latte N /10 mm
- Scissors
- Yarn needles
GAUGE
9 hdc-cl = 4″, 10 rows = 4″
SIZES
- Small: 7” hand circumference x 6” tall
- Medium: 7.5” hand circumference x 6” tall
- Large: 8” hand circumference x 6” tall
PATTERN KEY
ch: chain
FO: fasten off
fsc: foundation single crochet
hdc: half double crochet
hdc-cl: half double crochet cluster
hdc-cl inc: hdc-cl increase
L-ch: long chain
sl st: slip stitch
sc: single crochet
sp: space
st(s): stitch(es)
YO: yarn over
yo-slst: slip stitch yarn over
SPECIAL STITCHES & TECHNIQUES
Hdc-cl: YO, insert hook into same st as last st made (or first st of the row), YO, pull up a loop (3 loops on hook), YO (4 loops on hook), sk 1 st, insert hook in next st, YO, pull up a loop (5 loops on hook), YO, pull through all 5 loops, ch 1
- •Next row: L-ch, hdc-cl in same st as sl st and next ch-1 sp; remaining hdc-cl are worked in same ch-1 sp as last st made and the next ch-1 sp
Hdc-cl inc: YO, insert hook in same st as last st made, YO, pull up loop (3 loops on hook), YO (4 loops on hook), insert hook in next hdc-cl (do not skip a st), YO, pull up a loop (5 loops on hook), YO pull through all loops, ch 1
- •Make next hdc-cl in same hdc-cl of last st and the next ch-1 sp
L-ch: Pull up a loop to height of row, ch 1, proceed with st in pattern
YO-slst: YO, insert hook in back loop of next st, YO, pull through st and 2 loops on hook
EXPERIENCE LEVEL
Intermediate
NOTES
- Pattern is written US terms.
- Read the entire pattern before beginning.
- Pattern is worked in 3 sections: Ribbing, Hand, Edging
- Beginning ch 1, ch 2 and L-ch do not count as first st
- It may help to mark the last slst-yo before turning to help maintain stitch count.
- Turn work clockwise when completing the ribbing.
Grab the ad-free PDF from My Pattern Shops


INSTRUCTIONS:
Right Hand Ribbing: Small (Medium, Large)
Row 1: 8 fsc, turn
*Note: If you would like a longer ribbing, add any number of fsc
Row 2: Ch 1, slst-yo in each st across, turn – 8 slst-yo
Row 3-22 (24, 26): Repeat Row 2. Do not FO
Right Hand
Fold Row 1 over to Row 22 (24, 26), sl st through one loop of each st of both rows to seam; do not FO. Seam can be left facing outward, or be flipped inward.
Row 1: Ch 1, evenly sc 25 (27, 29) in the ends of the Ribbing, sl st to join – 25 (27, 29)
Row 2: L-ch, hdc-cl starting in first st, * hdc-cl 11(12, 13) times, hdc-cl in same st as last st made and first st of first hdc-cl, sl st to L-ch (counts as ch-1 for last hdc-cl only, here and throughout), turn – 13 (14, 15) hdc-cl
Row 3: L-ch, hdc-cl starting in first st, hdc-cl 4 (4, 5) times, hdc-cl inc, hdc-cl in remaining 7 (8, 9) sts, sl st to join in L-ch, turn – 14 (15, 16) hdc-cl
Row 4-6 : Repeat Row 3, turn – 17 (18, 19) hdc-cl
Row 7-8: L-ch, hdc-cl starting in first st, hdc-cl around, sl st in L-ch to join, turn – 17 (18, 19) hdc-cl
Row 9: L-ch, hdc-cl starting in first st, hdc-cl 2 times, hdc-cl in same ch-1 sp as last st made and 4th ch-1 from hook (4 hdc-cl skipped), 10 (11, 12) hdc-cl, sl st in L-ch to join, turn – 14 (15, 16) hdc-cl
Row 10:L-ch, hdc-cl starting in first st, hdc-cl around, sl st in L-ch to join, turn – 14 (15, 16) hdc-cl
Row 11-12: Ch 3 (counts as hdc and ch 1), sk next st, *hdc in next ch-1 sp, ch1; repeat from * around, sl st to ch-2, FO – 14 (15, 16) hdc, 14 (15, 16) ch-1
Left Hand Ribbing: Small (Medium, Large)
Row 1: 8 fsc, turn
*Note: If you would like a longer ribbing, add any number of fsc
Row 2: Ch 1, slst-yo in each st across, turn – 8 slst-yo
Row 3-22 (24, 26): Repeat Row 2. Do not FO
Left Hand
Fold Row 1 over to Row 22 (24, 26), sl st through one loop of each st of both rows to seam; do not FO. Seam can be left facing outward, or be flipped inward.
Row 1: Ch 1, evenly sc 25 (27, 29) in the ends of the Ribbing, sl st to join – 25 (27, 29)
Row 2: L-ch, hdc-cl starting in first st, * hdc-cl 11(12, 13) times, hdc-cl in same st as last st made and first st of first hdc-cl (counts as ch-1 for last hdc-cl only, here and throughout), sl st to L-ch, turn – 13 (14, 15) hdc-cl
Row 3: L-ch, hdc-cl starting in first st, hdc-cl 4 (4, 5) times, hdc-cl inc, hdc-cl in remaining 7 (8, 9) sts, sl st to join in L-ch, turn – 14 (15, 16) hdc-cl
Row 4-6 : Repeat Row 3, turn – 17 (18, 19) hdc-cl
Row 7-8: L-ch, hdc-cl starting in first st, hdc-cl around, sl st in L-ch to join, turn – 17 (18, 19) hdc-cl
Row 9: L-ch, hdc-cl starting in first st, 9 (10, 11) hdc-cl, hdc-cl in same ch-1 sp as last st made and 4th ch-1 from hook (4 hdc-cl skipped), 3 hdc-cl, sl st in L-ch to join, turn – 14 (15, 16) hdc-cl
Row 10:L-ch, hdc-cl starting in first st, hdc-cl around, sl st in L-ch to join, turn – 14 (15, 16) hdc-cl
Row 11-12: Ch 3 (counts as hdc and ch 1), sk next st, *hdc in next ch-1 sp, ch1; repeat from * around, sl st to ch-2, turn. FO after Row 12 – 14 (15, 16) hdc, 14 (15, 16) ch-1
Edging
Row 1: Using US N/10mm hook and Yarn B, create a loop by pulling B around any hdc on Row 11, working round each hdc, sl st around, sl st to join in back loop of first st
Row 2: Sc (without ch 1) around first ch-1 sp, *sc around each ch-1 sp, FO then weave end to join.
Finishing
Sew in all ends, trim excess.
More Patterns You May Like:
Pin this pair of faux fur fingerless gloves to make later
Want to talk about yarn goodness, crochet tips, and exclusive weekly deals? Join my Facebook Group, Confidently Crochet with Creations By Courtney.
If we’re not hanging out on social media yet, come check me out on Facebook, Instagram and Pinterest.
Join my newsletter for sneak peeks, crochet tips, and more. Plus you’ll receive a 21-page guide for making crochet garments without gauge. *wink wink SIGNUP TODAY
Use #CreationsByCourtney on social media when sharing your projects.
©2020, 2025 This pattern is not to be duplicated or resold, and not to be reproduced commercially. You may sell finished products on Etsy, at farmers markets, and craft fairs, but please credit Creations By Courtney as the pattern’s author.If we’re not hanging out on social media yet, come check me out on


6 Responses
Sooo cute !
Thank you!