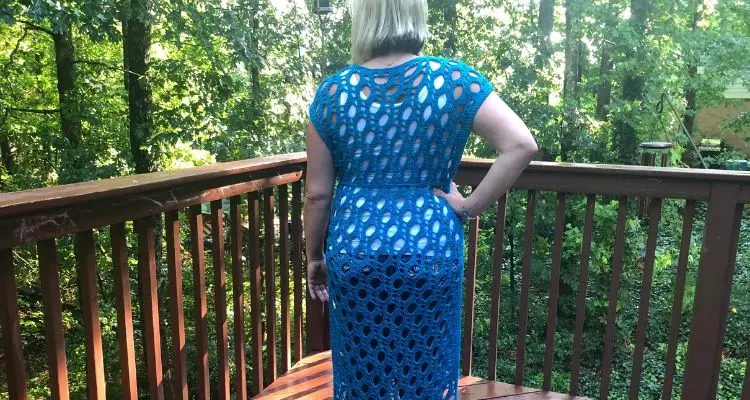
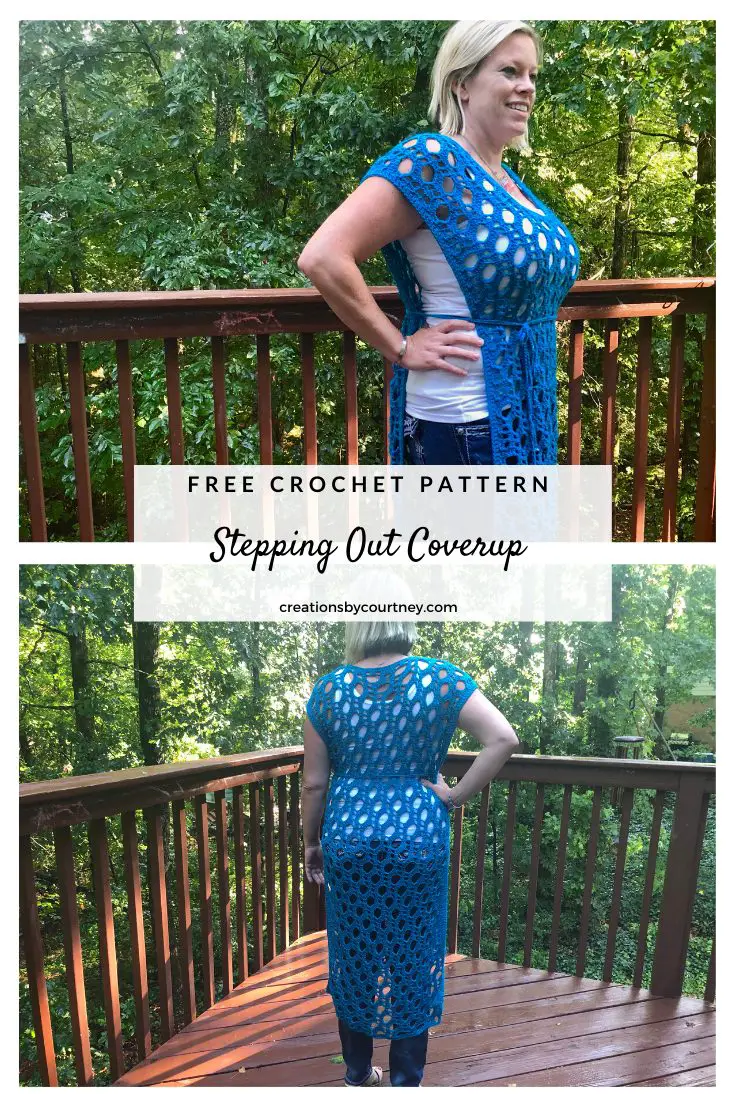
The Stepping Out Coverup is a lacy crochet coverup to be worn to the pool, beach, or anywhere. I discovered this stitch 5 years ago, and was intending to create a lacy crochet top to layer with tank tops, but I never made it beyond making two swatches to practice the stitch pattern flat and in the round.

When I had the chance to participate in the Furls Blog Hop 2020, I was ecstatic!! If you aren’t aware of my love for Furls a Crochet, I LOVE LOVE LOVE their hooks, and now the z-twist yarn, Whims Merino! I wish every yarn was a z-twist for crocheters because the yarn NEVER split. The shine of Whims Merino DK makes everything better too!
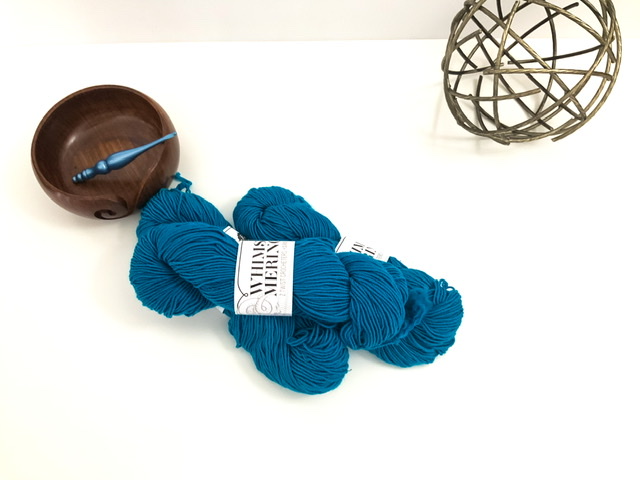
A happy dance was required when the Whims Merino DK and Candy Shop Hook arrived! Anybody else love that the hanks arrive in a black satin bag??

It was so hard to choose one color, as I love all colors, but I decided to choose the blue, as it said, “Summertime!” to me and can easily be worn through the fall and winter. If I’m honest, the Stepping Out Coverup works up so fast, that you can make a few in different colors to match your favorite summer and fall outfits. And the Candy Shop Hook colors are all awesome, but I chose the Cosmic Mint (G+/ 4.5mm) as it’s a size that works well for DK and light worsted weight projects.
Besides wearing this over a swimsuit, this lacy crochet coverup is like a poncho to layer with any outfit, but also has AH-MAZING drape to be styled as a large scarf or wrap for cool weather days. I made some short ties for each side, and a super long chain with beads attached to the ends to create a simple belt. It’s fun to experiment with different looks with a sassy piece like this.
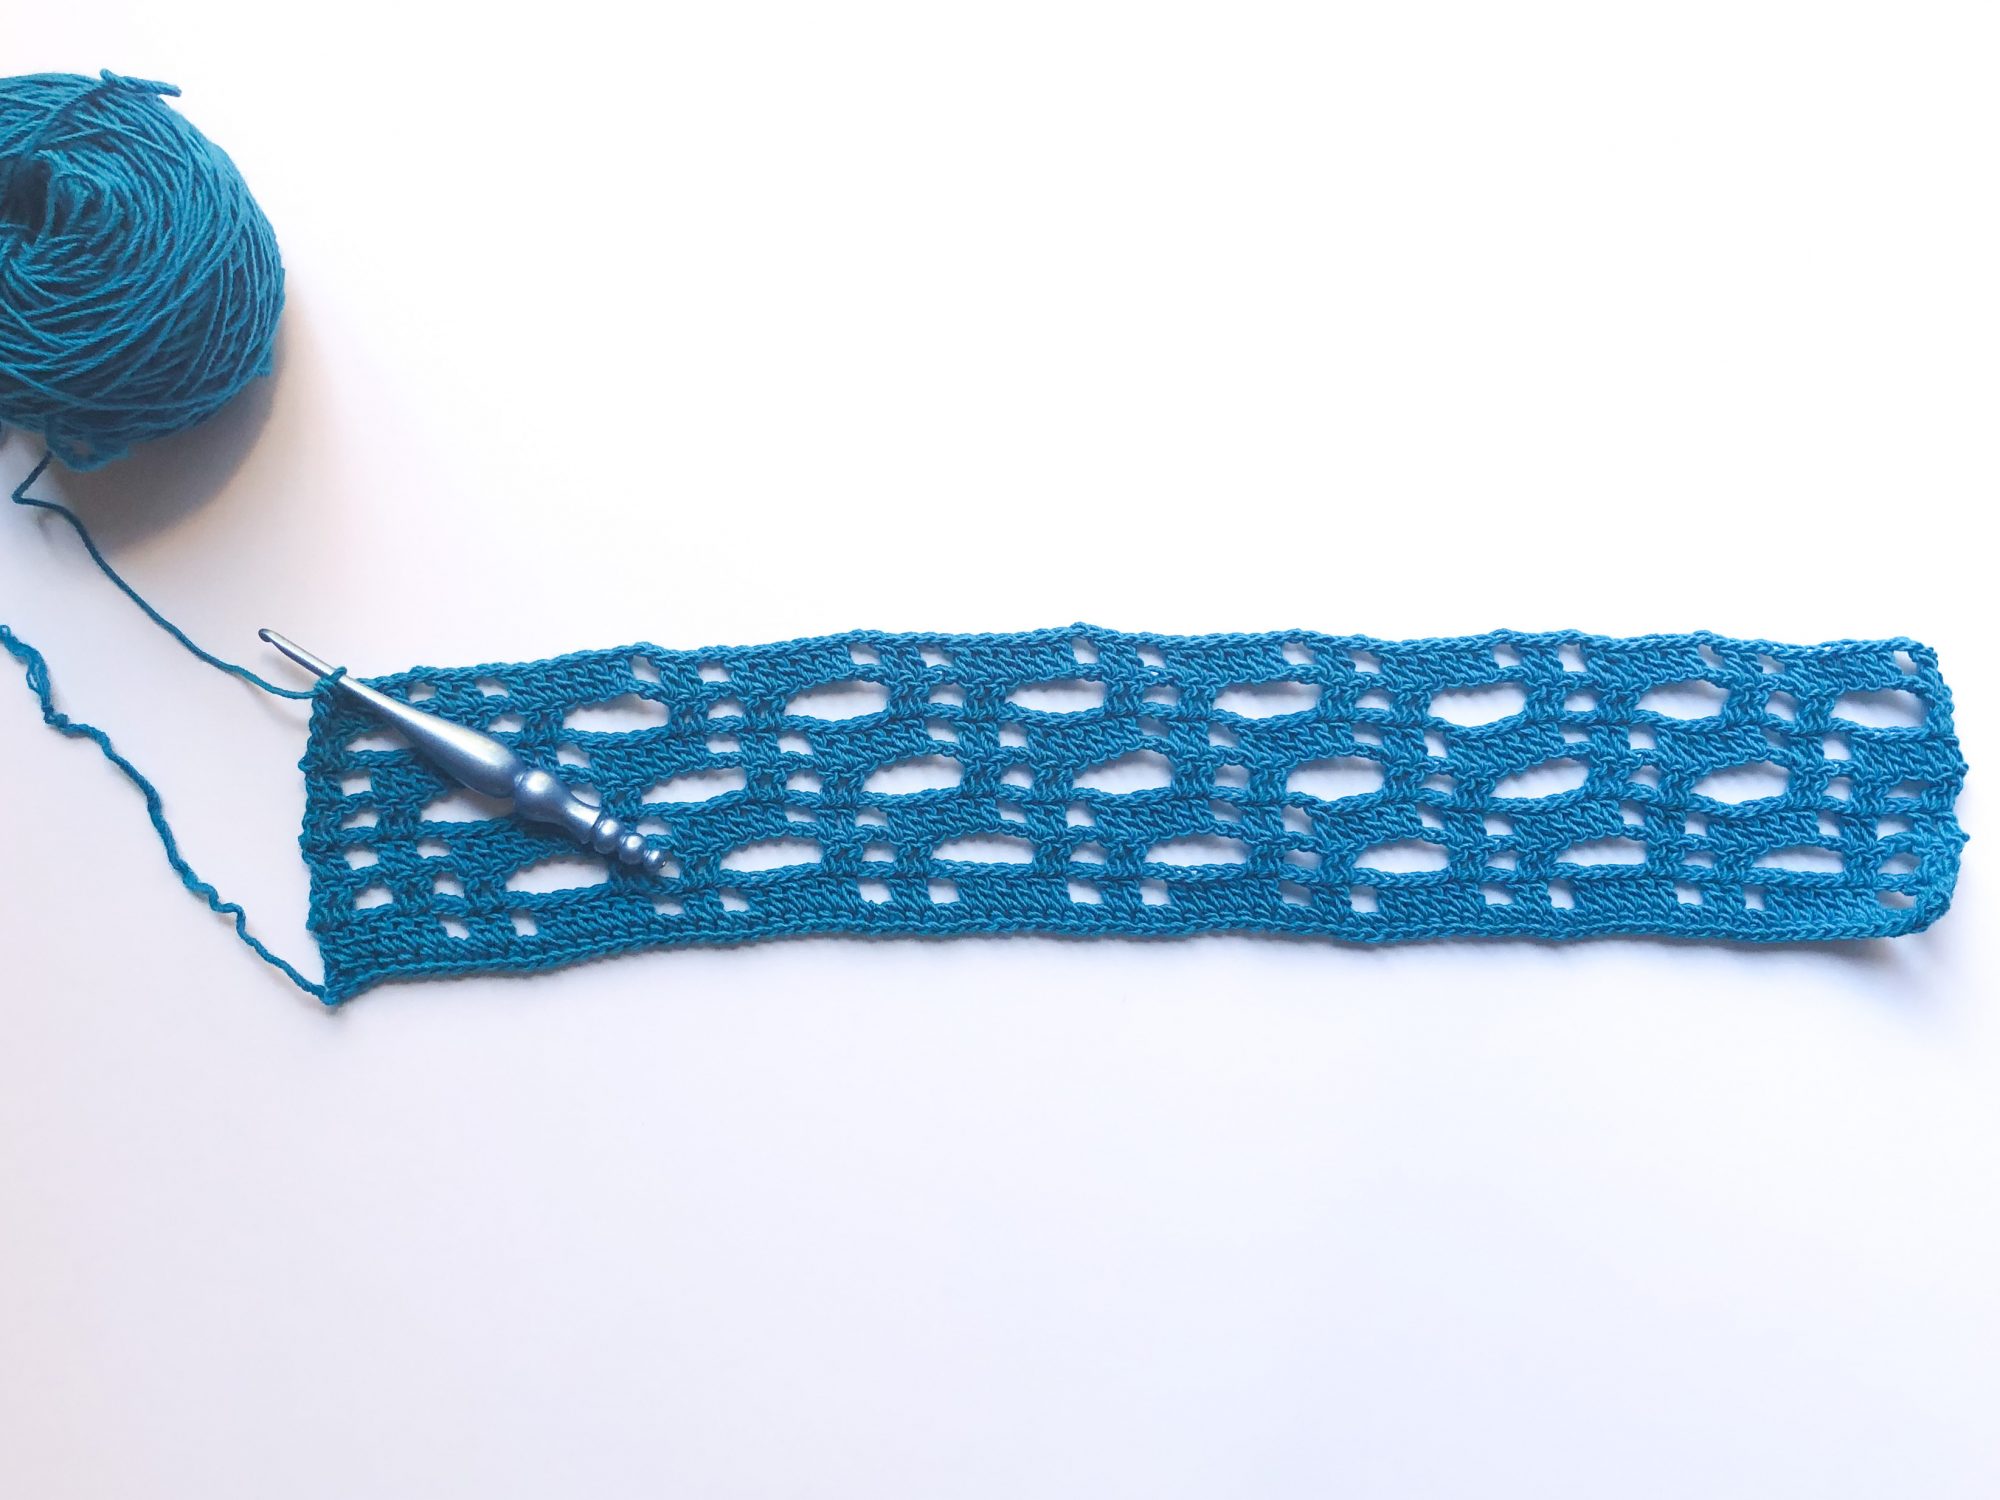
You will be surprised by how quickly you learn the stitch and row repeat. 🙂 Besides the foundation row, this entire garment only uses double crochet, chain and single crochet. It’s also made in one piece and there is no seaming, unless you decide to seam the sides to wear the coverup like a lacy dress or poncho. As one tester said, the stitches change shape as the project grows, so it kept her attention.
Thanks to my friends, Roeska (@handmadebyroeska on IG) and Tiffany of Crafty Cub Crochet the ad-free PDF has stitch diagrams and was professionally tech edited. Additionally, the pattern was tested by Cheryl, Denise, Audrey, Katie, Gunya and Elsie. My awesome neighbor and friend modeled the S/M.
Check out their gorgeous coverups HERE.
*Disclosure: This post may contain affiliate links to products that I use, and think you will enjoy using too. Should you decide to use any such link, I will earn a small commission at no cost to you. Thank you for supporting this small business.
Add to Ravelry Queue
MATERIALS
- Furls Crochet Whims Merino (50% fine superwash merino wool, 50% nylon, 196 yards / 180 meters, 3.5 ounces / 100 grams) Blue: 5, 7, 9, or 11 skeins or 980; 1,176; 1,764; or 2,156 yards
- Hook – Furls Crochet Candy Shop Blueberry Mint, G+/ 4.5 mm or size needed to meet gauge
- Scissors
- Yarn needle
- 2 stitch markers
- Measuring tape
GAUGE
Swatch, relaxed: 12.5 pattern sts = 4” (10 cm), 9 pattern rows = 4” (10 cm)
In pattern (stretched by weight of fabric): 19 pattern sts = 4” (10 cm); 8 pattern rows = 4” (10 cm)
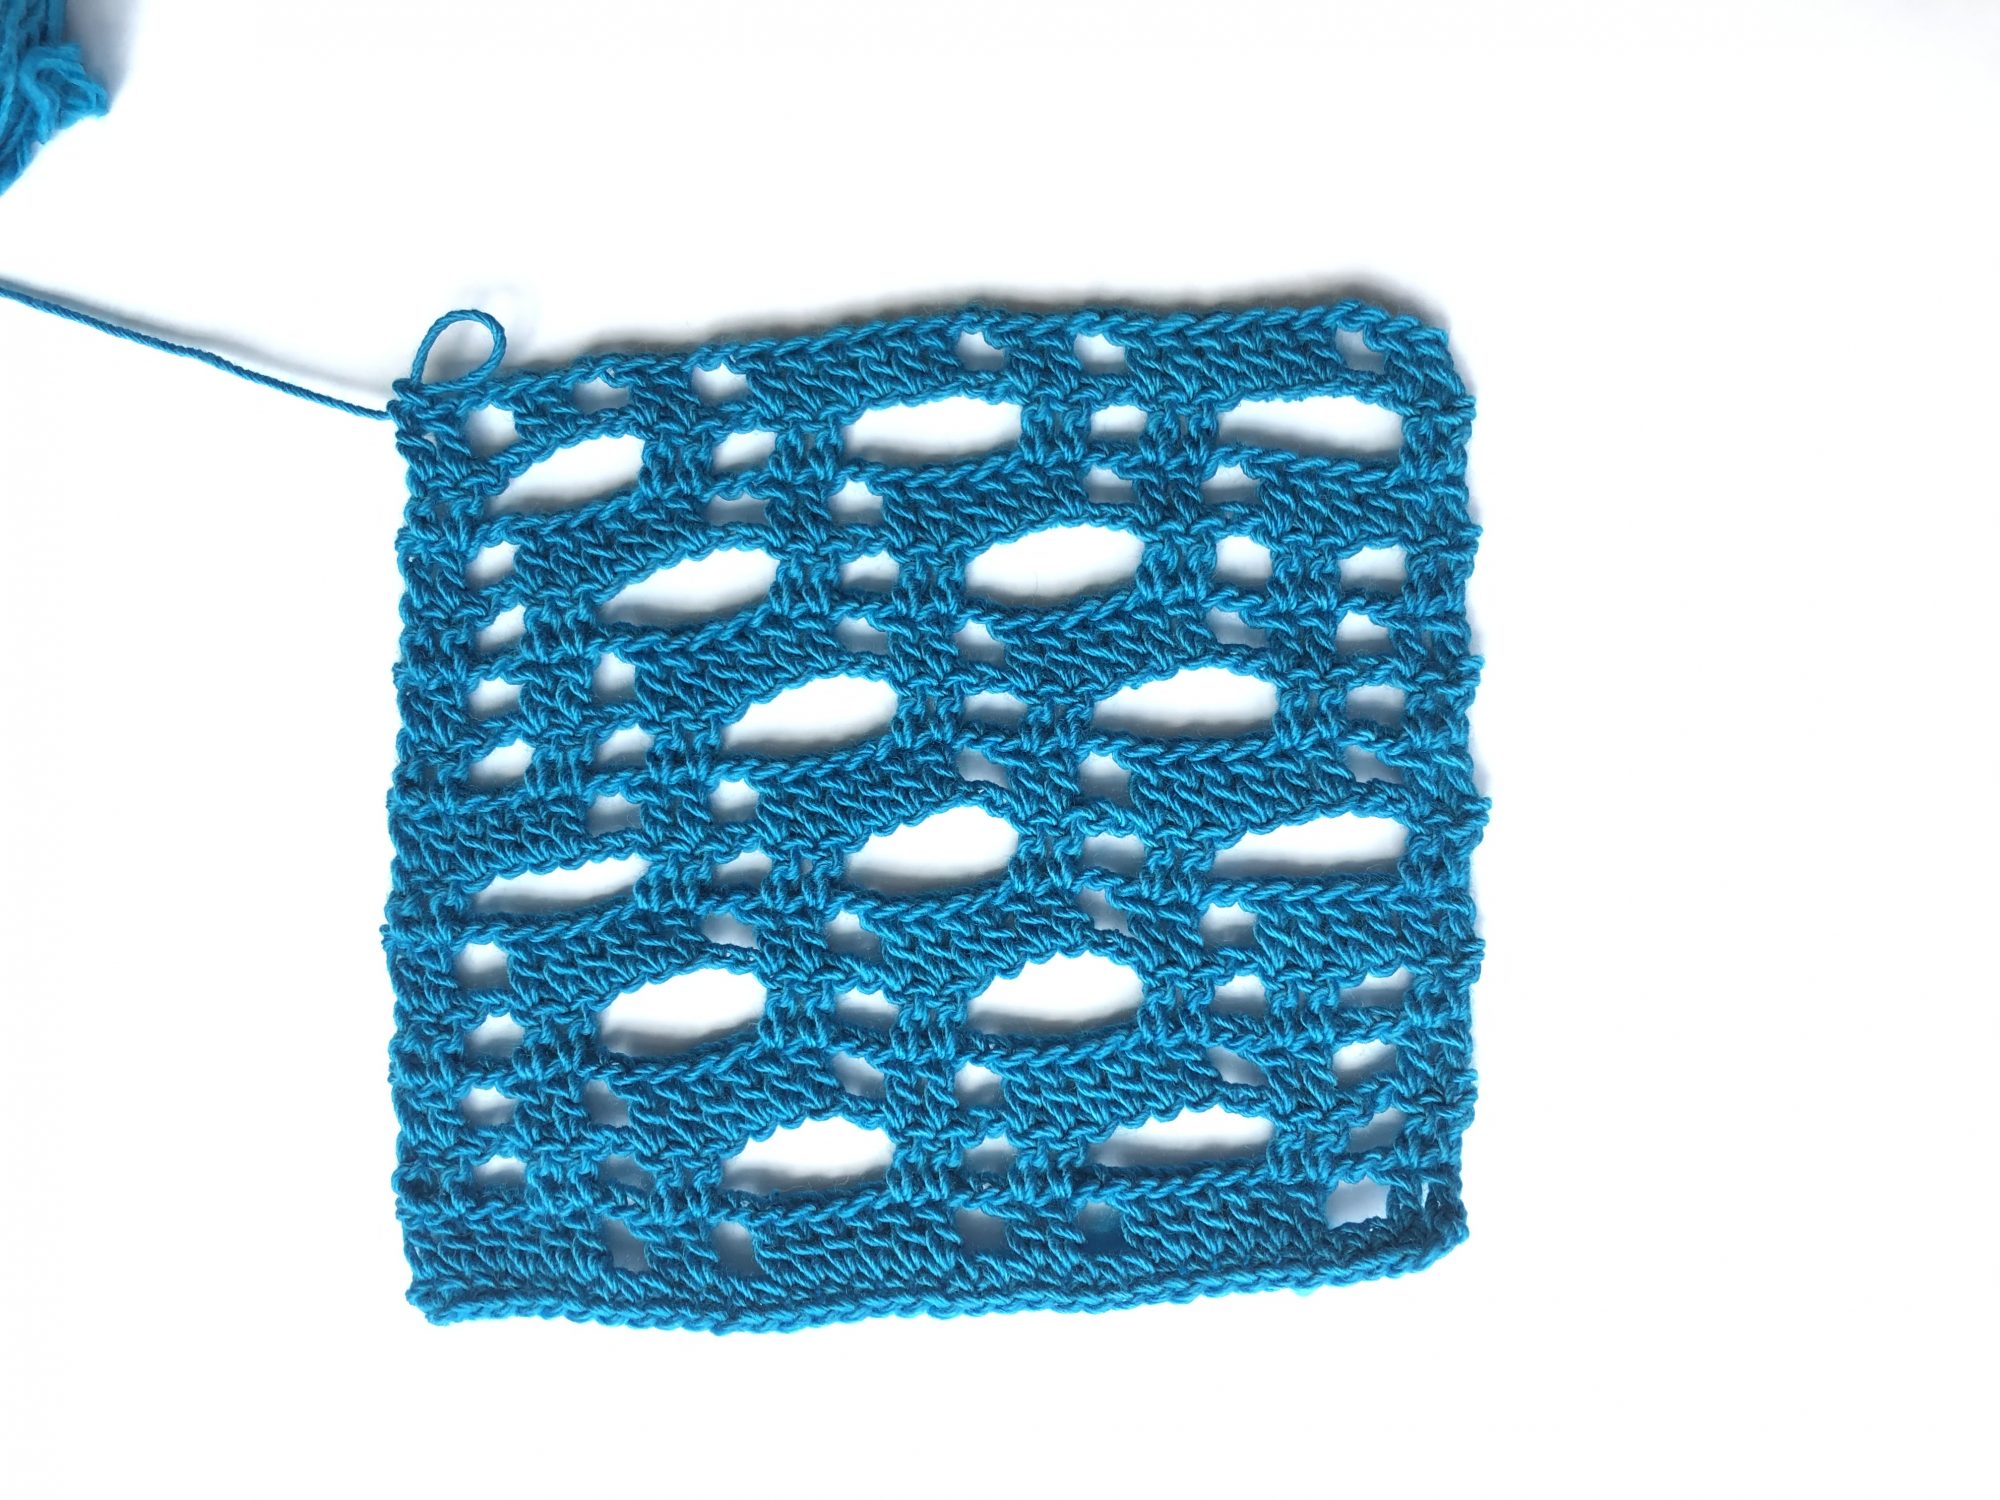
To make gauge swatch:
Fsc 34
Row 1: CSDC in first st, dc in next st, ch 2, sk 2 sts, dc in next 6 sts, *ch 2, sk 2 sts, dc in next 2 sts, ch 2, sk 2 sts, dc in next 6 sts; repeat from * one more time, turn
Row 2: CSDC in first st, dc in next st, [ch 2, sk 2 sts, dc in next 2 sts] 2 times, *ch 6, sk 6 sts, dc in next 2 sts, ch 2, sk 2 sts, dc in next 2 sts; repeat from * one more time, turn
Row 3: CSDC in first st, dc in next st, ch 2, sk 2 sts, *dc in next 2 sts, ch 2, sk 2 sts, dc in next 6 sts, ch 2, sk 2 sts; repeat from * until 6 sts remain, dc in next 2 sts, ch 2, sk 2 sts, dc in last 2 sts, turn
Row 4: CSDC in first st, dc in next st, ch 2, sk 2 sts, dc in next 2 sts,*ch 6, sk 6 st, dc in next 2 sts, ch 2, sk 2 sts, dc in next 2 sts, repeat from * one more time, ch 2, sk 2 sts, dc in last 2 sts, turn
Row 5: CSDC in first st, dc in next 5 sts, ch 2, sk 2 sts, dc in next 2 sts, *ch 2, sk 2 sts, dc in next 6 sts, ch 2, sk 2 sts, dc in next 2 sts; repeat from * one more time, turn
Row 6: CSDC in first st, dc in next st, ch 6, sk 6 sts, dc in next 2 sts, *ch 2, sk 2 sts, dc in next 2 sts, ch 6, sk 6 sts, dc in next 2 sts; repeat from * one more time, turn
Row 7: CSDC in first st, dc in next st, ch 2, sk 2 sts, dc in next 6 sts, *ch 2, sk 2 sts, dc in next 2 sts, ch 2, sk 2 sts, dc in next 6 sts; repeat from *one more time, turn
Repeat Rows 2-7 one more time
SIZES
- S/M: 19” wide x 35” long [47.5 cm x 87.5 cm], when folded in half
- L/1XL: 21.5” wide x 35” long [53.75 cm x 87.5 cm], when folded in half
- 2XL/3XL: 24” wide x 32” long [60 cm x 80 cm], when folded in half
- 4XL/5XL: 27” wide x 32” long [67.5 cm x 80 cm], when folded in half
PATTERN KEY
- Ch: chain
- CSDC: chainless starting double crochet
- dc: double crochet
- M: stitch marker
- sc: single crochet
- sc2tog: single crochet 2 together
- sc3tog: single crochet 3 together
- sk – skip
- sl st: slip stitch
- st(s) – stitch(es)
- YO – yarn over
SPECIAL STITCHES & TECHNIQUES
- CSDC: pull up a tall loop, holding loop in place, YO and wrap yarn around hook (yarn over), insert hook in first st, YO, pull up a loop, [YO, pull through 2 loops] twice
EXPERIENCE LEVEL
Intermediate
NOTES
- Pattern is written in US terms.
- Read the entire pattern before beginning.
- Make a gauge swatch to ensure there is enough yarn to meet the final measurements. The swatch is also used as well to become familiar with the stitch pattern.
- Pattern is worked in 6 sections: Front, First Shoulder, Second Shoulder, Neck Opening Edge, Back, Edging.
- Instructions given fit woman’s size S/M; changes for L/1XL, 2XL/3XL and 4XL/5XL are in [ ].
- “Width” of size refers to width measured from shoulder to shoulder. “Length” in size refers to the total row height of Front / Back (from the neck down to the bottom).
- This garment is meant to be narrow and fall on the shoulders. You can choose to make a larger size for a wider garment.
- CSDC can be replaced with ch 3, but will likely create a noticeable gap.
- This pattern is a 6 row repeat. The length can be adjusted by creating fewer or more row repeats. After any adjustments to row count, end on a final row of repeat.
- Yarn amounts listed do not include any additional rows. Yarn with a natural fiber will stretch more, and require less yarn to reach the suggested length.
Purchase the ad-free PDF with a schematic, stitch charts and color coding for each size.
INSTRUCTIONS
S/M (L/1XL, 2XL/3XL, 4XL/5XL)
Fsc 94, 106, 118, 130
Row 1 (RS): CSDC in first st, dc in next st, ch 2, sk 2 sts, dc in next 6 sts, *ch 2, sk 2 sts, dc in next 2 sts, ch 2, sk 2 sts, dc in next 6 sts; repeat from * 6 (7, 8, 9) more times, turn – 94, 106, 118, 130 sts
Row 2: CSDC in first st, dc in next st, ch 2, sk 2 sts, dc in next 2 sts, ch 2, sk 2 sts, dc in next 2 sts, *ch 6, sk 6 sts, dc in next 2 sts, ch 2, sk 2 sts, dc in next 2 sts; repeat from * 6 (7, 8, 9) more times, turn – 94, 106, 118, 130 sts
Row 3: CSDC in first st, dc in next st, ch 2, sk 2 sts, *dc in next 2 sts, ch 2, sk 2 sts, dc in next 6 sts, ch 2, sk 2 sts; repeat from * 6 (7, 8, 9) more times, dc in next 2 sts, ch 2, sk 2 sts, dc in last 2 sts, turn – 94, 106, 118, 130 sts
Row 4: CSDC in first st, dc in next st, ch 2, sk 2 sts, *dc in next 2 sts, ch 6, sk 6 sts, dc in next 2 sts, ch 2, sk 2 sts; repeat from * 6 (7, 8, 9) more times, dc in next 2 sts, ch 2, sk 2 sts, dc in last 2 sts, turn – 94, 106, 118, 130 sts
Row 5: CSDC in first st, dc in next 5 sts, ch 2, sk 2 sts, dc in next 2 sts, *ch 2, sk 2 sts, dc in next 6 sts, ch 2, sk 2 sts, dc in next 2 sts; repeat from * 6 (7, 8, 9) more times to end, turn – 94, 106, 118, 130 sts
Row 6: CSDC in first st, dc in next st, ch 6, sk 6 sts, dc in next 2 sts, *ch 2, sk 2 sts, dc in next 2 sts, ch 6, sk 6 sts, dc in next 2 sts; repeat from * 6 (7, 8, 9) more times to end, turn – 94, 106, 118, 130 sts
Row 7: CSDC in first st, dc in next st, ch 2, sk 2 sts, dc in next 6 sts, *ch 2, sk 2 sts, dc in next 2 sts, ch 2, sk 2 sts, dc in next 6 sts; repeat from * 6 (7, 8, 9) more times, turn – 94, 106, 118, 130 sts
Row 8-49 (8-49, 8-55, 8-55): Repeat Rows 2-7 until piece measures 24.5” (24.5”, 26.5”, 26.5”) / [62.5 cm, 62.5 cm, 67.5 cm, 67.5 cm], turn
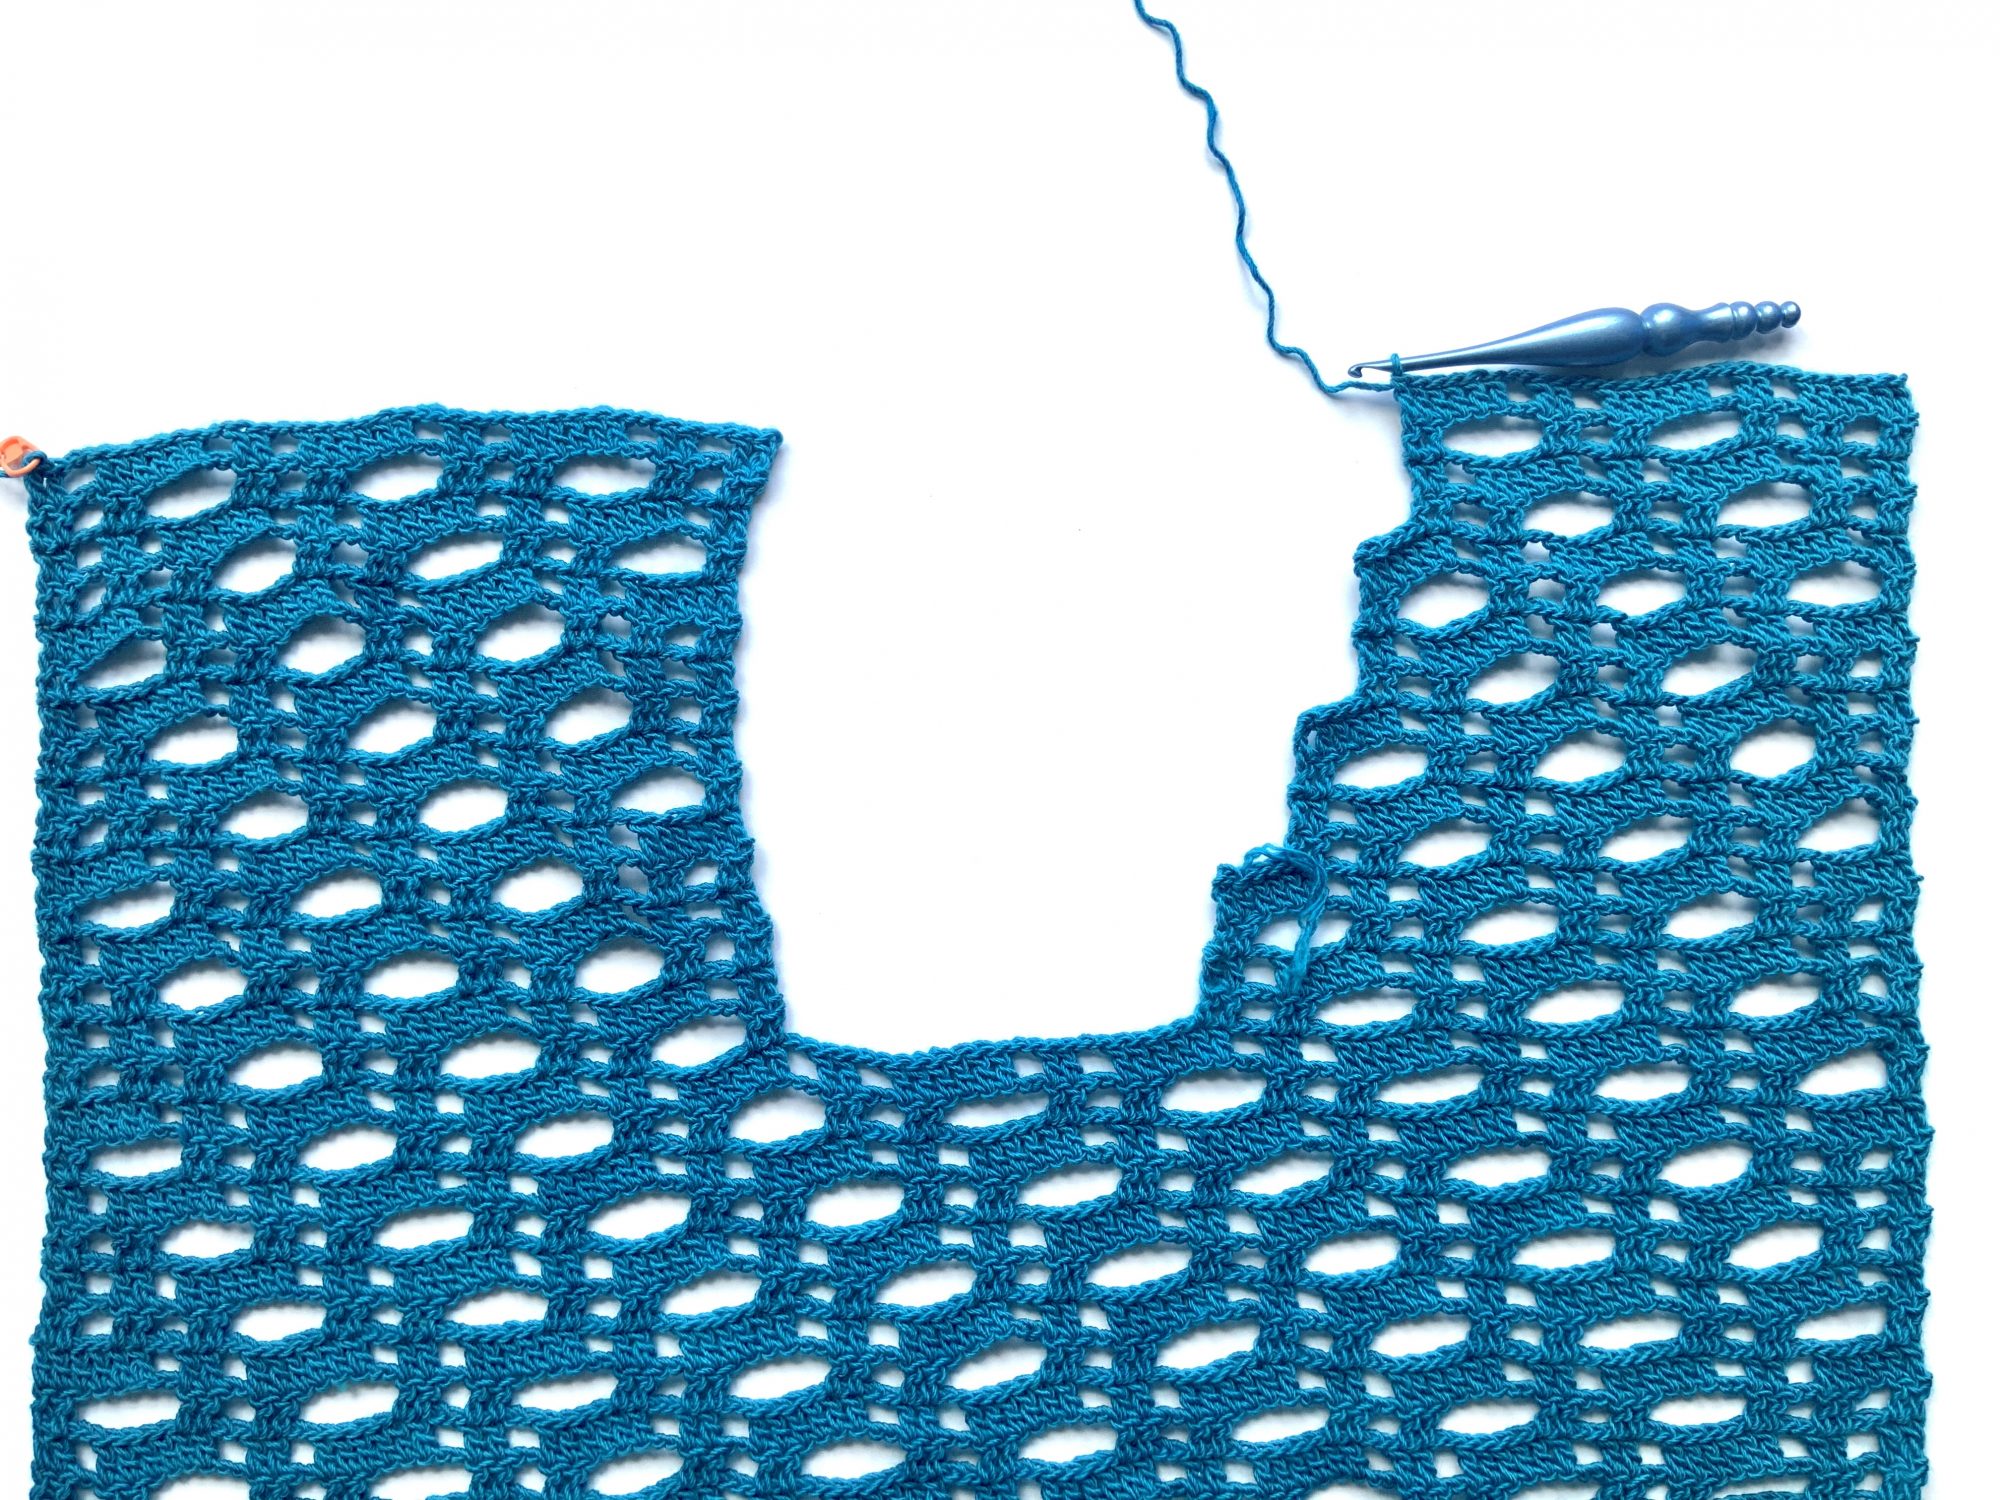
First Shoulder
Counting from the beginning of the row (the direction you will work the next row), place M in 34th (42nd, 46th, 54th) st. Counting from end of row (where the last st will be placed), place M in 42nd (42nd, 54th, 54th) st; 2 M placed; 18 (22, 18, 22) sts will be unworked.
S/M and 2XL/3XL Only
Row 1: CSDC in first st, dc in next st, ch 2, sk 2 sts, *dc in next 2 sts, ch 2, sk 2 sts, dc in next 2 sts, ch 6, sk 6 sts; repeat from * 1 (2) more times, dc in next 2 sts, ch 2, sk 2 sts, dc in next 2 sts; leave remaining sts unworked, turn – 34, 46 sts
Row 2: CSDC in first st, dc in next st, *ch 2, sk 2 sts, dc in next 2 sts, ch 2, sk 2 sts, dc in next 6 sts; repeat from * 1 (2) more times, [ch 2, sk 2 sts, dc in next 2 sts] twice, turn – 34, 46 sts
Row 3: CSDC in first st, dc in next st, *ch 2, sk 2 sts, dc in next 2 sts, ch 6, sk 6 sts, dc in next 2 sts; repeat from * 1 (2) more times, [ch 2, sk 2 sts, dc in next 2 sts] twice, turn – 34, 46 sts
Row 4: CSDC in first st, dc in next 5 sts, *ch 2, sk 2 sts, dc in next 2 sts, ch 2, sk 2 sts, dc in next 6 sts; repeat from * 1 (2) more times, ch 2, sk 2 sts, dc in next 2 sts, turn – 34, 46 sts
Row 5: CSDC in first st, dc in next st, *ch 6, sk 6 sts, dc in next 2 sts, ch 2, sk 2 sts, dc in next 2 sts; repeat from * 1 (2) more times, ch 6, sk 6 sts, dc in last 2 sts, turn – 34, 46 sts
Row 6: CSDC in first st, dc in next st, *ch 2, sk 2 sts, dc in next 6 sts, ch 2, sk 2 sts, dc in next 2 sts; repeat from * 1 (2) more times, ch 2, sk 2 sts, dc in last 6 sts, turn – 34, 46 sts
Row 7-12: Repeat Row 1-6, turn – 34, 46 sts
Row 13-16: Repeat Row 1-4. DO NOT FASTEN OFF.
L/1XL and 4XL/5XL Only
Row 1: CSDC in first st, dc in next st, ch 2, sk 2 sts, *dc in next 2 sts, ch 2, sk 2 sts, dc in next 2 sts, ch 6, sk 6 sts; repeat from *2 (3) more times, dc in next 2 sts; leave remaining sts unworked, turn – 42, 54 sts
Row 2: CSDC in first st, dc in next st, *ch 2, sk 2 sts, dc in next 2 sts, ch 2, sk 2 sts, dc in next 6 sts; repeat from * 2 (3) more times, ch 2, sk 2 sts, dc in next 2 sts, turn – 42, 54 sts
Row 3: CSDC in first st, dc in next st, *ch 2, sk 2 sts, dc in next 2 sts, ch 6, sk 6 sts, dc in next 2 sts; repeat from * 2 (3) more times, ch 2, sk 2 sts, dc in next 2 sts, turn – 42, 54 sts
Row 4: CSDC in first st, dc in next 5 sts, *ch 2, sk 2 sts, dc in next 2 sts, ch 2, sk 2 sts, dc in next 6 sts; repeat from * 2 (3) more* times, turn – 42, 54 sts
Row 5: CSDC in first st, dc in next st, *ch 6, sk 6 sts, dc in next 2 sts, ch 2, sk 2 sts, dc in next 2 sts; repeat from * 2 (3) more times, ch 2, sk 2 sts, dc in last 2 sts, turn – 42, 54 sts
Row 6: CSDC in first st, dc in next st, *ch 2, sk 2 sts, dc in next 6 sts, ch 2, sk 2 sts, dc in next 2 sts; repeat from * 2 (3) more times, ch 2, sk 2 sts, dc in last 2 sts, turn – 42, 54 sts
Row 7-12: Repeat Row 1-6, turn – 42, 54 sts
Row 13-16: Repeat Row 1-4. DO NOT FASTEN OFF.
Second Shoulder, All Sizes
Row 1: Attach yarn in 42nd (42nd, 54th, 54th) st where 2nd M is placed with sl st, CSDC in the same st, dc in next st, ch 2, sk 2 sts, dc in next 2 sts, *ch 6, sk 6 sts, dc in next 2 sts, ch 2, sk 2 sts, dc in next 2 sts; repeat from * 2 (2, 3, 3) more times, turn – 42, 42, 54, 54 sts
Row 2: CSDC in first st, dc in next st, ch 2, sk 2 sts, dc in next 2 sts, *ch 2, sk 2 sts, dc in next 6 sts, ch 2, sk 2 sts, dc in next 2 sts; repeat from * 2 (2, 3, 3) more times, turn – 42, 42, 54, 54 sts
Row 3: CSDC in first st, dc in next st, *ch 6, sk 6 sts, dc in next 2 sts, ch 2, sk 2 sts, dc in next 2 sts; repeat from * 2 (2, 3, 3) more times, ch 2, sk 2 sts, dc in next 2 sts, turn – 42, 42, 54, 54 sts
Row 4: CSDC in first st, dc in next 5 sts, *ch 2, sk 2 sts, dc in next 2 sts, ch 2, sk 2 sts, dc in next 6 sts; repeat from * 2 (2, 3, 3) more times, turn – 42, 42, 54, 54 sts
Row 5: Sl st in first st, sl st in next 4 sts, CSDC in same st as last sl st made, dc in next st, *ch 2, sk 2 sts, dc in next 2 sts, ch 6, sk 6 sts, dc in next 2 sts; repeat from * 2 (2, 3, 3) more times, turn – 38, 38, 50, 50 sts
Row 6: CSDC in first st, dc in next st, *ch 2, sk 2 sts, dc in next 6 sts, ch 2, sk 2 sts, dc in next 2 sts; repeat from * 2 (2, 3, 3) more times, turn – 38, 38, 50, 50 sts
Row 7: CSDC in first st, dc in next st, *ch 6, sk 6 sts, dc in next 2 sts, ch 2, sk 2 sts, dc in next 2 sts; repeat from * 2 (2, 3, 3) more times, turn – 38, 38, 50, 50 sts
Row 8: CSDC in first st, dc in next st, *ch 2, sk 2 sts, dc in next 2 sts, ch 2, sk 2 sts, dc in next 6 sts; repeat from * 2 (2, 3, 3) more times, turn – 38, 38, 50, 50 sts
Row 9: Sl st in first st, sl st in next 4 sts, CSDC in same st as last sl st made, dc in next st, *ch 2, sk 2 sts, dc in next 2 sts, ch 6, sk 6 sts, dc in next 2 sts; repeat from * 1 (1, 2, 2) more times, [ch 2, sk 2 sts, dc in next 2 sts] twice, turn – 34, 34, 46, 46 sts
Row 10: CSDC in first st, dc in next 5 sts, ch 2, sk 2 sts, dc in next 2 sts, *ch 2, sk 2 sts, dc in next 6 sts, ch 2, sk 2 sts, dc in next 2 sts; repeat from * 1 (1, 2, 2) more times, turn – 34, 34, 46, 46 sts
Row 11: CSDC in first st, dc in next st, ch 6, sk 6 sts, dc in next 2 sts, *ch 2, sk 2 sts, dc in next 2 sts, ch 6, sk 6, dc in next 2 sts; repeat from * 1 (1, 2, 2) more times, turn – 34, 34, 46, 46 sts
Row 12: CSDC in first st, dc in next st, *ch 2, sk 2 sts, dc in next 6 sts, ch 2, sk 2 sts, dc in next 2 sts; repeat from * 1 (1, 2, 2) more times, ch 2, sk 2, dc in next 6 sts, turn – 34, 34, 46, 46 sts
Row 13: Sl st in first st, sl st in next 4 sts, CSDC in same st as last sl st made, dc in next st, *ch 2, sk 2 sts, dc in next 2 sts, ch 6, sk 6 sts, dc in next 2 sts; repeat from * 1 (1, 2, 2) more times, ch 2, sk 2 sts, dc in next 2 sts, turn – 30, 30, 42, 42 sts
Row 14: CSDC in first st, dc in next st, *ch 2, sk 2 sts, dc in next 2 sts, ch 2, sk 2 sts, dc in next 6 sts; repeat from * 1 (1, 2, 2) more times, ch 2, sk 2 sts, dc in last 2 sts, turn –30, 30, 42, 42 sts
Row 15: CSDC in first st, dc in next st, *ch 6, sk 6 sts, dc in next 2 sts, ch 2, sk 2 sts, dc in next 2 sts; repeat from * 1 (1, 2, 2) more times, ch 2, sk 2 sts, dc in last 2 sts, turn – 30, 30, 42, 42 sts
Row 16: CSDC in first st, dc in next 5 sts, *ch 2, sk 2 sts, dc in next 2 sts, ch 2, sk 2 sts, dc in next 6 sts; repeat from * 1 (1, 2, 2) more times, DO NOT FASTEN OFF – 30, 30, 42, 42 sts
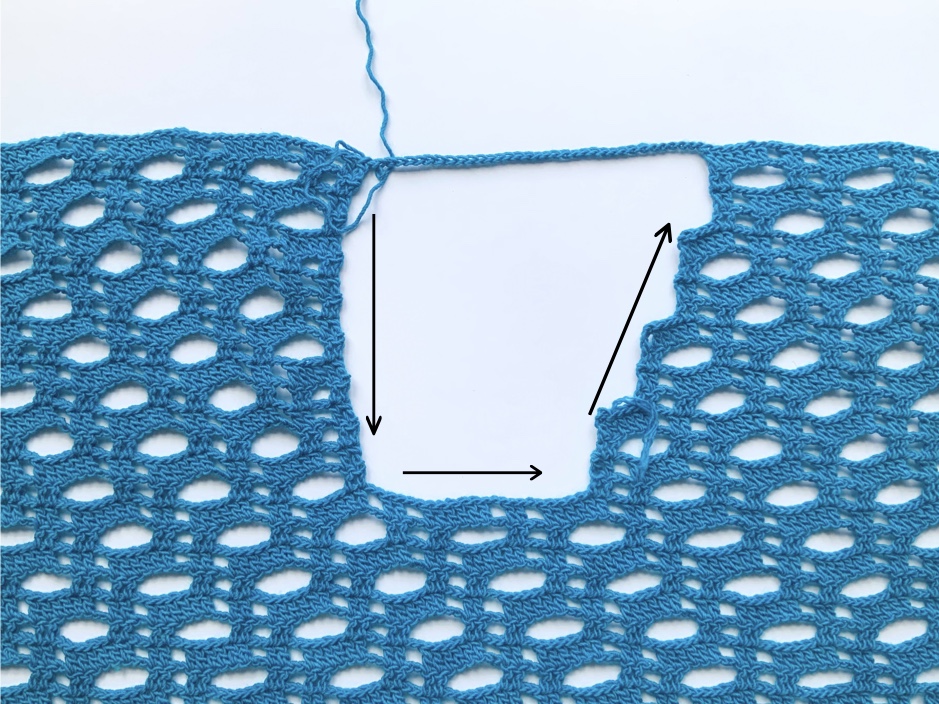
Neck Opening Edge
Note: This edging is worked inside of the neck opening.
Round 1: Using yarn from Second Shoulder, ch 30 (34, 30, 34), sl st to attach to First shoulder, rotate piece and evenly sc in the side of each row of the First Shoulder, sc2tog in side of row and the next st to make a corner, sc in next 16 (20, 16, 18) sts along Row 49 (49, 55, 55), sc2tog in next st and the side of the row to make a corner; rotate piece and *evenly sc in side of each row until corner, ch 1 (corner made), sc in the next 4 sl st; repeat from * , sc2tog in the side of the row and the next ch, sc in each ch, sl st to join to first sc, turn
Round 2: Working in last sc made of previous row and the first sc on the side, sc2tog, *sc in each st until 1 st before the corner**, sc2tog, sc in next 3 sts, (sc, ch 1, sc) in ch-1 of previous round; repeat from * to -**, sc3tog to turn and begin working along the bottom of the neckline, sc in next 14 (18, 14, 16) sts, sc3tog, sc in each st until 1 st before the next corner, sc2tog, sc in the next 28 (32, 32, 32) sts, sl st to join, FASTEN OFF.
Note: You can complete additional rounds of sc with sc 2 or 3 together in the corners to make it neater.
Back
Row 1: Using yarn from the First Shoulder, CSDC in first st, dc in next st, ch 6, sk 6 sts, dc in next 2 sts, *ch 2, sk 2 sts, dc in next 2 sts, ch 6, sk 6 sts, dc in next 2 sts; repeat from * 6 (7, 8, 9) more times to end, turn – 94, 106, 118, 130 sts
Row 2: CSDC in first st, dc in next st, ch 2, sk 2 sts, dc in next 6 sts, *ch 2, sk 2 sts, dc in next 2 sts, ch 2, sk 2 sts, dc in next 6 sts; repeat from * 6 (7, 8, 9) more times, turn – 94, 106, 118, 130 sts
Row 3: CSDC in first st, dc in next st, ch 2, sk 2 sts, dc in next 2 sts, ch 2, sk 2 sts, dc in next 2 sts, *ch 6, sk 6 sts, dc in next 2 sts, ch 2, sk 2 sts, dc in next 2 sts; repeat from * 6 (7, 8, 9) more times, turn – 94, 106, 118, 130 sts
Row 4: CSDC in first st, dc in next st, ch 2, sk 2 sts, *dc in next 2 sts, ch 2, sk 2 sts, dc in next 6 sts, ch 2, sk 2 sts; repeat from * 6 (7, 8, 9) more times, dc in next 2 sts, ch 2, sk 2 sts, dc in last 2 sts, turn – 94, 1706, 118, 130 sts
Row 5: CSDC in first st, dc in next st, ch 2, sk 2 sts, *dc in next 2 sts, ch 6, sk 6 sts, dc in next 2 sts, ch 2, sk 2 sts; repeat from * 6 (7, 8, 9) more times, dc in next 2 sts, ch 2, sk 2 sts, dc in last 2 sts, turn – 94, 106, 118, 130 sts
Row 6: CSDC in first st, dc in next 5 sts, ch 2, sk 2 sts, dc in next 2 sts, *ch 2, sk 2 sts, dc in next 6 sts, ch 2, sk 2 sts, dc in next 2 sts; repeat from * 6 (7, 8, 9) more times to end, turn – 94, 106, 118, 130 sts
Row 7: CSDC in first st, dc in next st, ch 6, sk 6 sts, dc in next 2 sts, *ch 2, sk 2 sts, dc in next 2 sts, ch 6, sk 6 sts, dc in next 2 sts; repeat from * 6 (7, 8, 9) more times to end, turn – 94, 106, 118, 130 sts
Row 8: CSDC in first st, dc in next st, ch 2, sk 2 sts, dc in next 6 sts, *ch 2, sk 2 sts, dc in next 2 sts, ch 2, sk 2 sts, dc in next 6 sts; repeat from * 6 (7, 8, 9) more times, turn – 94, 106, 118, 130 sts
Row 9-62 (9-62, 9-68, 9-68): Repeat Row 3-8, until Back is the same length as the Front, turn. Do not fasten off. Continue to Edging.
Edging
Row 1: Ch 1, *sc in each st to corner, ch 1, rotate piece to work along long side, evenly sc in each row (2 sc per dc) to next corner, ch 1; repeat from *, ch 1, sl st to join
Note: This round goes around the entire piece, and the next row is only worked along a short and long side before fastening off.
Row 2: Ch 1, sc in each st to corner, rotate piece to work along long side, CSDC in ch-1 space, dc in next st, dc in each st to corner, dc in ch-1 space, dc in next st, fasten off
Edging along Other Side
Row 1: Attach yarn in next ch-1 space, CSDC in next st, dc in each st to the next corner, dc in next ch-1 space, fasten off.
Finishing
Sew in all ends, trim excess.
Block, if needed.
If we’re not hanging out on social media yet, come check me out on Facebook, Instagram and Pinterest.
Want to talk about yarn goodness, crochet tips, and exclusive weekly deals? Join my Facebook Group, Creations By Courtney Community.
Join my newsletter for sneak peeks, crochet tips, and more. HERE
Please use #CreationsByCourtney on social media when sharing your projects.
This pattern is not to be duplicated or resold, and not to be reproduced commercially. You may sell finished products on Etsy, at farmers markets, and craft fairs, but please credit Creations By Courtney as the pattern’s author.

11 Responses
I love the texture and pattern created with this stitch. It keeps the style interesting and fresh.
Thank you! It was a fun design to create.
I love the look of this pattern and will try it thanks a lot for sharing
Thank you! If you prefer charts, the PDF has a few charts to make it even easier to make.
I like the design of this pattern. Thinking of making for my daughter-in-law. Thank you for sharint.
This coverup is super classy….love the lacy stitches throughout the garment
This would also be a great piece to take on holiday…way to go Courtney