When you’re midway through a sweater or blanket, you may wonder, “how big will this be when I’m done?” — as you’ve been stitching away for 10 hours and not checked how long or wide your project is. Learn how to easily check project size with the steps below and keep your crochet or knit project on track, or know to make adjustments now rather than later.
To make it super easy, I created the Stitch & Row Gauge Calculator (below) so that you can easily and quickly check the size of your project without taking out a tape measure…for now. This does not account for the difference in measurements of your WIP after being blocked (stay tuned to for an upcoming post to learn that *wink wink), but is still helpful to know if you are close or WAY OFF.
This calculator can also give you how many stitches and rows are needed to reach a desired width and length. This is for my Crochet and Knit Besties that like to do their own thing rather than follow a written pattern. I see you out there hoping for the best while you’re stitching. This will save you some time and frogging. I promise that you don’t have to learn any math.
Why checking project size matters
Nothing squashes excitement faster than finishing a gorgeous piece that doesn’t fit (or a blanket that is too small). 😭
Sizing issues typically come from our gauge changing while we were crocheting (tightens or relaxes based on our mood or how we’re sitting), not knowing how a fiber behaves from the added weight or after blocking, or not measuring periodically.
The fix is simple: always make a swatch (then block it) > start crocheting/knitting > check the measurements > adjust, if needed.
No one wants to spend hours and hours on a project just to find out that the size is off. These steps are meant to save you time and frustration so that you won’t have to frog hours of your stitching.
It really is a simple and helpful habit to build into your crafting routine — check project size in less than a minute.
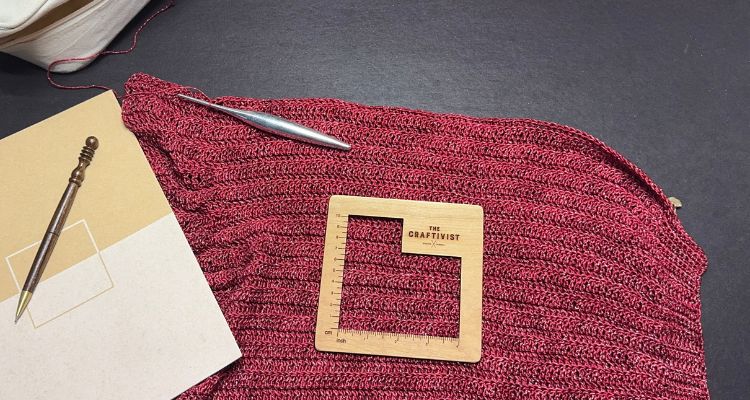
What You’ll Need
- Straight ruler or retractable tape measure
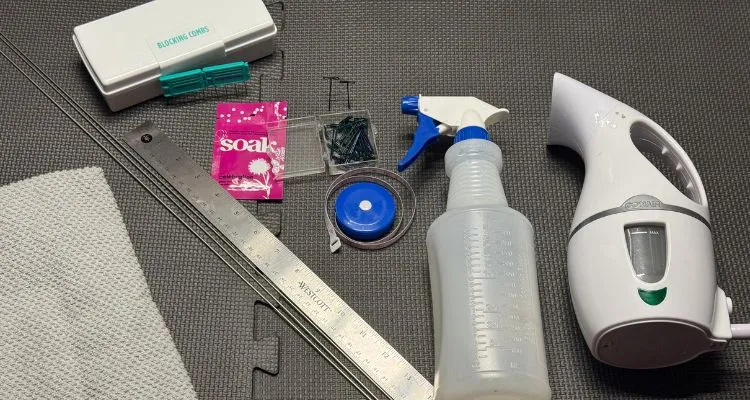
- Flat surface + good lighting
- Blocking mats + t-pins for you swatch, if you didn’t block it yet
- Your WIP (work in progress)
- Calculator (further down this page)
Tip: Always measure on a flat, relaxed fabric—no stretching, tugging or holding in the air.
Step 1 — Get your gauge
- Make a swatch in your stitch pattern, if you haven’t already.
- Count full stitches and full rows/rounds inside a 4″/10 cm area.
- In the Stitch & Row Gauge Calculator, choose 4″ or 10 cm and enter those counts.
You’ll see sts/in, rows/in, sts/cm, rows/cm and the standard 4″/10 cm gauge lines.
Do you sometimes check and recheck the gauge to ensure that you placed the ruler or tape measure in the right spot?
Step 2 — Check your current project size (width & length)
- Enter stitches in your current row/round → calculator outputs width (in & cm).
- Enter completed rows/rounds so far → calculator outputs length (in & cm).
Tip: You can also enter the pattern’s stitch/row totals here to see the finished size you’re headed toward.
Step 3 — Plan from a desired size
- Enter desired width/length (in or cm).
The calculator returns stitches needed and rows/rounds needed based on your gauge.
This is for the free spirited crafters that don’t follow patterns or aspiring designers.
Check Fiber Project Size Calculator
Enter stitches & rows counted in a 4″ or 10 cm area. Get sts/in, rows/in, sts/cm, rows/cm, plus instant width/length—or the stitches/rows needed for a desired size. Knit & crochet friendly.
1) Your Gauge from a 4″/10 cm Area
—
—
2) Check Your Current Project
3) Plan From Desired Size
Understanding your results
What you entered
- Section 1 — Gauge from a 4″/10 cm area: stitches & rows/rounds you counted
- Section 2 — Check current project: stitches in the row/round and rows/rounds completed
- Section 3 — Plan from desired size: target width/length (in or cm)
What you got
- Stitches/Rows per in & cm: your true gauge
- Width / Length: the size your current counts produce right now
- Stitches/Rows needed: how many to hit a chosen size at your gauge
Step 4 — Measure while you work (use the 3% rule)
Check every…
- 2–3″ (5–8 cm) of vertical progress
- Every few rounds for on large motifs and working in the round
- Construction milestone: after ribbing, yoke depth, at underarm split, waist/hip markers, before edging/bind-off
Make note of your progress
- How does it compare to the pattern instructions?
- Do you need to make adjustments now?
- Am I within 3%?
- Double check your stitch count every once in a while to make sure stitches weren’t added or skipped on accident.
Wait a sec, Courtney, what is this 3% rule??
This is a small enough percentage that it won’t ‘ruin’ the overall fit, especially since yarn stretches. Now if your current WIP is more or less than 3%, then you have entered the ‘wonky’ zone that WILL impact the overall fit and requires adjustment.
Luckily, you don’t need to figure out the math on whether you’re within 3% of the desired width/length because you may have noticed numbers appear under the width and length boxes of Section 2. Those numbers are in red with a + (over) or – (under) to indicate the percentage away from the desired width and length, and will only appear when you fill in all three sections.
Now, if this is confusing when it comes to checking project sizes, then don’t worry about it. *wink wink* It’s just additional information that can help you decide what to do with your current WIP.
Step 5 — Adjust if you’re off (quick fixes)
If your check shows you’re not on-size, make a small, intentional tweak and re-measure.
- Too wide: go down 0.5–1.0 mm in hook/needle size or remove stitches evenly (a tool coming soon to easily determine how to decrease or increase) across the row/round.
- Too narrow: go up 0.5–1.0 mm in hook/needle size or add stitches evenly.
- Too long: reduce row/round count (or adjust the golden loop if a specific row count is needed for seaming pieces).
- Too short: add rows/repeats (or use a larger tool for height-only sections).
Use the Stitch & Row Gauge Calculator again after making adjustments to check again.
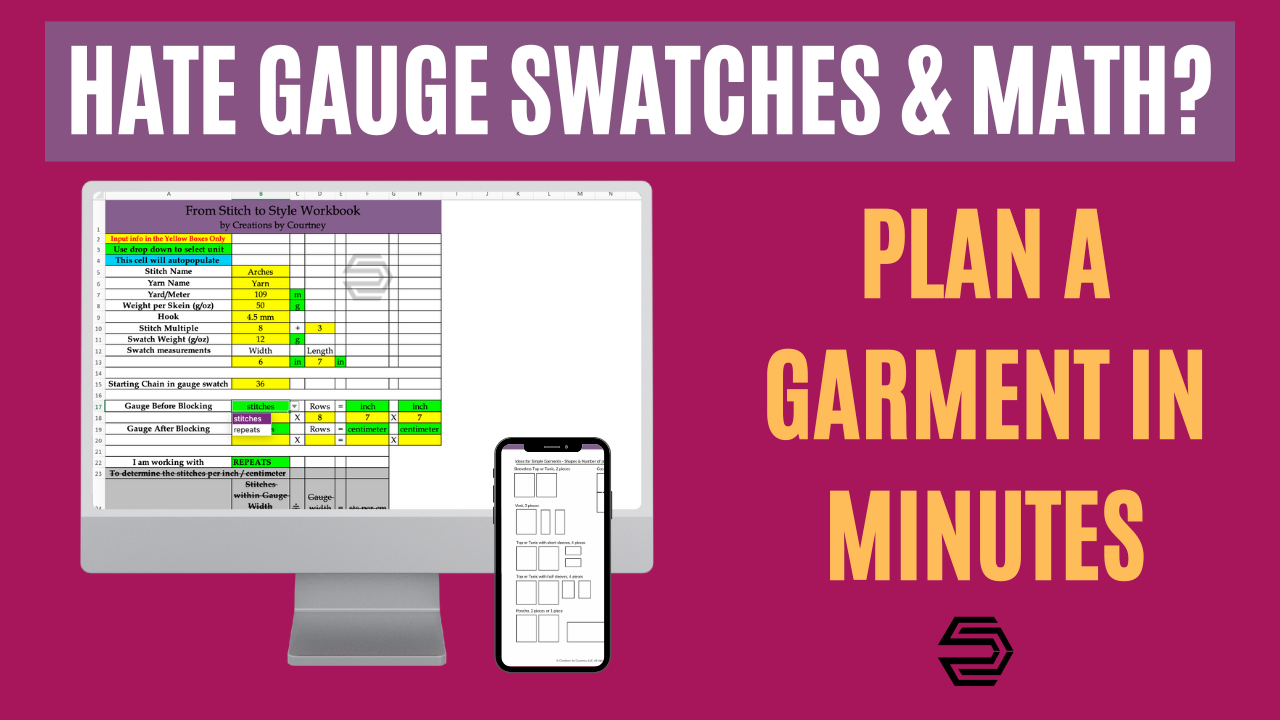
Want the full, repeatable system that is even easier?
Get the From Stitch to Style Workbook → from entering gauge to planning garment pieces and measurements to stitch and row counts with yarn amounts. This done-for-you workbook makes planning and sizing a garment easy breezy!
Plan, check, and finish garments that fit—step by step.
First steps for every new fiber project
You’ve just checked your current size using your stitch & row gauge. For your next project, start smarter:
- Make your gauge swatch in the pattern stitch, and record it.
- If the pattern or your own design will be blocked when it’s finished, BLOCK THE GAUGE SWATCH too.
- Enter your gauge and the pattern gauge information in the Gauge Comparison Calculator to get instant results on whether you’re on track.
- You’ll know whether to adjust hook/needle size before you get started on your WIP.
- Get your gauge right, then start stitching!
- Once a few inches/ centimeters have been made use the Stitch & Row Gauge Calculator to ensure that you’re still on track.
- Keep up with these steps to enjoy your crochet or knit projects with more confidence that you won’t be frogging later.
If you are loving this calculator to save you time and answer your questions, don’t forget to pin it and share with your other Crochet Besties, then check out the other calculators to make your crochet time easier.
Coming soon: How to Calculate Expected Growth from Blocking (with a companion calculator) so you can predict post-block size changes with confidence. Coming soon!
FAQs
Do I have to block my swatch?
Yes—fabric after blocking can be a different size and feel. Swatch the way you’ll treat the finished item.
What if my stitch gauge matches but row gauge doesn’t?
Prioritize stitch gauge for width/fit, then adjust row/round counts (or tool size for height sections) to hit length.
How big should my swatch be?
At least 5″×5″ (13×13 cm) so you can measure an inner 4″/10 cm window accurately.
Can I measure in cm instead of inches?
Absolutely—the Stitch & Row Gauge Calculator outputs both.
How much can fiber grow after blocking?
It depends on fiber and stitch. Cotton/linen often grow more in length; wool blends bloom; lace opens up. Forecast growth using blocked swatch numbers (and watch for our upcoming post on “Predicting Gauge Growth After Blocking”).
Need More Help?
Check out these other helpful tools for checking gauge and determining how much yarn you need for a project.
Want to talk about yarn goodness, crochet tips, and exclusive weekly deals? Join my Facebook Group, Confidently Crochet with Creations By Courtney.
If we’re not hanging out on social media yet, come check me out on Facebook, Instagram and Pinterest.
Join my newsletter for sneak peeks, crochet tips, and more.
Use #CreationsByCourtney on social media when sharing your projects.
This tool is not to be duplicated or to be reproduced commercially. You may share with your friends (definitely save to Pinterest) and credit Creations By Courtney as the creator.


