Ready to battle?
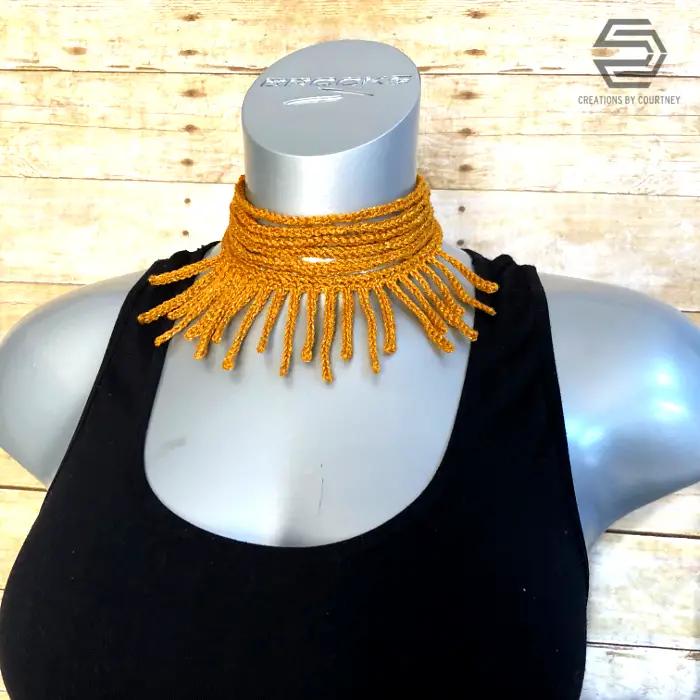
Have you seen Black Panther? I did!! And it was awesome!!! Besides the ENTIRE MOVIE being great, I loved the all woman royal guard, the Dora Milaje led by the fearless Okoye. I did not dress up to attend the opening weekend, but I was inspired by the strength of the female characters throughout the film. And since Avengers:Infinity War releases this week, we get to see just about everyone from the Marvel Universe, including the Dora Milaje. If you’re a fan that enjoys cosplay, grab some sport weight or thinner yarn and a hook to make the Warrior Choker. The Warrior Choker crochet pattern can be made by an advanced beginner, and makes a great project for practicing foundation single crochet and counting.
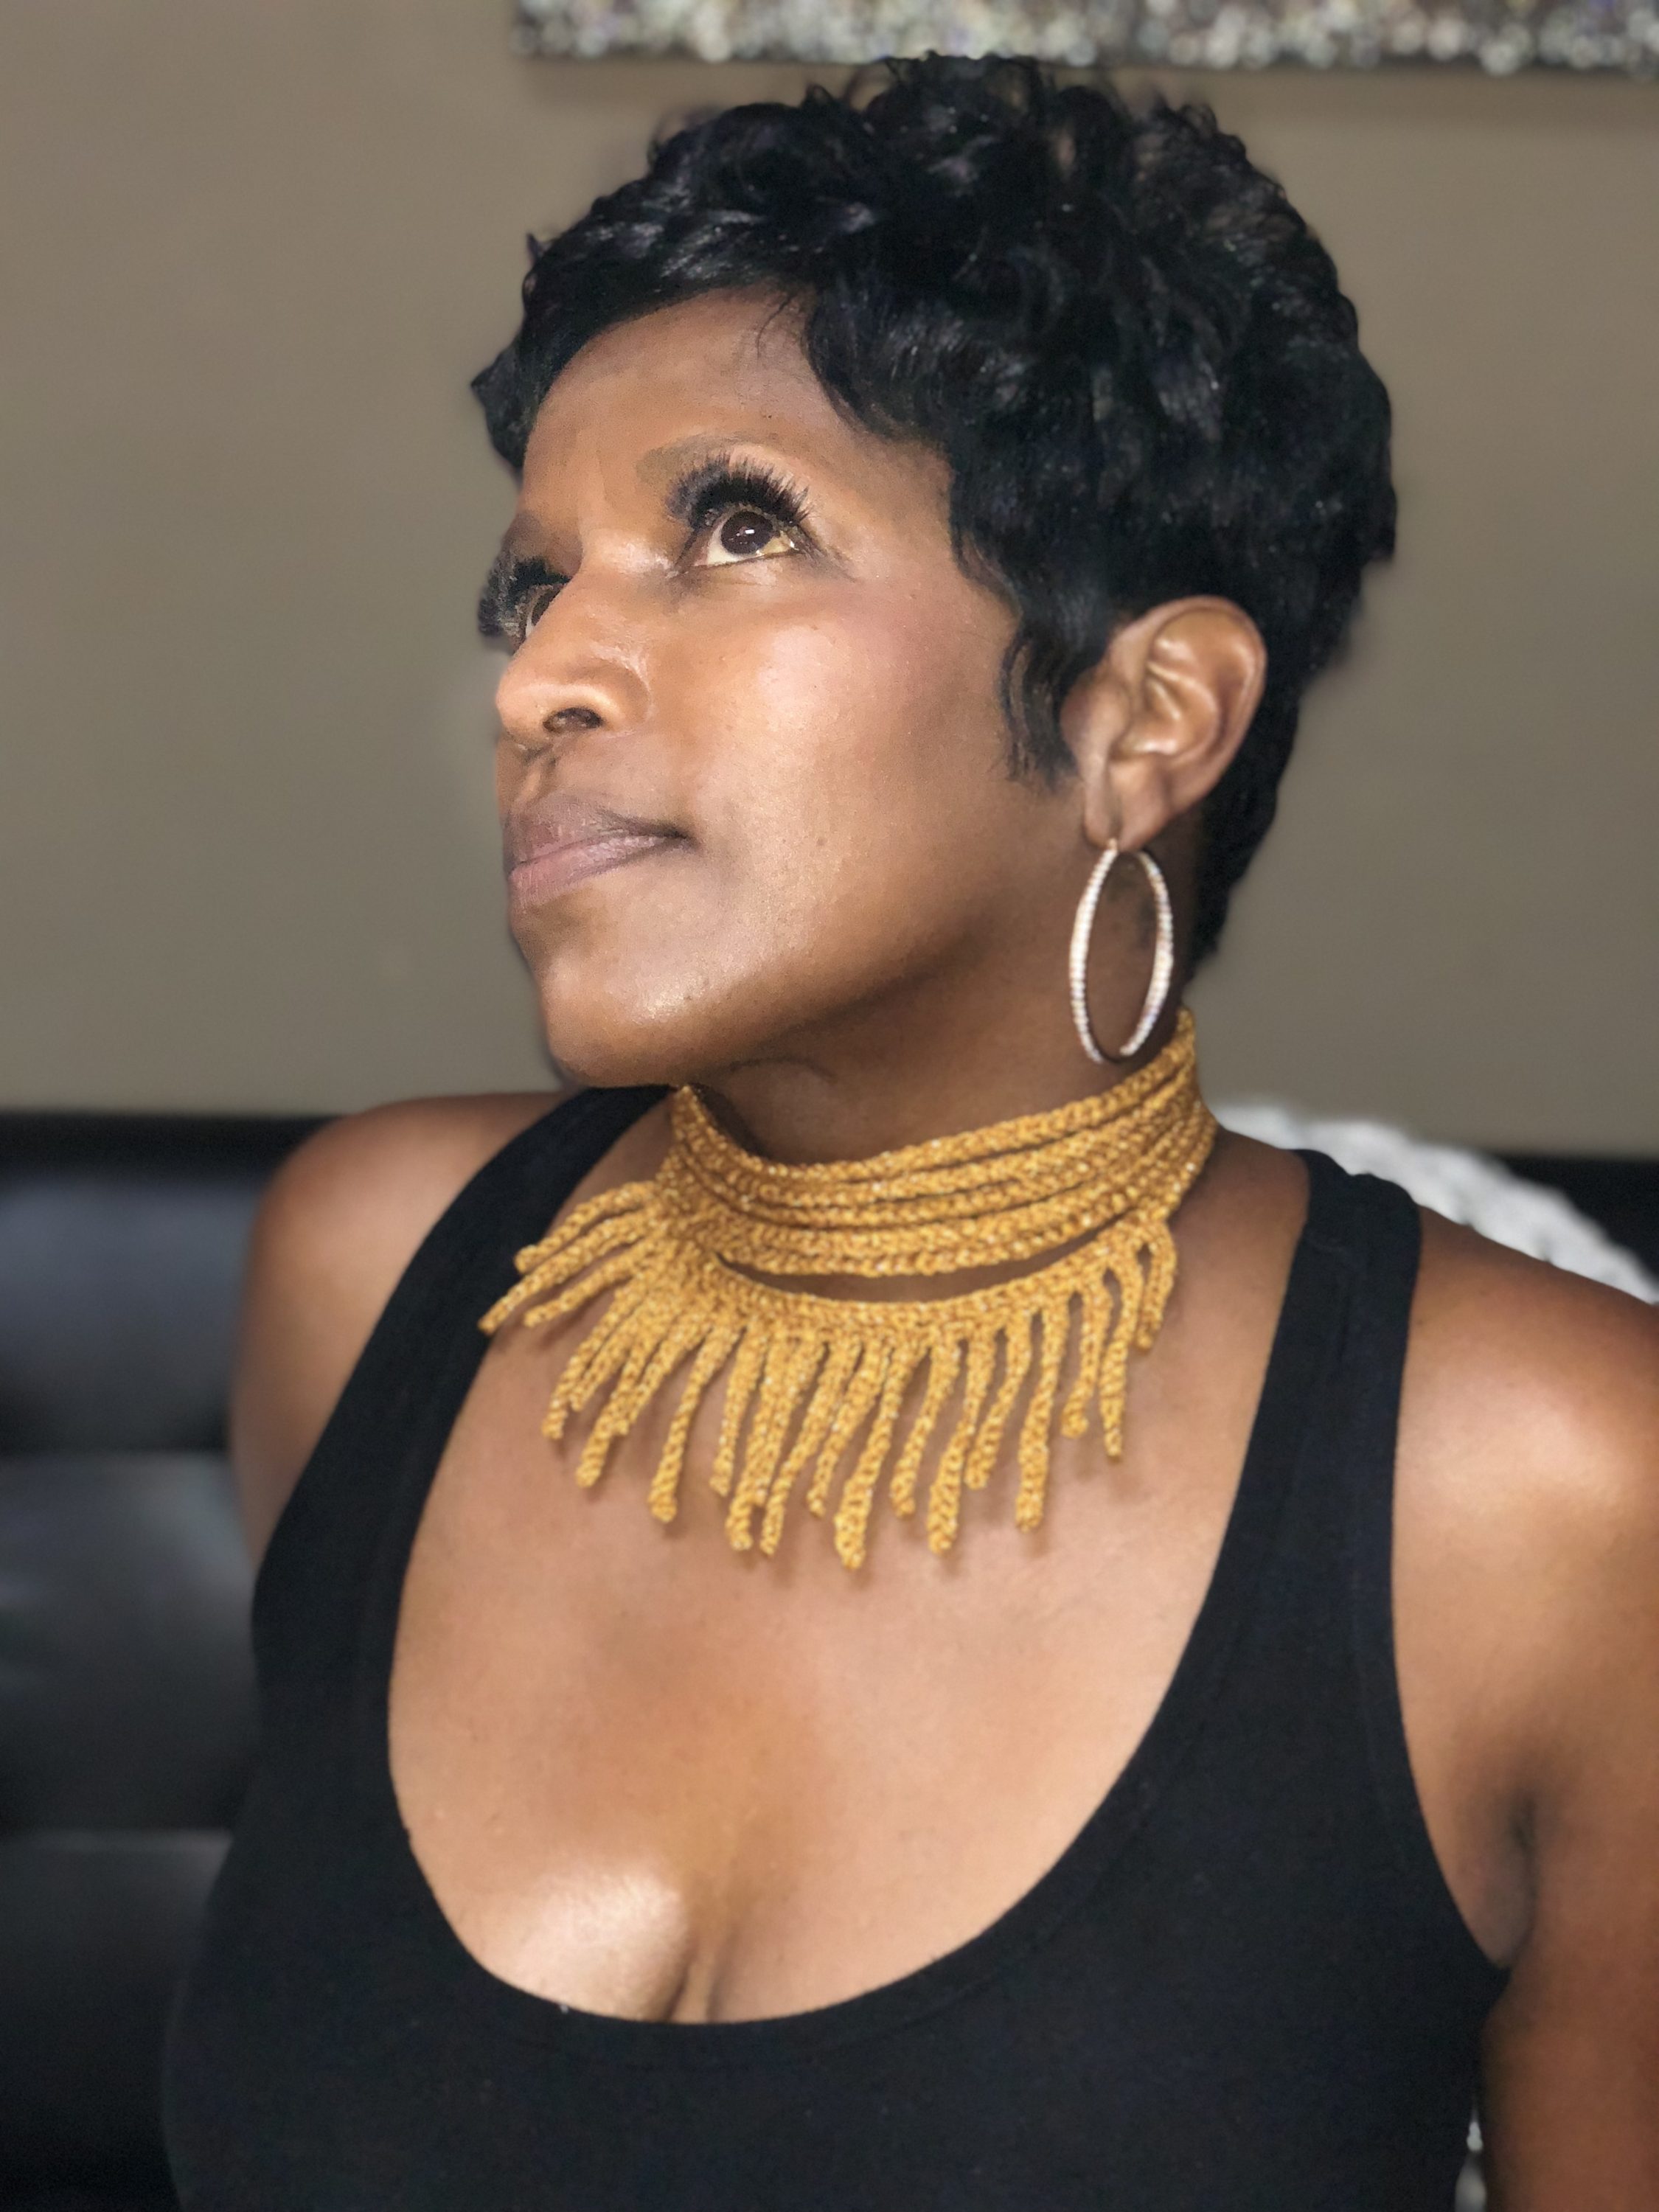
And if you aren’t a fan of Marvel Universe, but have funky style, the Warrior Choker is a great accessory for you too. Wear your choker with you favorite v-neck black dress for date night, or pair with a tank, jeans and some heels for a sassy, casual look.
I will definitely be rocking my Warrior Choker to see Okoye and her fearless warriors fight alongside Black Panther, Captain Rogers, Black Widow, Iron Man, the Guardians, and everyone else kick Thanus’ butt! I’ll be sure to share a pic on the ‘gram ?
Want a convenient, ad-free PDF copy of the pattern? Buy in My Shop, Ravelry or Craftsy.
*All efforts were made to ensure an accurate pattern. If an error is found, let me know. This post contains an affiliate link. If you choose to use it, there is not fee to you, but I will earn a small amount, which allows me to continue to offer free crochet patterns.
Difficulty: Advanced Beginner
Materials Needed:
Hook: size E (3.5 mm)
Yarn: Newton’s Yarn Country Flash (60% acrylic, 25% nylon, 15% metallic) or any sport weight/ category 2 yarn or smaller- approximately 66 yards
scissors
spacer bars with closures attached
thin crafting needle to fit within holes of spacer bars
Stitches Used:
ch= chain
sc = single crochet
st(s) = stitch(es)
sl st = slip stitch
fsc = foundation single crochet
Gauge: Not important for this project
Measurements: 14” long X 3” wide, excluding dangles to fit the average woman’s neck.
Additional Notes:
- Row lengths can be adjusted to fit your neck by subtracting or adding additional foundation single crochet. It is helpful to measure around your neck, and determine how loose or fitted you would like the choker to fit. Make Row 1 about an inch shorter than your neck measurement, and then add two additional foundation single crochet every two rows (i.e. 55, 55, 57, 57, 59, 59 total stitches)
- Each choker row will be separated by a ch-1, and you will have a continuous chain of foundation single crochet. Before creating the Row Connector, be sure to untwist, so that they will lay flat.
- When making the dangle, rather than adding an extra chain, work slip stitches immediately into the next ch, and it helps to make the last chain slightly looser. If you have a hard time working into the next chain, add one chain, and then make the first slip stitch into the second chain from hook.
- Pattern is written in US crochet terms
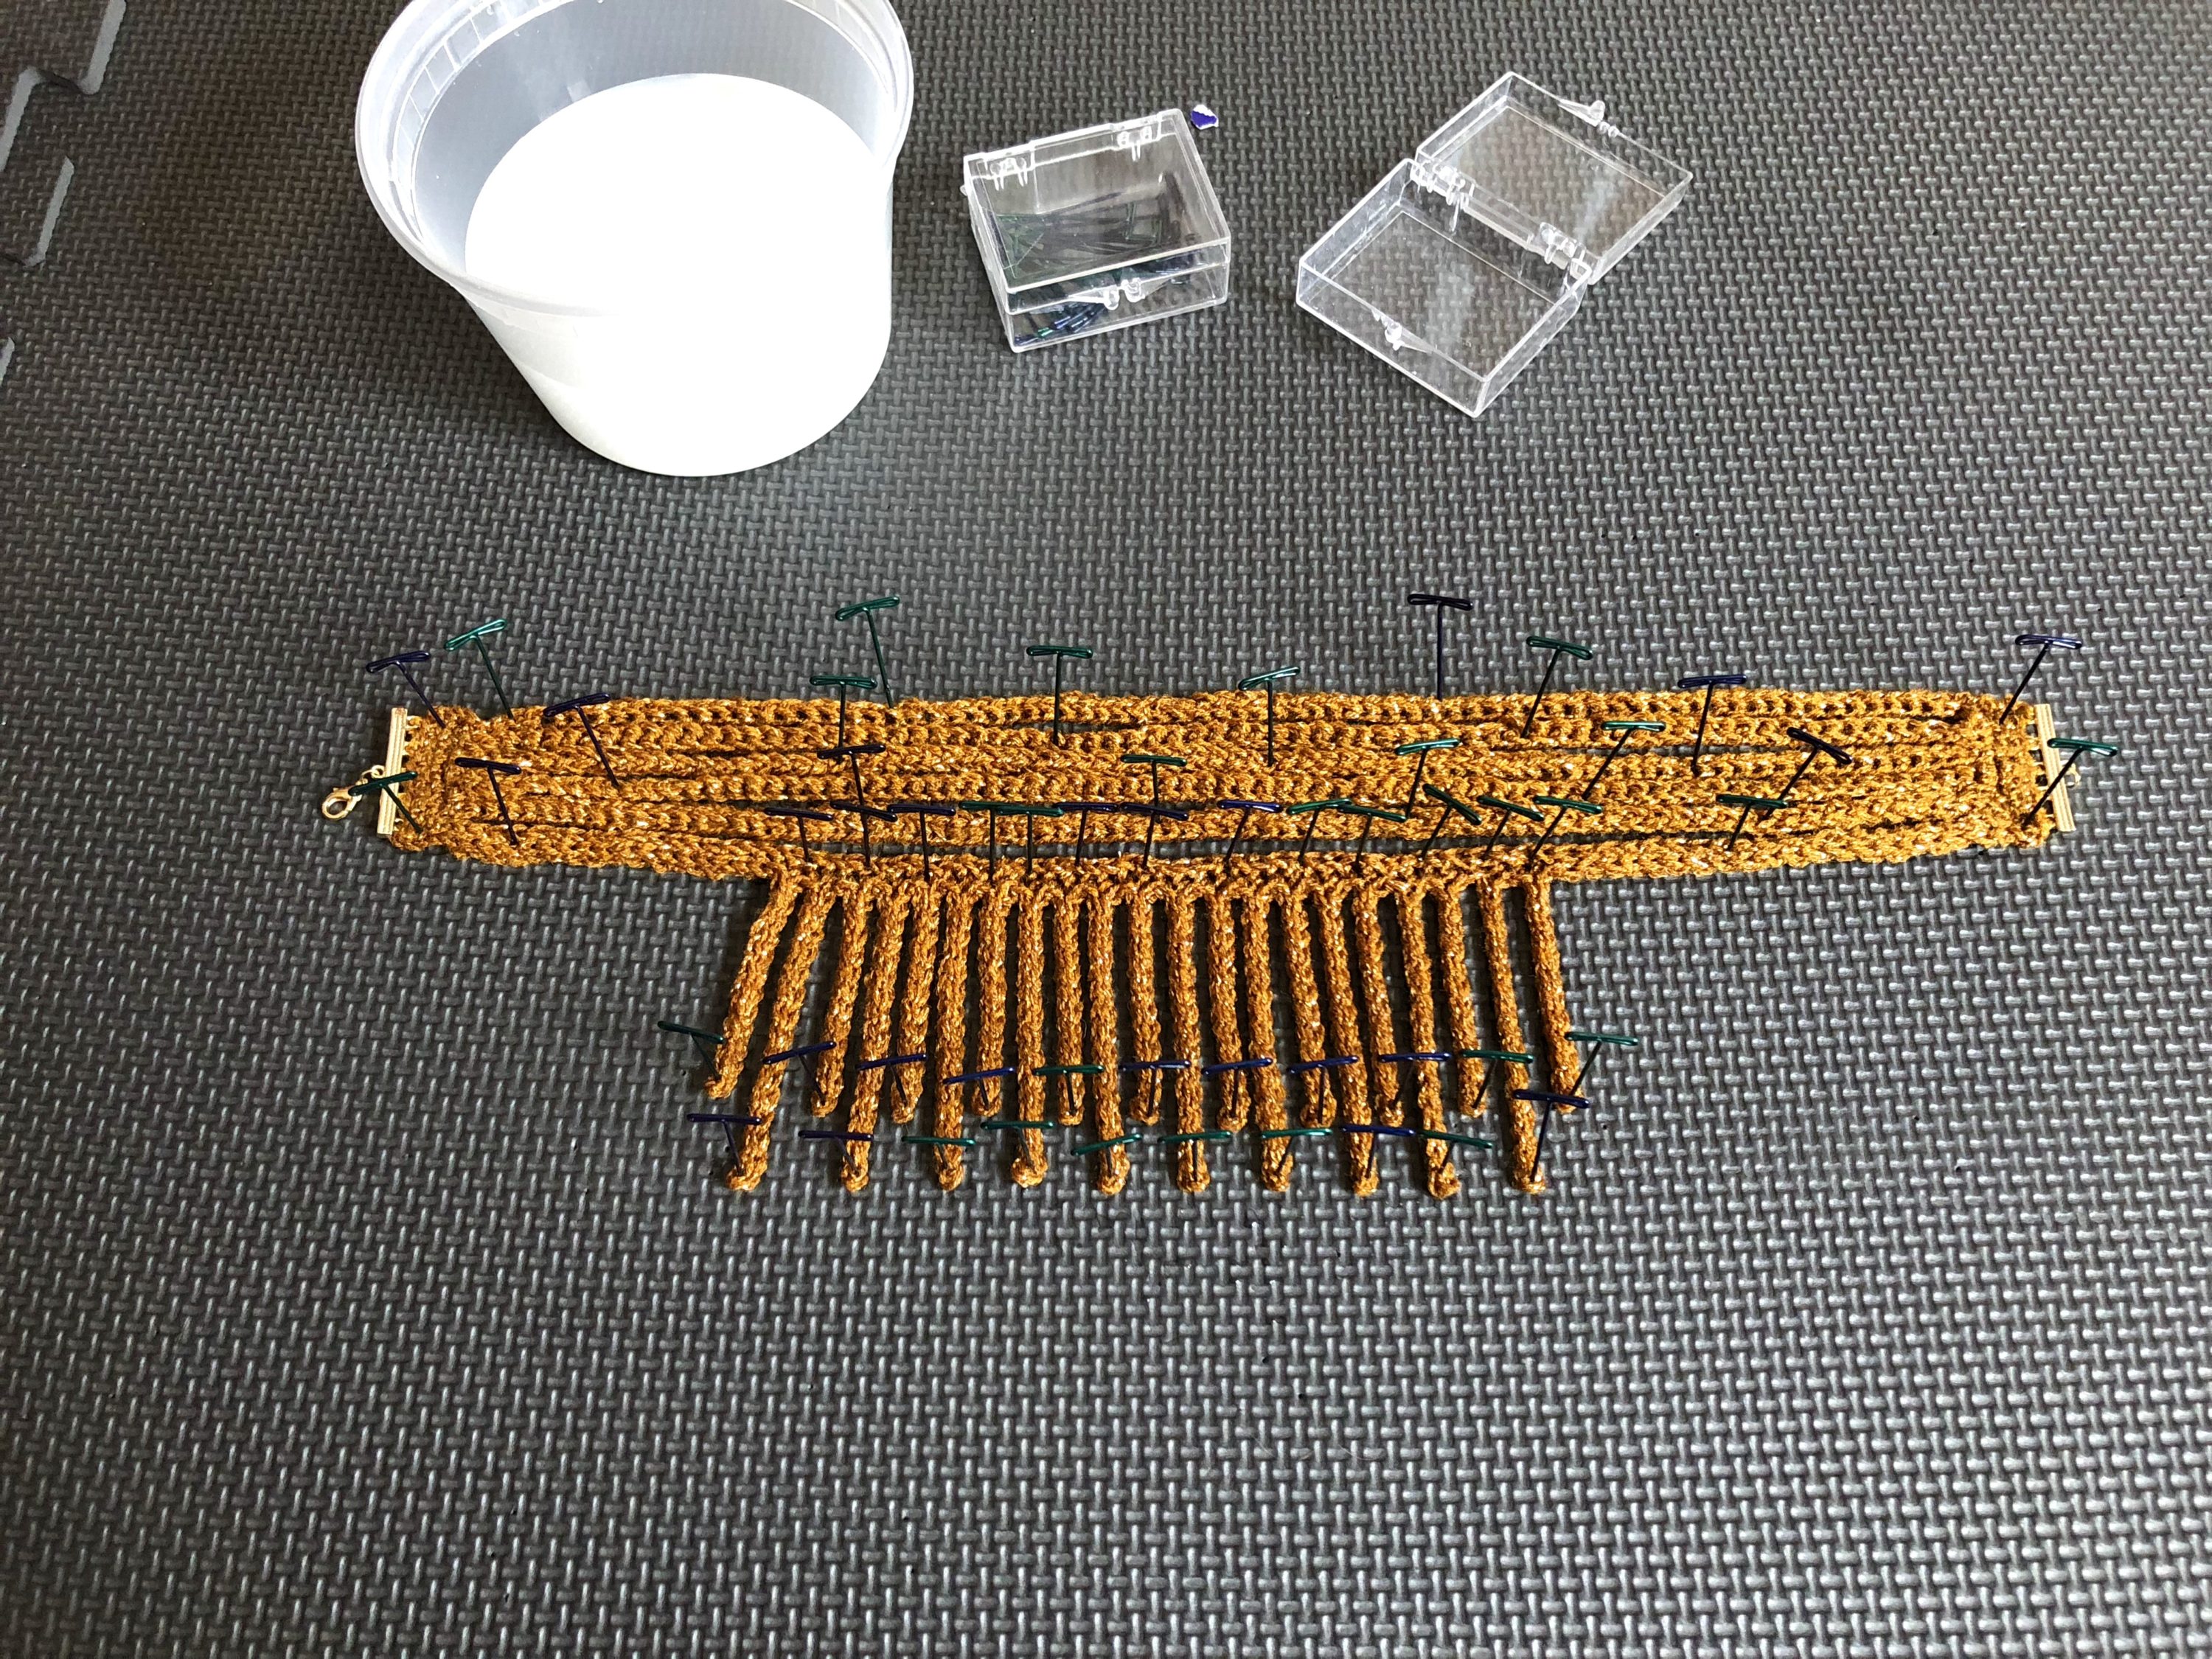
- If you would like to stiffen the dangles, gently wash the necklace with mild soap and cool water, squeeze of excess water. Use your favorite stiffening method, such as water + cornstarch or sugar water, to dip dangles into, squeeze out excess, and then pin flat to block and stiffen dangles. Allow adequate drying times before wearing. *Stiffening will need to be repeated if the necklace get wets or washed. Check out a picture below.
Pattern:
Row 1: Slip knot, 75 fsc
Row 2: Ch 1, 75 fsc.
Row 3-4: Ch 1, 77 fsc.
Row 5-6: Ch 1, 79 fsc, do not fasten off
Row Connector
Row 1: Working in the ends of the rows, Ch 1, sc in end of Row 6, sc in end of Row 5, sc in next ch-1, sc in end of Row 4, sc in end of Row 3, sc in next ch-1, sc in end of Row 2, sc in end of Row 1, turn (8 sc)
Row 2-3: Ch 1, sc in each st, do not fasten off
Dangles
Determine how many dangles you would like, and place markers where to start and end. There are 21 dangles in the sample featured in the picture. Row 1: 3 sl st along sc rows, working into Row 6, sl st in next 19 sc, *(ch 12, sl st in next 12 ch), sl st in next 2 sts, (ch 15, sl st in next 15 ch), sl st in next 2 sts. Repeat from * 9 more times, (ch 12, sl st in next 12 ch), sl st in each st to the end. Do not fasten off
Second Row Connector
Row 1: Ch 1, sc in end of Row 6, sc in next ch-1, sc in end of Row 5, sc in end of Row 4, sc in next ch-1, sc in end of Row 3, sc in end of Row 2, sc in next ch-1, sc in end of Row 1, turn (9 sc) Row 2: Ch 1, sc in next 3 st, sc2tog, sc in remaining stitches, turn (8 sc) Row 3: Ch 1, sc in each st across, do not fasten off.
Attach spacer bar
Cutting a length of 1 yard (3 feet) or longer, thread yarn through thin needle, attach the first Spacer Bar, weave yarn through rows to secure well, weave through Row 6 for added stability to other Row Connector, attach second Space Bar, and weave through rows to secure, fasten off.
How to Block
Enjoy your Warrior Choker! Embody power and femininity wherever you go.
Thank you for your support! ♥ You can pick up my latest free and paid patterns by visiting my website: https://www.creationsbycourtney.com/cbc-designs
Additionally, I invite you to sign-up for my email newsletter, and follow me on social media for more crochet and yarnie goodness!
Newsletter: http://eepurl.com/cJh_2j
Facebook: https://www.facebook.com/creationsbycourtneyllc
Pinterest: https://www.pinterest.com/cbycourtney
Instagram: http://www.instagram.com/creationsbycourtneyllc
Ravelry: http://www.ravelry.com/designers/courtney-w-of-creations-by-courtney
SaveSave
SaveSave
SaveSave




2 Responses