The PNW Hat + Cowl Crochet Set was inspired by the yarn I purchased during the Maryland Alpaca and Fleece Festival! Look at those colors! 😍😍😍
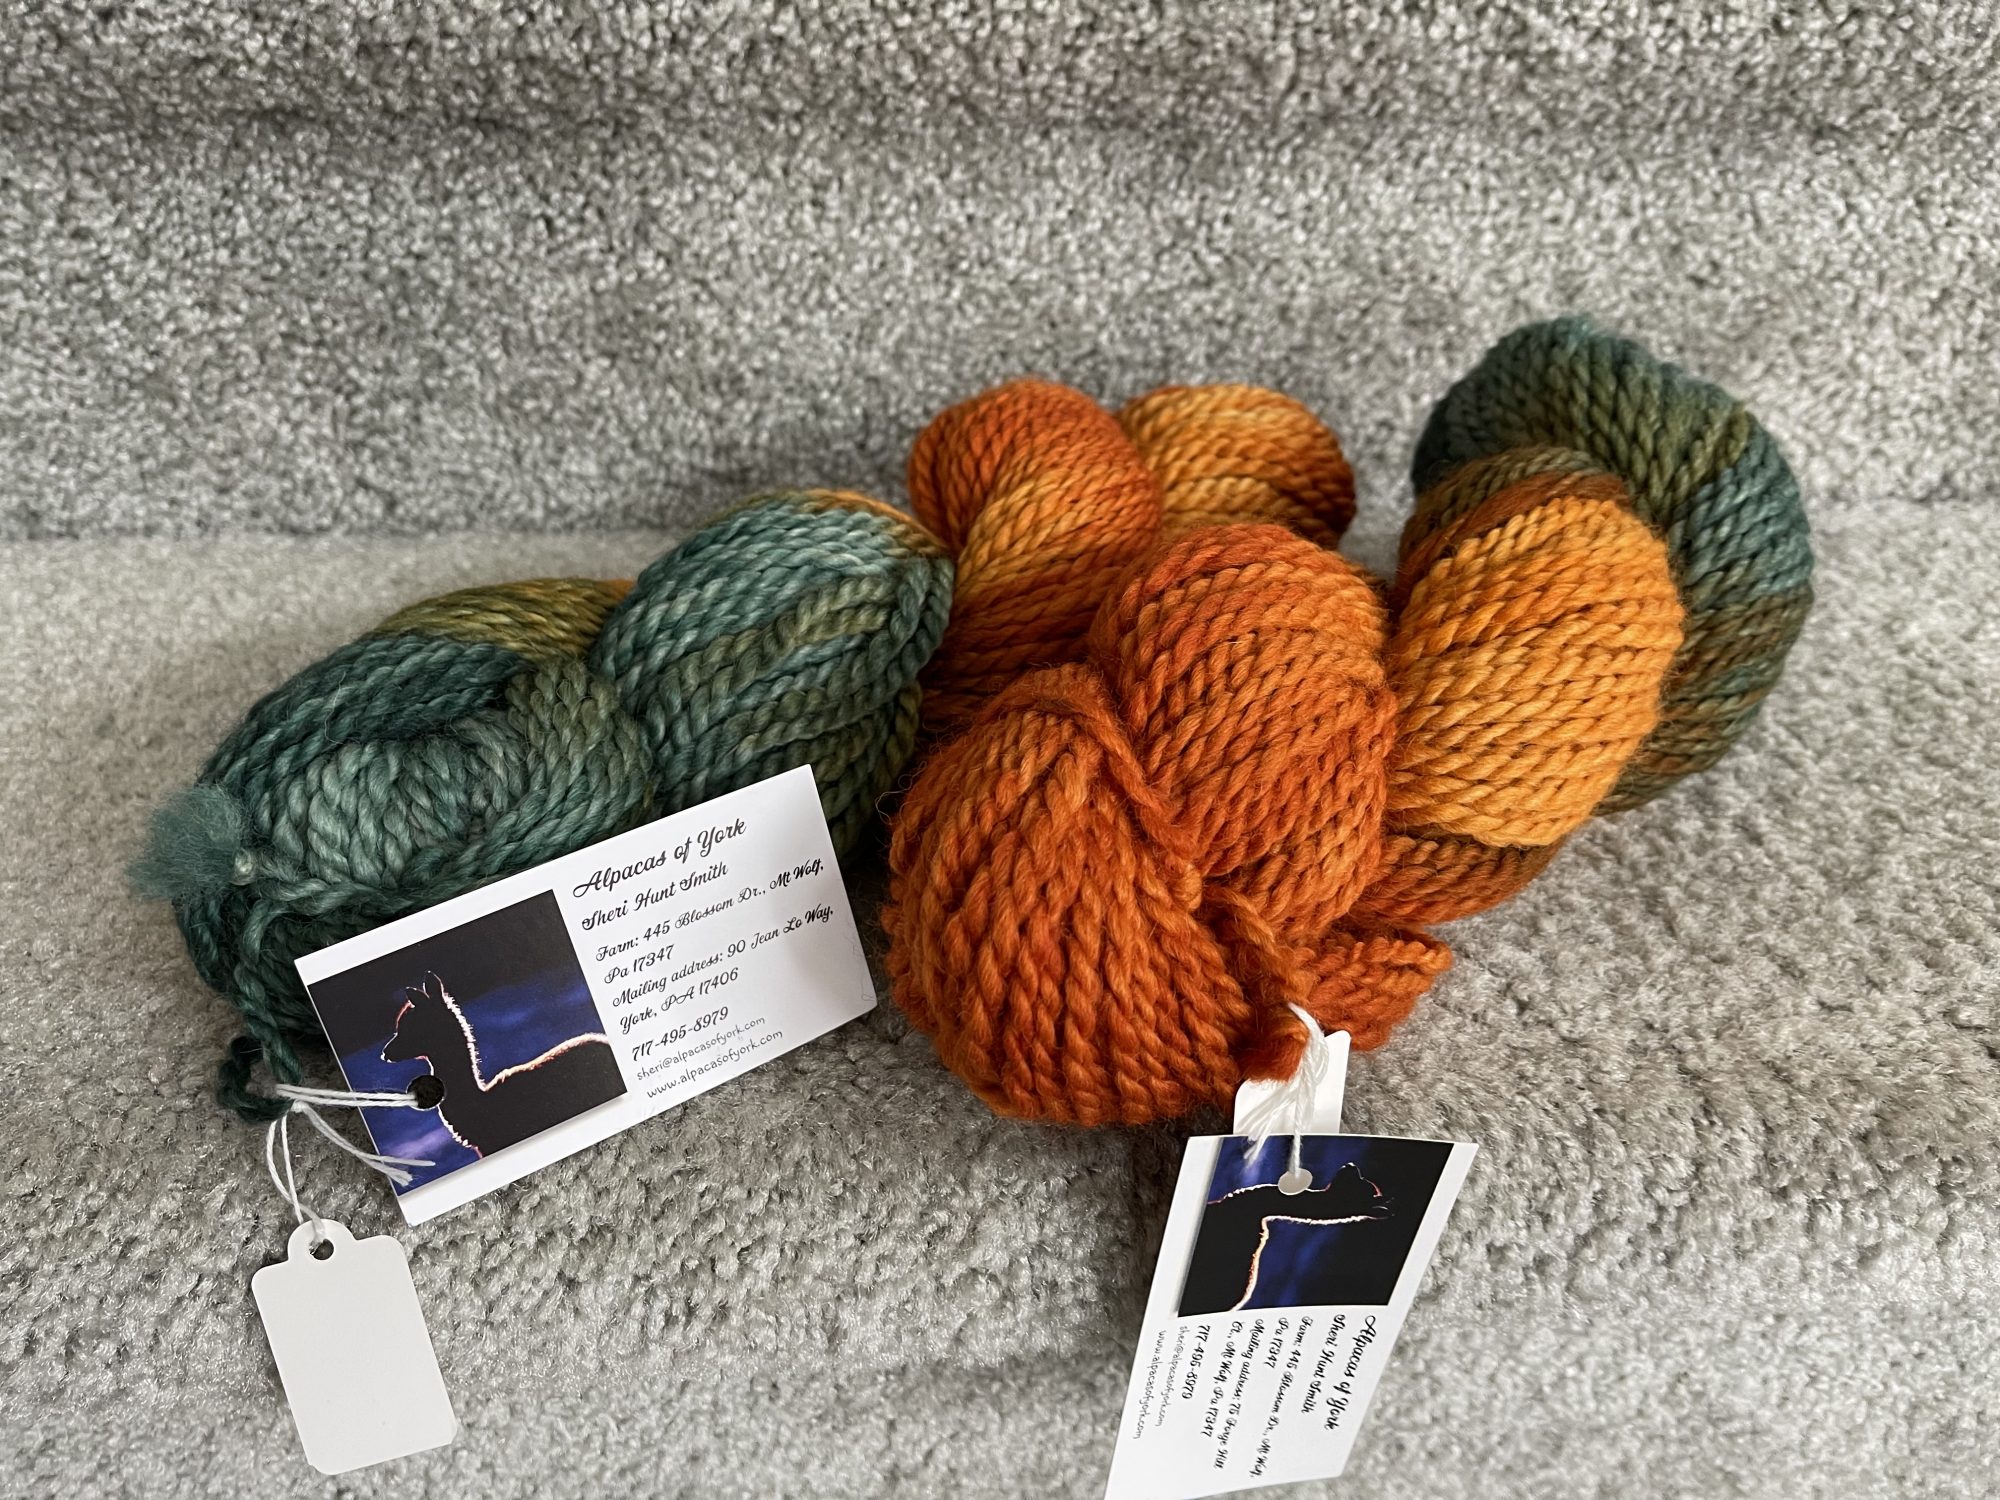
With only 2 hanks of yarn, I had to get creative with what I could make and ensure I had enough yarn. My friend was willing to drive back out to the fair grounds on Sunday if I wanted to get more yarn…
I’m sure we all have single skeins that have been turned into a hat or ear warmer because these are the safest crochet projects to win at yarn chicken.
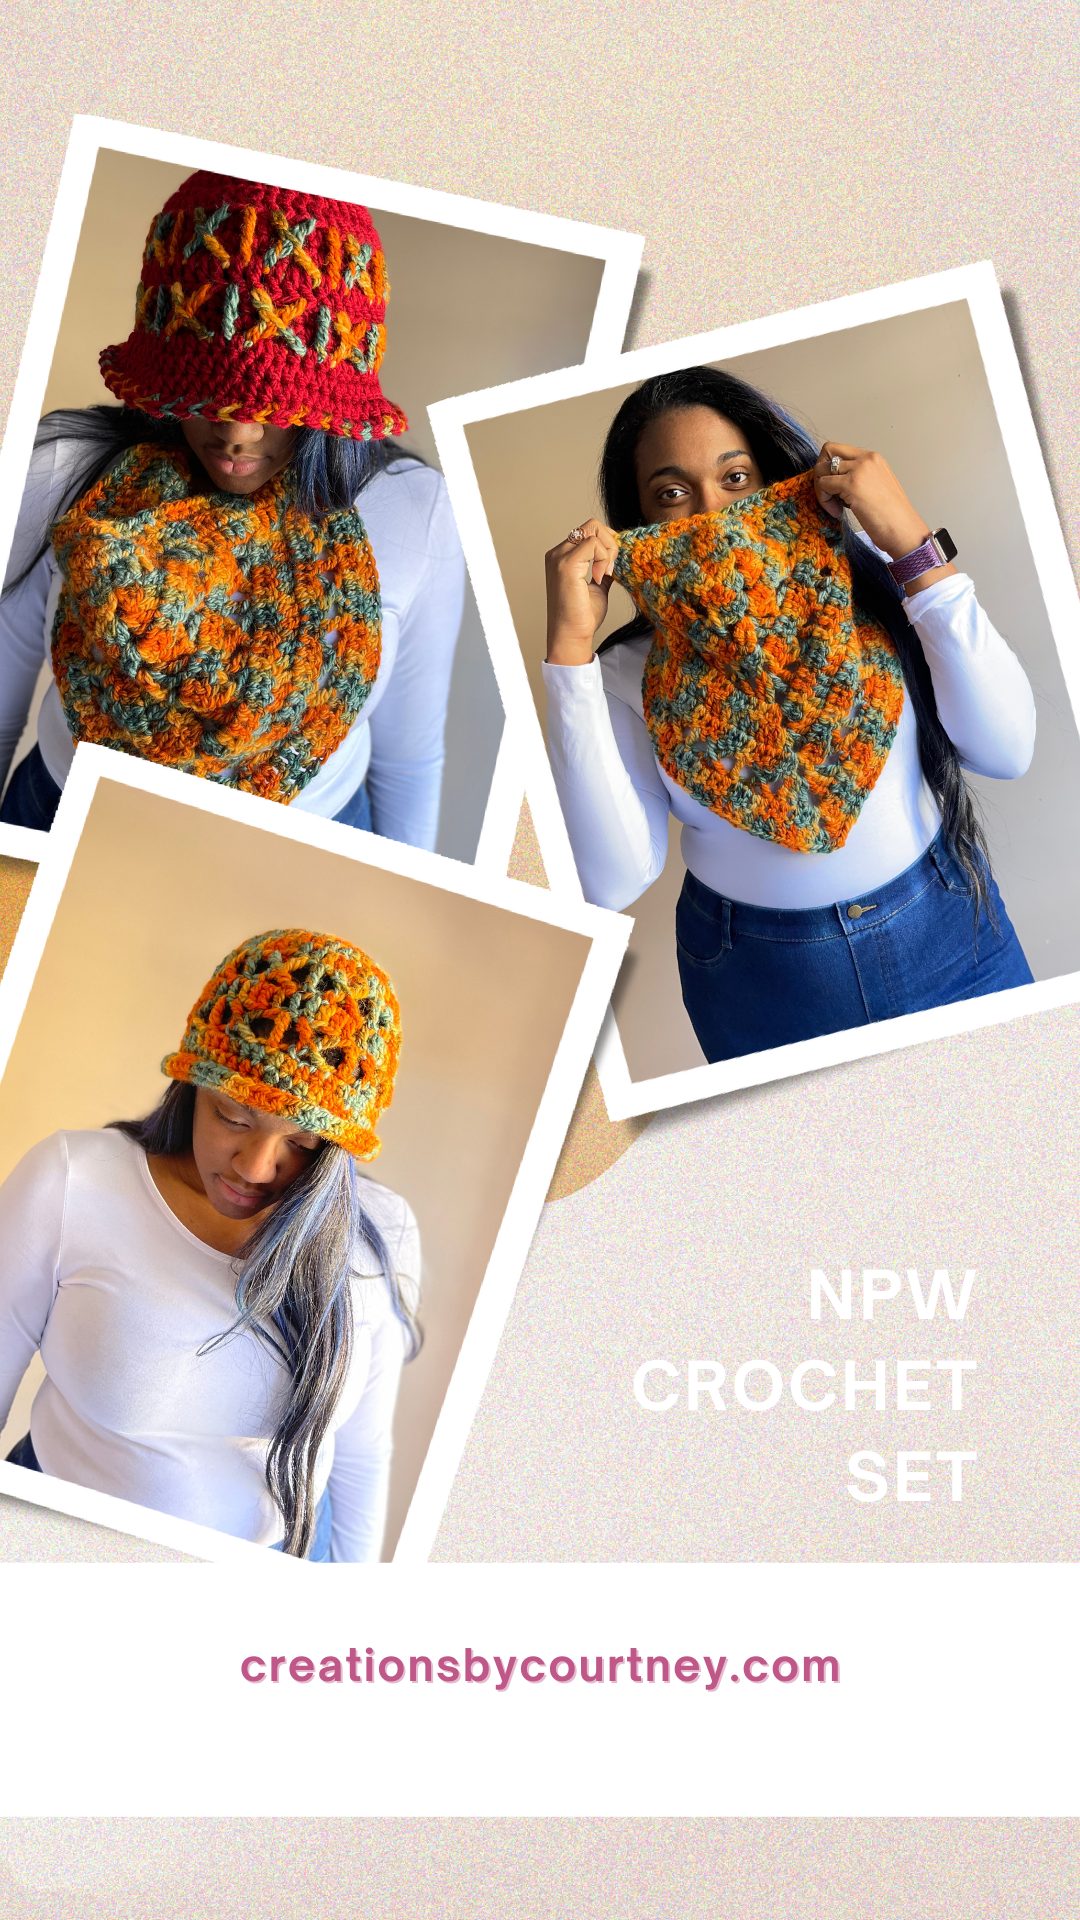
While chatting with my friend, I wound up the hanks into scrumptious cakes, and started on the hat with the intentions on keeping it simple… We laughed together at the idea of me making a simple hat because I decided to add in the X-stitch, one of my favorite stitches!
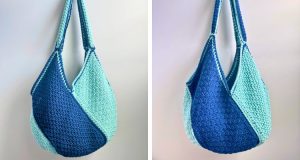
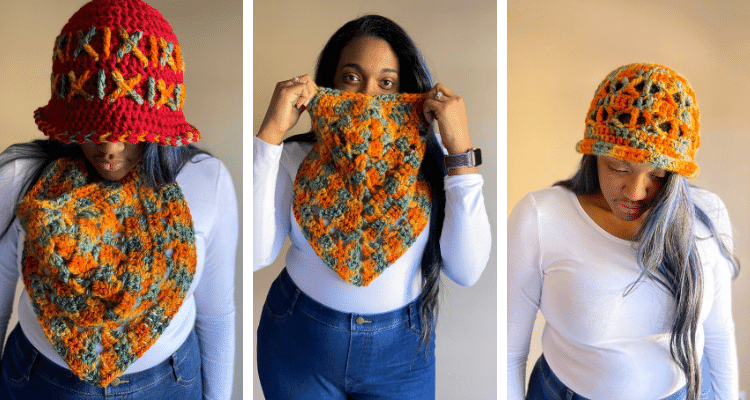
The first hat became a bucket style as I wanted to make sure I had enough yarn. Luckily, the mix of double crochet with X-stitches worked out with yarn to spare, so a cowl was the best use for the remainder of the yarn. After sharing a picture in my FB group, several members mentioned that the open stitches wouldn’t be practical during winter, so a second version was created. No matter your weather, there’s an option to keep you cute and warm. If you’re a maker, the PNW hats and cowl work up quickly with bulky yarns.
When it came to naming the hat, I thought about the obvious, X-capade Bucket Hat, to go along with the other designs that use the X-stitch, but the colors told a different story. As I thought more, the shades of orange and green reminded me of the changing leaves of fall, and then I wondered what fall looked in the Pacific Northwest. I found several images that perfectly captured the colors of the yarn. 😍 The one that matches the yarn colors the most was a sunset over a lake.

Yarn
I discovered Alpacas of York during the Maryland Alpaca and Fleece Festival in November. There were so many gorgeous yarns that were made from wool, alpaca, and even angora. I grabbed two hanks in the color way called Ocean, which comes in 108 yards as a bulky weight. It was a dream to crochet with, as the colors are vibrant and the 80% alpaca and 20% wool is soft and warm.
The second yarn I chose to use was Bernat Softee Chunky Yarn, which is a super bulky #6 yarn that is 100% acrylic. This yarn comes in 36 colors, which means lots of options for color combinations. For me, it is not as soft as other chunky acrylic yarns I’ve worked with. For future projects, I’ll use a larger hook, but a smaller hook if making something that needs to hold its shape.
*Disclosure: This post may contain affiliate links to products that I use, and think you will enjoy using too. Should you decide to use any such link, I will earn a small commission at no cost to you. Thank you for supporting this small business.
Add to Ravelry Queue
MATERIALS
- Color A: Bernat Softee Chunky, super bulky #6 (100% acrylic; 108 yds/ 99 m; 3.5 oz/ 100 g): Wine x 1 skein
- Color B: Alpacas of York, super bulky weight #6 yarn (80% alpaca, 20% wool, 125 yds/ m; oz/ 120 g): Ocean x 2 skeins
- US Furls Crochet M (8.00 mm) hook or hook to meet gauge
- Scissors
- Yarn Needle
- Measuring Tape
GAUGE
- Hat Version 1: 3 rnds in pattern = 5” [12.7 cm]
- Hat Version 2: 3 rnds in pattern = 4.5” [11.5 cm]
- Cowl: 5 rows = 4” [10 cm], when measured along the straight edge
FINISHED SIZE
- Hats: To fit head circumference up to 24” [56 cm] x 9.5” [24 cm]
- Cowl: 14.5” (37 cm) L x 28” (71 cm) wingspan
PATTERN KEY
BL: back loop
Ch: chain
CSDC: chainless starting double crochet
CSTR: chainless starting treble crochet
Dc: double crochet
Dc2tog: double crochet 2 together
FO: fasten off
Hdc: half double crochet
Hdc2tog: half double crochet 2 together
Prev: previous
Rem: remain(s)
Rep: repeat
RS: right side
Sc: single crochet
Sc2tog: single crochet 2 together
Sk: skip
Sl st: slip stitch
Sp: space(s)
St(s): stitch(es)
Tr: treble crochet
WS: wrong side
X-st: x-stitch
YO: yarn over
SPECIAL STITCHES & TECHNIQUES
CSDC: pull up a loop that is row height, holding loop in place and wrap yarn around hook (YO), insert hook in first st, YO, pull up a loop, [YO, pull through 2 loops] 2 times
CSTR: pull up a loop to height of row, holding loop in place and wrap yarn around hook twice (yarn over), insert hook in first st, YO, pull up a loop, [YO, pull through 2 loops] three times
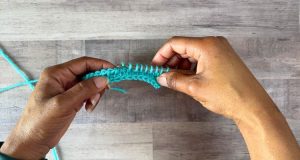
X Stitch: YO 2 times, insert hook in next st, pull up a loop (4 loops on hook), YO, pull through 2 loops (3 loops on hook), sk 2 sts, YO, insert hook in next st, pull up a loop (5 loops on hook), [YO, pull through 2 loops] 4 times, ch 2, YO, insert hook from right to left in center of X, pull up a loop, [YO, pull through 2 loops] 2 times
EXPERIENCE LEVEL
INTERMEDIATE

NOTES
- Pattern is written in US terms.
- Read entire pattern before beginning.
- Pattern key listed applies to all patterns.
- The PNW Bucket Hat is made in the round. There are 2 versions of the hat, one uses an overlay technique and one with lace sections, for different levels of warmth.
- Do not turn unless indicated.
- The bandana cowl pattern instructions are below, and is made in 2 parts: Triangle and Neckband
- The Neckband has some shaping with decreases that may make it protrude forward. This shaping helps when wearing the cowl.
- Ch 1 does not count as a st.
- Instructions are given for one size to fit adults.
Grab the ad-free PDF from your favorite pattern shop.


INSTRUCTIONS
Hat, Version 1
Row 1: With Color A, make a magic circle, CSDC in the loop, 9 dc in loop, tighten, sl st to join –10 dc
Rnd 2: CSDC in first st, dc in same st, 2 dc in each st, sl st to join – 20 dc
Rnd 3: CSDC in first st, dc in same st, dc in next st, *2 dc in next st, dc in next st; rep from * around, sl st to join – 30 dc
Rnd 4: CSDC in first st, dc in same st, dc in next 2 sts, *2 dc in next st, dc in next 2 sts; rep from * around, sl st to join – 40 dc
Rnd 5: CSDC in first st, dc in same st, dc in next 3 sts, *2 dc in next st, dc in next 3 sts; rep from * around, sl st to join – 50 dc
Rnd 6: Working in BL only, ch 1, hdc in first st, hdc in each st around, sl st to join – 50 hdc
Rnd 7: Ch 1, hdc in first st, hdc in each st around, sl st to join. DO NOT FO Color A – 50 hdc
Rnd 8: With Color B, make a slip knot and have working yarn in front, pull the tail to the WS, attach ya rn to FL of Rnd 6, CSTR in first st, X-st, *tr in next st, X-st; rep from * around, sl st to join. FO – 10 tr, 10 X-st
Rnd 9: With Color A, work over the sts of Rnd 8 and through the sts of Rnd 7, CSDC in first st, dc in each st around, sl st to join – 50 dc
Rnds 10-11: Rep Rnds 6-7
Rnd 12: Attach Color B to any FL that aligns with a tr of Rnd 8, rep Rnd 8, FO Color B
Rnd 13: With Color A, work over sts of Rnd 12 and through the sts of Rnd 11, ch 1, hdc in first st, hdc in next 3 sts, 2 hdc in next st, *hdc in next 4 sts, 2 hdc in next st; rep from * around, sl st to join – 60 hdc
Rnd 14: Ch 1, hdc in first st, hdc in each st around, sl st to join – 60 hdc
Rnd 15: Ch 1, hdc in first st, hdc in next 4 sts, 2 hdc in next st, *hdc in next 5 sts, 2 hdc in next st; rep from * around, sl st to join and change to Color B – 70 hdc
Rnd 16: Alternating between Color B and Color A each st, ch 1, hdc in first st, hdc in each st, sl st to join, FO – 70 hdc, 35 hdc in Color A, 35 hdc in Color B
Finishing
Weave in all ends.
Hat, Version 2
Row 1: Make a magic circle, CSDC in the loop, 9 dc in loop, tighten, sl st to join –10 dc
Rnd 2: CSDC in first st, dc in same st, 2 dc in each st, sl st to join – 20 dc
Rnd 3: CSDC in first st, dc in same st, dc in next st, *2 dc in next st, dc in next st; rep from * around, sl st to join – 30 dc
Rnd 4: CSDC in first st, dc in same st, dc in next 2 sts, *2 dc in next st, dc in next 2 sts; rep from * around, sl st to join – 40 dc
Rnd 5: CSDC in first st, dc in same st, dc in next 3 sts, *2 dc in next st, dc in next 3 sts; rep from * around, sl st to join – 50 dc
Rnd 6: CSTR in first st, X-st, * tr in next st, X-st; rep from * around, sl st to join – 10 tr, 10 X-st
Rnd 7: CSDC in first st, dc in each st around, sl st to join – 50 dc
Rnd 8: Rep Rnd 6
Rnds 9-13: Ch 1, hdc in first st, hdc in each st. FO after Rnd 13
Finishing
Weave in all ends.
Cowl
Triangle
Row 1: Magic Circle, CSDC, (2 dc, ch 2, 2 dc), dc, tighten loop, turn – 6 dc, 2 ch
Row 2: CSDC in first st, dc in same st, dc in next 2 sts, (2 dc, ch 2, 2 dc) in ch-2 sp, dc in next 2 sts, 2 dc in last st, turn – 12 dc, 2 ch
Row 3: CSDC in first st, dc in same st, dc in next 5 sts, (2 dc, ch 2, 2 dc) in ch-2 sp, dc in next 5 sts, 2 dc in last st, turn – 18 dc, 2 ch
Row 4: CSTR in first st, tr in same st, X-st 2 times, (2 tr, ch 2, 2 tr) in ch-2 sp, X-st 2 times, 2 tr in last st, turn – 8 tr, 4 X-st, 2 ch
Row 5: CSDC in first st, dc in same st, dc in next 11 sts, (2 dc, ch 2, 2 dc) in ch-2 sp, dc in next 11 sts, 2 dc in last st, turn – 30 dc, 2 ch
Row 6: CSTR in first st, tr in same st, [X-st, tr in next st] 2 times, X-st, (2 tr, ch 2, 2 tr) in ch-2 sp, X-st, [tr in next st, X-st] 2 times, 2 tr in last st, turn – 12 tr, 6 X-st, 2 ch
Row 7: CSDC in first st, dc in same st, dc in next 17 sts, (2 dc, ch 2, 2 dc) in ch-2 sp, dc in next 17 sts, 2 dc in last st, turn – 42 dc, 2 ch
Row 8: CSDC in first st, dc in same st, dc in next 20 sts, (2 dc, ch 2, 2 dc) in ch-2 sp, dc in next 20 sts, 2 dc in last st, turn – 48 dc, 2 ch
Row 9: CSDC in first st, dc in same st, dc in next 23 sts, (2 dc, ch 2, 2 dc) in ch-2 sp, dc in next 23 sts, 2 dc in last st, turn – 54 dc, 2 ch
Row 10: CSTR in first st, tr in same st, tr in next st, [X-st, tr in next st] 5 times, (2 tr, ch 2, 2 tr) in ch-2 sp, [tr in next st, X-st] 5 times, tr in next st, 2 tr in last st, turn – 20 tr, 10 X-st, 2 ch
Row 11: CSDC in first st, dc in same st, dc in next 29 sts, (2 dc, ch 2, 2 dc) in ch-2 sp, dc in next 29 sts, 2 dc in last st, turn – 66 dc, 2 ch
Row 12: CSDC in first st, dc in same st, dc in next 32 sts, (2 dc, ch 2, 2 dc) in ch-2 sp, dc in next 32 sts, 2 dc in last st, turn – 72 dc, 2 ch
Neckband
Row 1: Ch 10, starting in 3rd ch from hook (sk 2 ch does not count as st), dc in each ch, dc evenly to next corner, 8 fdc, turn – 70 sts
Row 2: CSDC in first st, dc2tog, dc in next 2 sts, dc2tog, dc in next 25 sts, dc2tog 3 times, dc in next 25 sts, dc2tog, dc in next 2 sts, dc2tog, dc in last st, turn – 65 sts
Row 3: Ch 1, sc in first st, sc in next st, ch 2, sk 2 sts (button hole made), sc in next 26 sts, sc3tog, sc in rem sts, turn – 58 sts, 2 ch
Row 4: Ch 1, hdc in first st, hdc in next 28 sts, hdc2tog over next 3 sts (sk 2nd st), hdc in last 29 sts, FO – 59 sts
Finishing
- Weave in ends.
- Attach button to RS of Neckband; make sure it lines up with the button hole on the opposite side.
PIN IT FOR LATER
Loved this pattern? Check out these patterns.
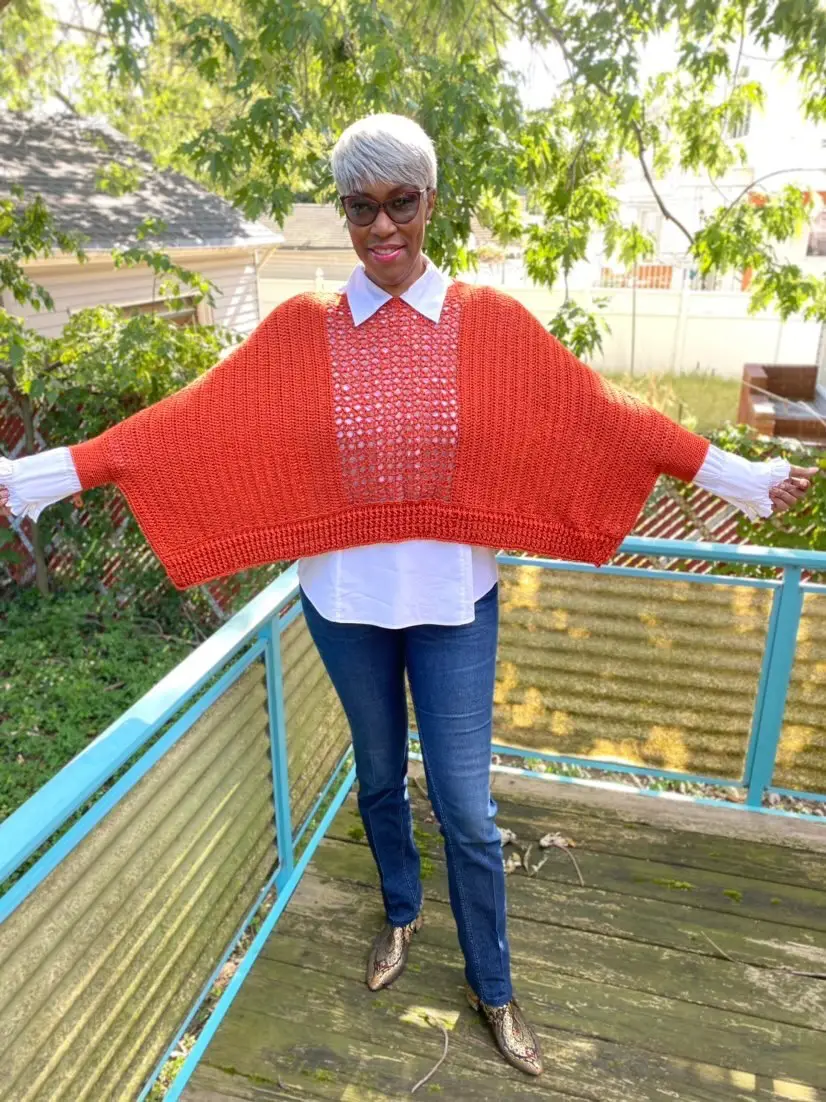
- Syrah Swancho
- X-capade Cardigan
- X-capade Poncho
Syrah Swancho 
X-capade Poncho 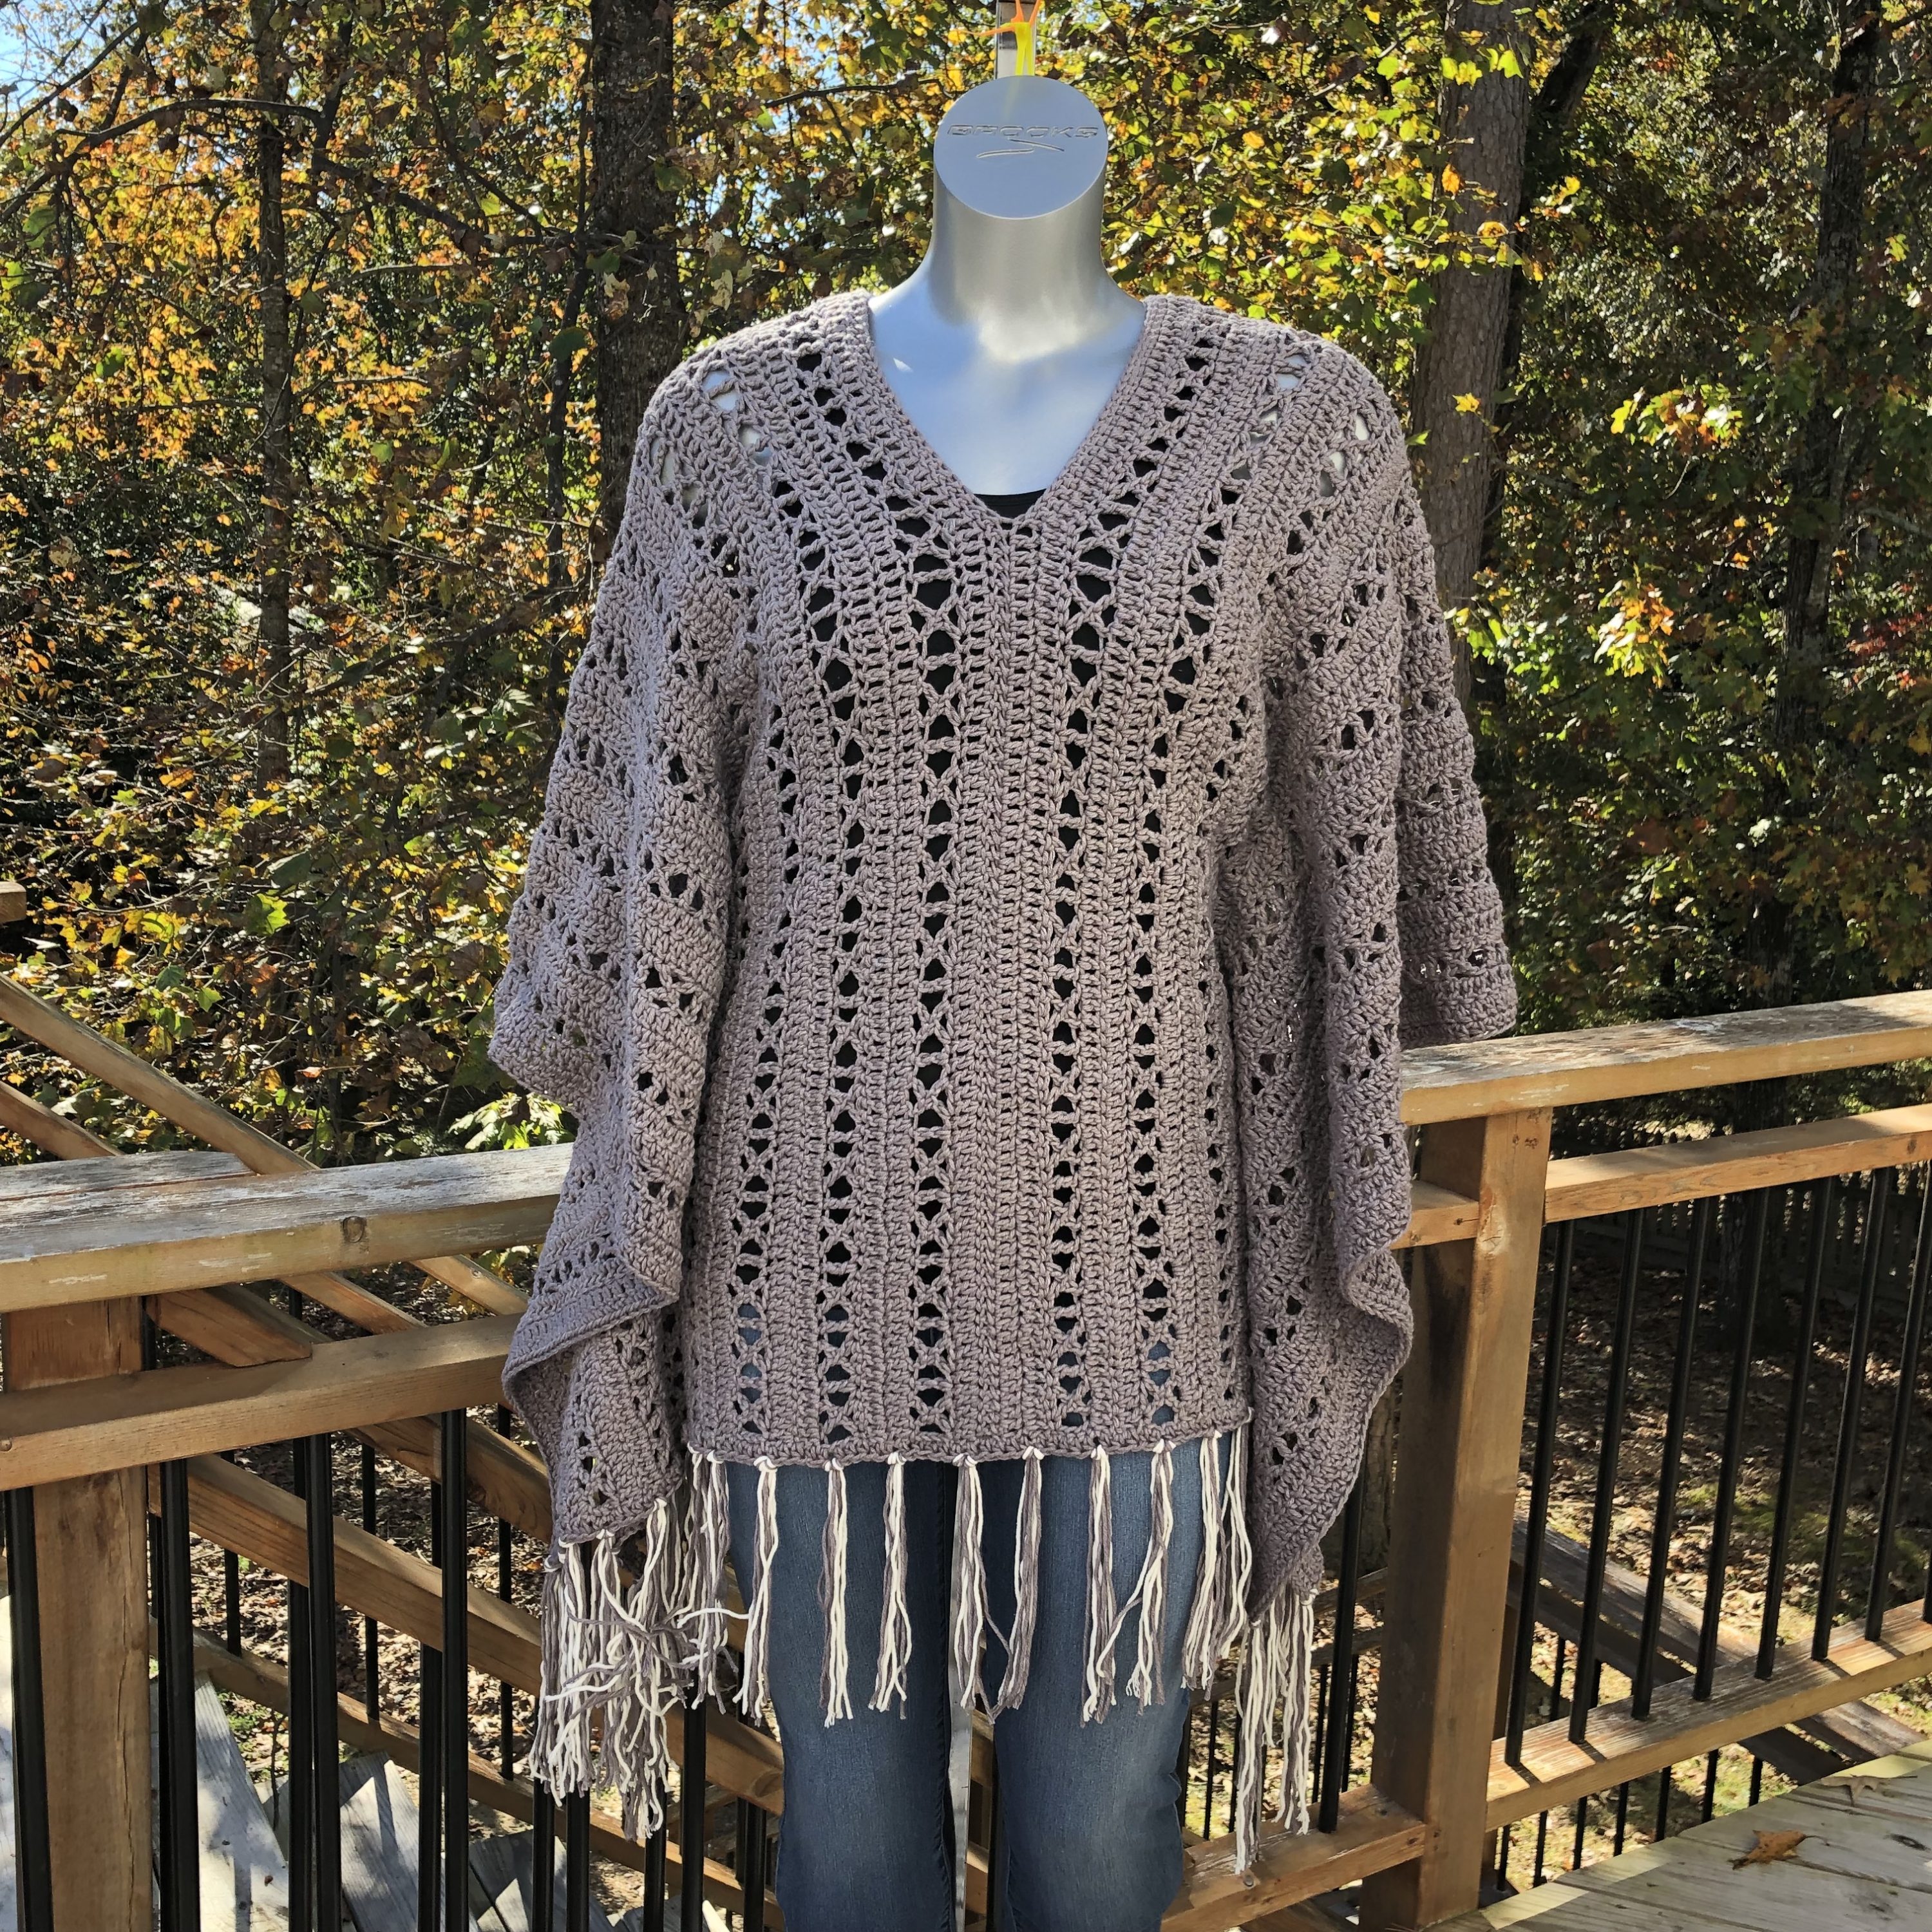
X-capade Poncho
If we’re not hanging out on social media yet, come check me out on Facebook, Instagram and Pinterest.
Want to talk about yarn goodness, crochet tips, and exclusive weekly deals? Join my Facebook Group, Creations By Courtney Community.
Join my newsletter for sneak peeks, crochet tips, and more. HERE
Please use #CreationsByCourtney on social media when sharing your projects.
This pattern is not to be duplicated or resold, and not to be reproduced commercially. You may sell finished products on Etsy, at farmers markets, and craft fairs, but please credit Creations By Courtney as the pattern’s author.