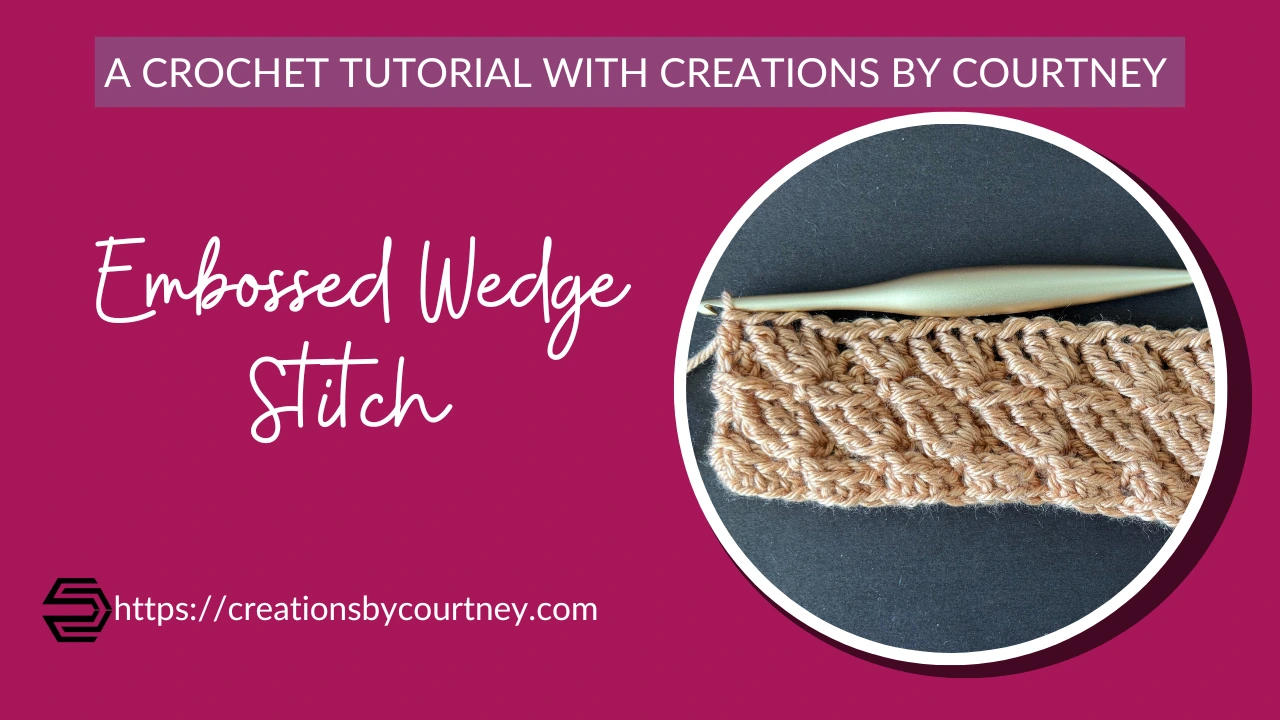
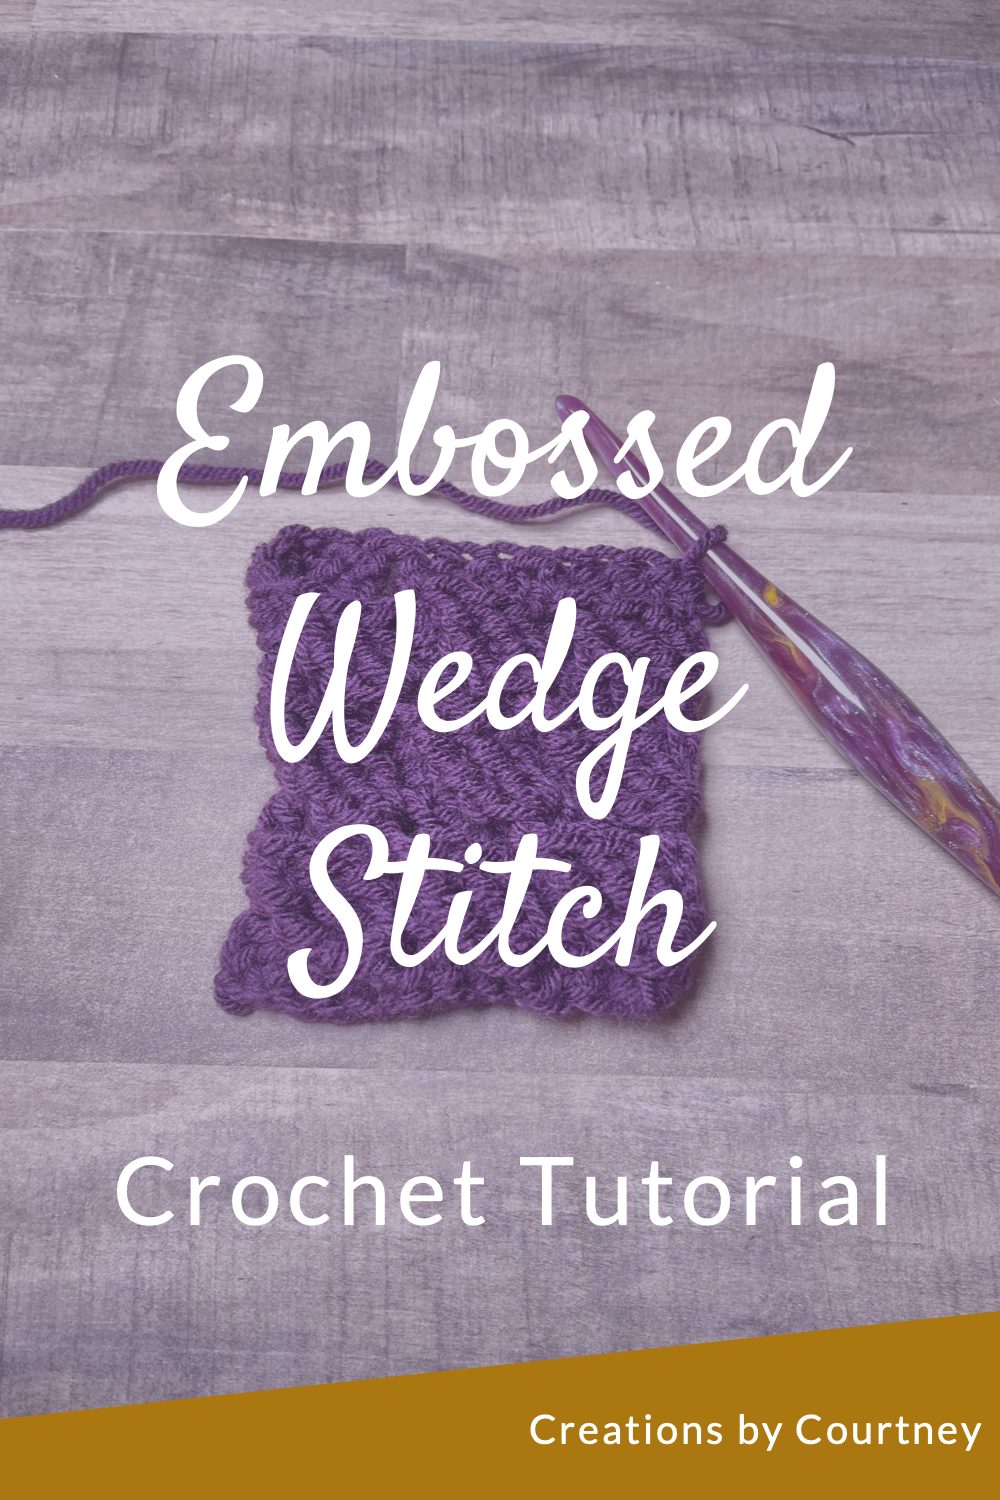
Welcome to the Embossed Wedge Stitch crochet tutorial!
I found this stitch in one of my crochet stitch dictionaries, or as I refer to them as a stitchionary. I find these crochet books to be invaluable for the digital and physical bookshelves.
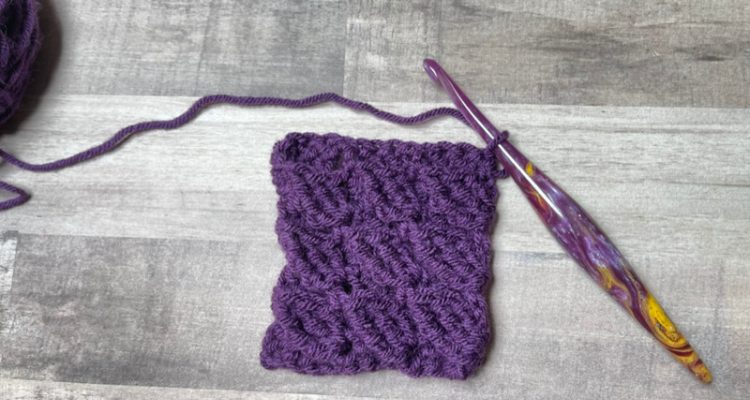
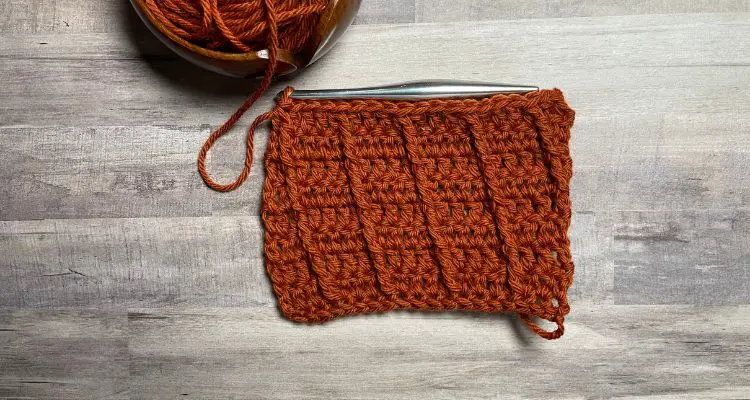
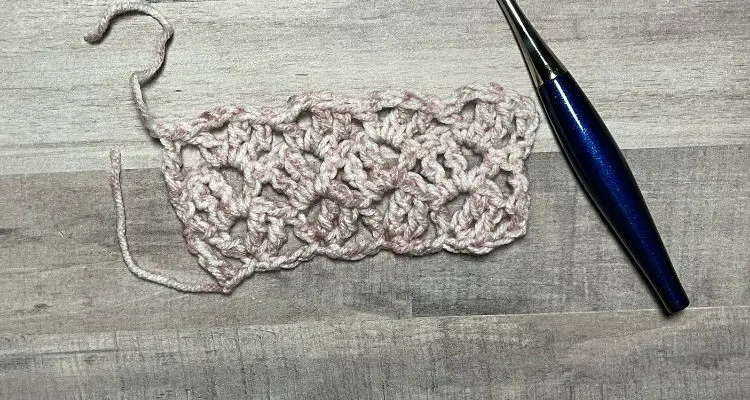
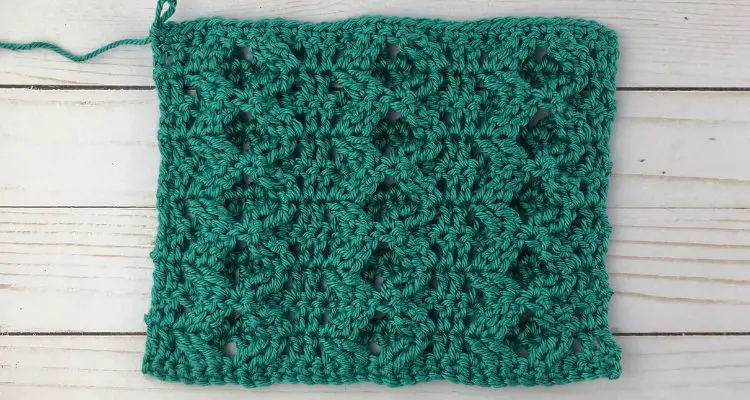
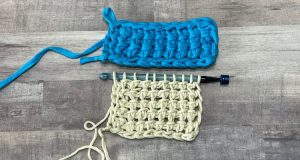
One one color the embossed wedge stitch is pretty, but it looks even better in at least two colors. The contrasting colors help highlight the wedge shape, which is lost in a single color. If you prefer to use one color to make a larger project, then consider a variegated or ombre to highlight the cluster of stitches.
I’m not sure why any stitch gets its name, but I think the Embossed Wedge is named for the cluster of stitches and how that cluster protrudes from the fabric.
This crochet stitch is the main stitch pattern in the Berry Cozy Cowl, but could be used for any number of crochet projects. Imagine crochet blankets (but not for young kids with tiny fingers and toes to get caught), a super scarf, blanket square, or even a wearable garment.
Below in this crochet tutorial, you will find the stitch multiple needed to start in two different ways, pattern key, special stitches, notes, and written and video instructions.
Don’t forget to practice, and you’ll have it added to your mental crochet stitch library!
Multiples needed for the stitch
Multiple needed: ch a multiple of 4 + 2
Start with foundation sts: ch a multiple of 4 + 1
Work in the round: ch a multiple of 4 (video coming soon!)
Abbreviations Used:
Ch: chain
Cl: cluster
Fhdc: foundation half double crochet
FO: fasten off
Fpdc: front post double crochet
Fpdtr: front post double treble
Fptr: front post treble crochet
Hdc: half double crochet
Rem: remain(s)
Rep: repeat
St(s): stitch(es)
Sk: skip
YO: yarn over
SPECIAL STITCHES & TECHNIQUES
Cluster: fpdc, fptr, fpdtr
*Disclosure: This post may contain affiliate links to products that I use, and think you will enjoy using too. Should you decide to use any such link, I will earn a small commission at no cost to you. Thank you for supporting this small business.
Supplies Used:
Any Yarn. I used Brava worsted weight in mulberry.
Hook appropriate for the yarn. I used a Furls Crochet Navy Odyssey hook in size I (5.50mm).
NOTES
- Ch 2 counts as hdc throughout pattern.
- It may help to place a stitch marker in the hdc of previous row to ensure right placement of hdc in the next row.
- Each cl is worked around the post of a hdc in the row below.
Written Instructions
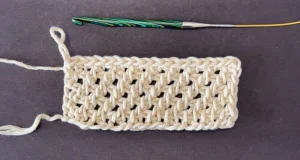
Ch 14
Row 1: Starting in 3rd ch from hook, hdc in each ch, turn. 13 hdc
Row 2: Ch 2 (counts as hdc here and throughout), cl around post of first hdc of row below, *sk next 3 sts of current row and row below, hdc in next st, cl around post of next hdc of row below, rep from * to end, turn. 3 cl, 4 hdc
Next Rows: Rep Row 2 until desired length
Prefer to use foundation stitches to start a project?
Row 1: 13 fhdc, turn
Row 2: Ch 2 (counts as hdc here and throughout), cl around post of first hdc of row below, *sk next 3 sts of current row and row below, hdc in next st, cl around post of next hdc of row below, rep from * to end, turn. 3 cl, 4 hdc
Next Rows: Rep Row 2 until desired length
Want to see that in video?
Let’s make this stitch in the round too!
Whether you start with a chain or foundation stitches, you will make a multiple of 4.
Start with chain stitches
Ch 24, sl st to join
Rnd 1: Ch 2 (counts as hdc here and throughout), hdc in each ch around, sl st to join, turn. 24 hdc
Rnd 2: Ch 2, cl around post of first hdc of row below, *sk 3 sts on current rnd and rnd below**, hdc in next st, cl around post of hdc below, rep from * around and end last rep at **, sl st to join to first hdc, turn. 6 cl, 6 hdc
Next rnds: Rep Rnd 2 until desired length
Video tutorial coming soon!
That’s all there is to Embossed Wedge Stitch!
How will you use this crochet stitch/technique?
Use #creationsbycourtney when sharing your practice swatch. I want to give you a shout out!
Pin it for Later
You may like these crochet tutorials
If we’re not hanging out on social media yet, come check me out on Facebook, Instagram and Pinterest.
Want to talk about yarn goodness, crochet tips, and exclusive weekly deals? Join my Facebook Group, Creations By Courtney Community.
Join my newsletter for sneak peeks, crochet tips, and more. HERE
Please use #CreationsByCourtney on social media when sharing your projects.

One Response